26
P001.
(3) Use “+”/“-” key to choose the pattern number you want to use,e.g. P200.
(4) Press N1- key, the display will show the stitch number “n 1”
(5) Press N1- key, the display will show “0.0” as current value of the x coordinate of stitch
No. 1.
(6) Use “+”/“-” key to adjust this value to “-4.0”.
(7) Press N1- key, the display will show the current stitch number “n 1” again.
(8) Use “+”/“-” key to adjust current stitch number to “n 2”.
(9) Press N1- key, the display will show “0.0” as current x value of stitch No. 2.
(10) Use “+”/“-” key to adjust this value to “4.0”.
(11) Press N1- key, the display will show the current stitch number “n 2” again.
(12) Use “+”/“-” key to adjust current stitch number to “n 3”.
(13) Press N1- key, the display will show “0.0” as current x value of stitch No. 3.
(14) Use “+”/“-” key to adjust this value to “-4.0”.
(15) Press N1- key, the display will show the current stitch number “n 3” again.
(16) Press N1+ key to stop input, the display will show “End”.
(17) Press “Set” key to save the pattern and return to normal state.
Example 2:
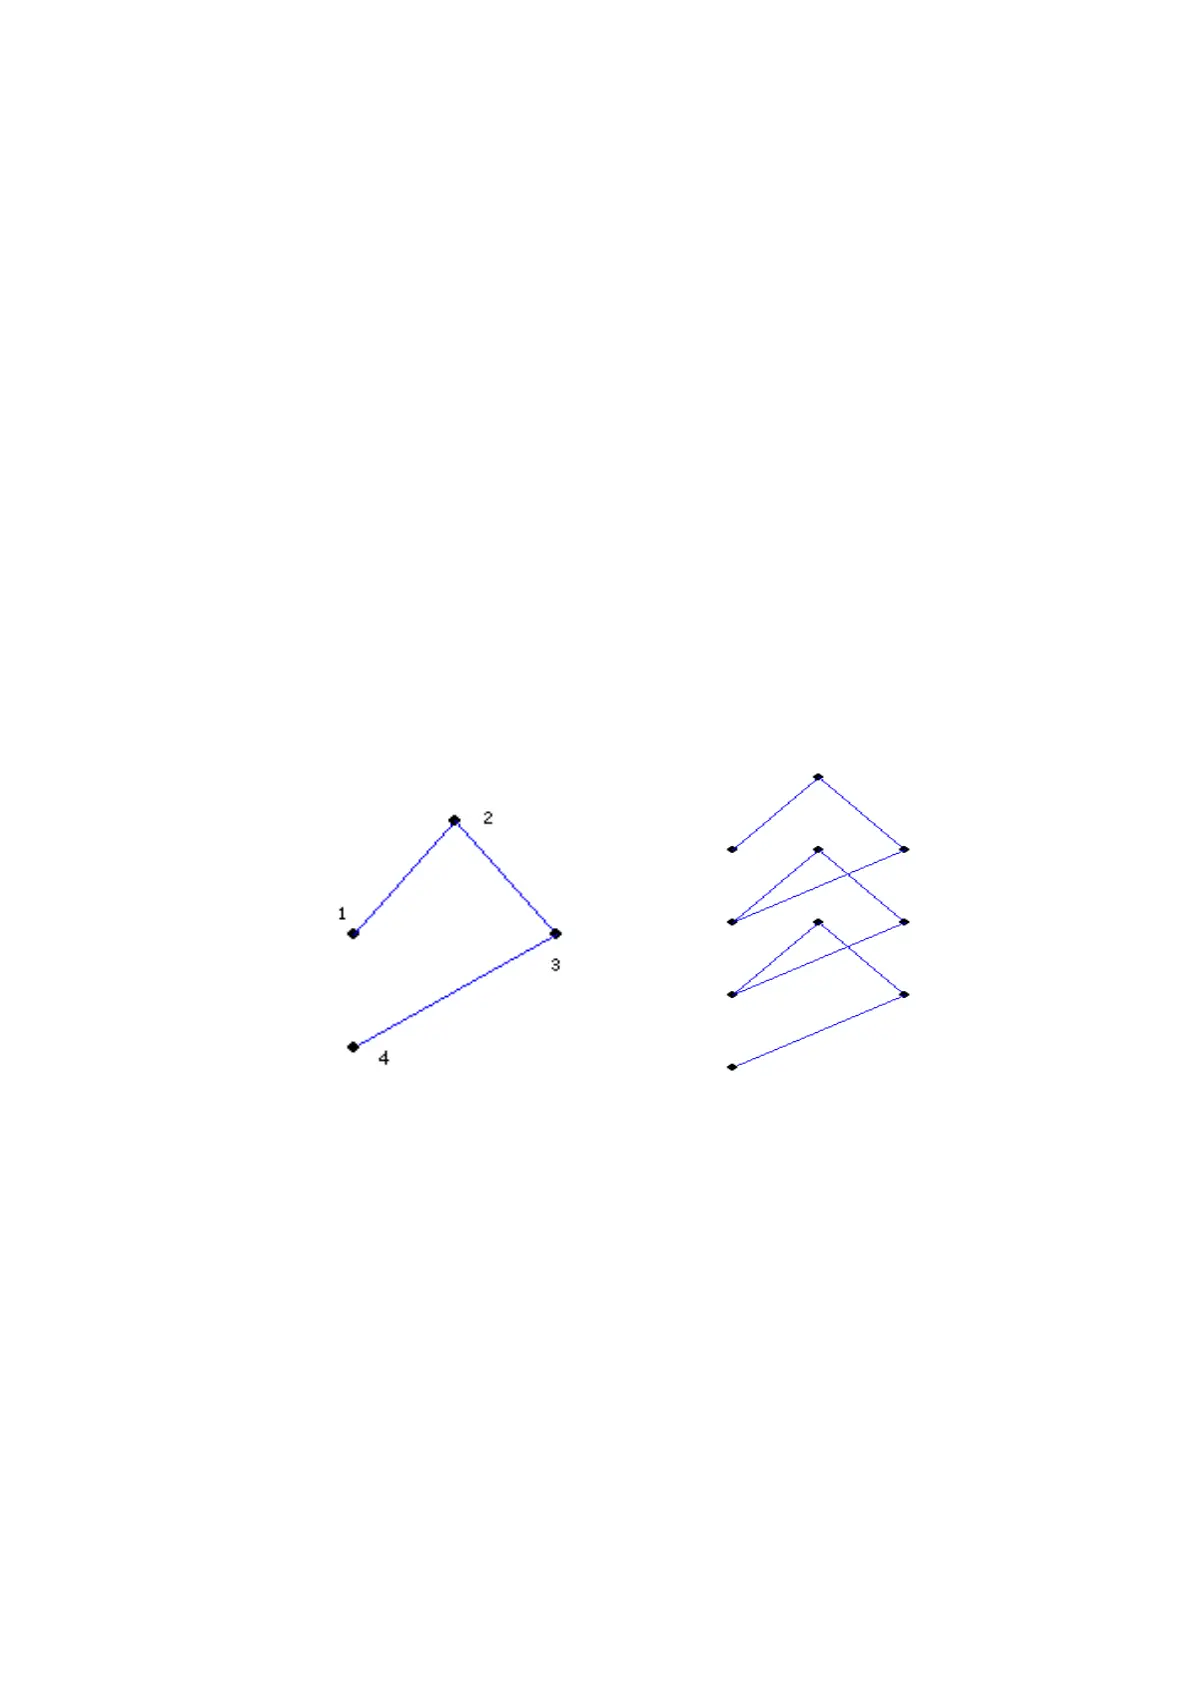
We need to create a pattern which drawing is as follows.
.
There are 4 stitches in this pattern. Assume that the coordinate of the 4 stitches is: (-4,2.5),
(0,-2.5),( 4,2.5),(-4,2.5). We note that the y coordinates of the 4 stitches do not equal to each
other.We name this type of pattern as “non-constant feed” pattern. To input the stitches of
non-constant feed pattern, we have to input the x coordinate and the y coordinate for each stitch.
The following is the operation steps to create this pattern.
(1) Press the N1+ and N4+ key simultaneously to let the main display show
“Prog”.
(2) Press N1- key, the main display will show the number of the first unused pattern, e.g.
P001.
(3) Use “+”/“-” key to choose the pattern number you want to use,e.g. P201.
(4) Press N1- key, the display will show the stitch number “n 1”
(5) Press N1- key, the display will show “0.0” as current value of the x coordinate of stitch
No. 1.
(6) Use “+”/“-” key to adjust this value to “-4.0”.