10
The operator need to move the hand wheel forward less than one circle by manual
until the warning tone disappear.During the process of the start-up initialization,if the
system find any fault by self check, it will show error code in main display to inform
the user(details please see the chapter 3: Failure Warning and the Processing
method).After Initialization success,the operation panel will enter ready mode, then
you can begin your sewing work.
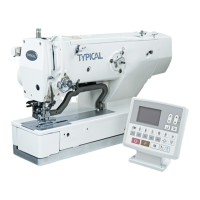
2.3 Sewing of the Standard Patterns
■Operation steps
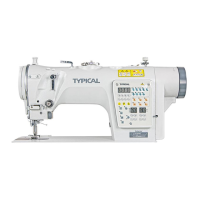
1) Turn on the Power.The control panel is at the initial condition. The typical
setting status is as follows.
2) Press one of the basic pattern keys 1 to 8. The indicator nearby that key
will turn on.The system load that pattern and search for step motor origin.
After that, the needle bar move to the start stitch.
3) Press the pedal and beginning your sewing.
4) After finish the sewing, press the pedal backward to trim thread .(Thread
trimmer and wiper is the option item).
■The list of basic sewing patterns:
Pattern
No.
Name of pattern Display status Stitch pattern
1 Straight Stitch 1 - - -
2 One step zigzag stitch 2 - - -
3 Two step zigzag stitch 3 - - -
4 Three step zigzag stitch 4 - - -
Main display show
Max.Width(mm)
8.0
Standard pattern 2
indicator
ON
Up Down Stop
indicator
ON
Foot indicator ON
Trimmer indicator ON
Wiper indicator ON