Do you have a question about the UCEC USB 2.0 Video Capture and is the answer not in the manual?
The USB Video Capture device installs automatically, eliminating the need for manual driver installation.
Disable antivirus, insert the CD-ROM, and start the ShowBiz 3.5 installer.
Provide user name and license key during the ShowBiz 3.5 installation process.
Select the destination folder for the ShowBiz 3.5 software installation.
Click 'Finish' to complete the ShowBiz 3.5 installation and restart the computer if prompted.
Right-click the taskbar and select 'Sounds' to access audio configuration options.
Select '2-AV TO USB2.0' as the recording device and enable listening.
Set 'Source' to 'AV TO USB2.0' and 'Audio Device' to '2-AV TO USB2.0' for capture.
Click 'Record' to start/stop video capture and save files in MPEG2 format.
Select video files to edit, apply effects, or edit pictures and audio files.
Use 'Produce' to create files for PMP, Disc, or File formats like AVI, MPEG4.
Create DVD files or upload videos directly to YouTube via the Produce panel.
Click the 'Option' button to access help for detailed ShowBiz 3.5 instructions.
Insert CD, select 'Install ShowBiz 3.5', then choose 'Remove' to uninstall.
Double-click OBS Studio on CD, click Next, Agree, and choose install location.
Select components, click Install, then Finish to complete the OBS Studio installation.
Use the Auto-configuration Wizard or manually configure settings in the main window.
Access sound settings via the taskbar and select the recording device.
Select '2-AV TO USB2.0', click 'Listen', and 'Apply' to complete sound setup.
Connect RCA cables, ensure detection, then add a video source in OBS.
Select 'AV To USB2.0' in the device box instead of the default camera lens.
Use 'Configure Crossbar' and 'Configure Video' to select input and video standard (e.g., PAL_I, NTSC_M).
Adjust brightness, contrast, hue, and saturation for optimal picture quality.
Select 'Capture audio only' and 'Use custom audio device' for audio input.
Mute all audio sources except the video capture device by clicking the speaker icon.
Adjust image size and position on canvas; use ALT key for cropping.
Click 'Start Recording' to begin and 'Stop Recording' to end video capture.
Access recorded videos via the 'File' menu and select 'Show Recordings'.
Click 'File' then 'Settings' to access the configuration options.
Set recording path and format (e.g., MP4) in the Output settings.
Set Sample Rate to 44.1KHz and select 'Disabled' for audio devices for optimal quality.
| Interface | USB 2.0 |
|---|---|
| Supported Standards | NTSC, PAL |
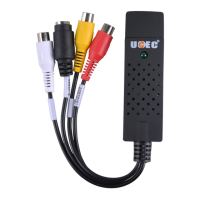
| Video Input | Composite (RCA), S-Video |
| Audio Input | RCA (L/R) |
| Video Output | USB |
| Supported Resolutions | 720x480 (NTSC), 720x576 (PAL) |
| Operating System Compatibility | Windows XP/Vista/7/8/10 |
| Output Format | AVI, MPEG |