18
As explained in chapter 2 the first layer of a print is very important. Therefore regular bed leveling is advised. Always
re-level the build plate when you notice that the plastic is not equally placed on the glass plate. After transportation of
your Ultimaker 2 it is also advised to re-level the build plate to ensure your 3D prints stuck well to the build plate.
BED LEVELING PROCEDURE
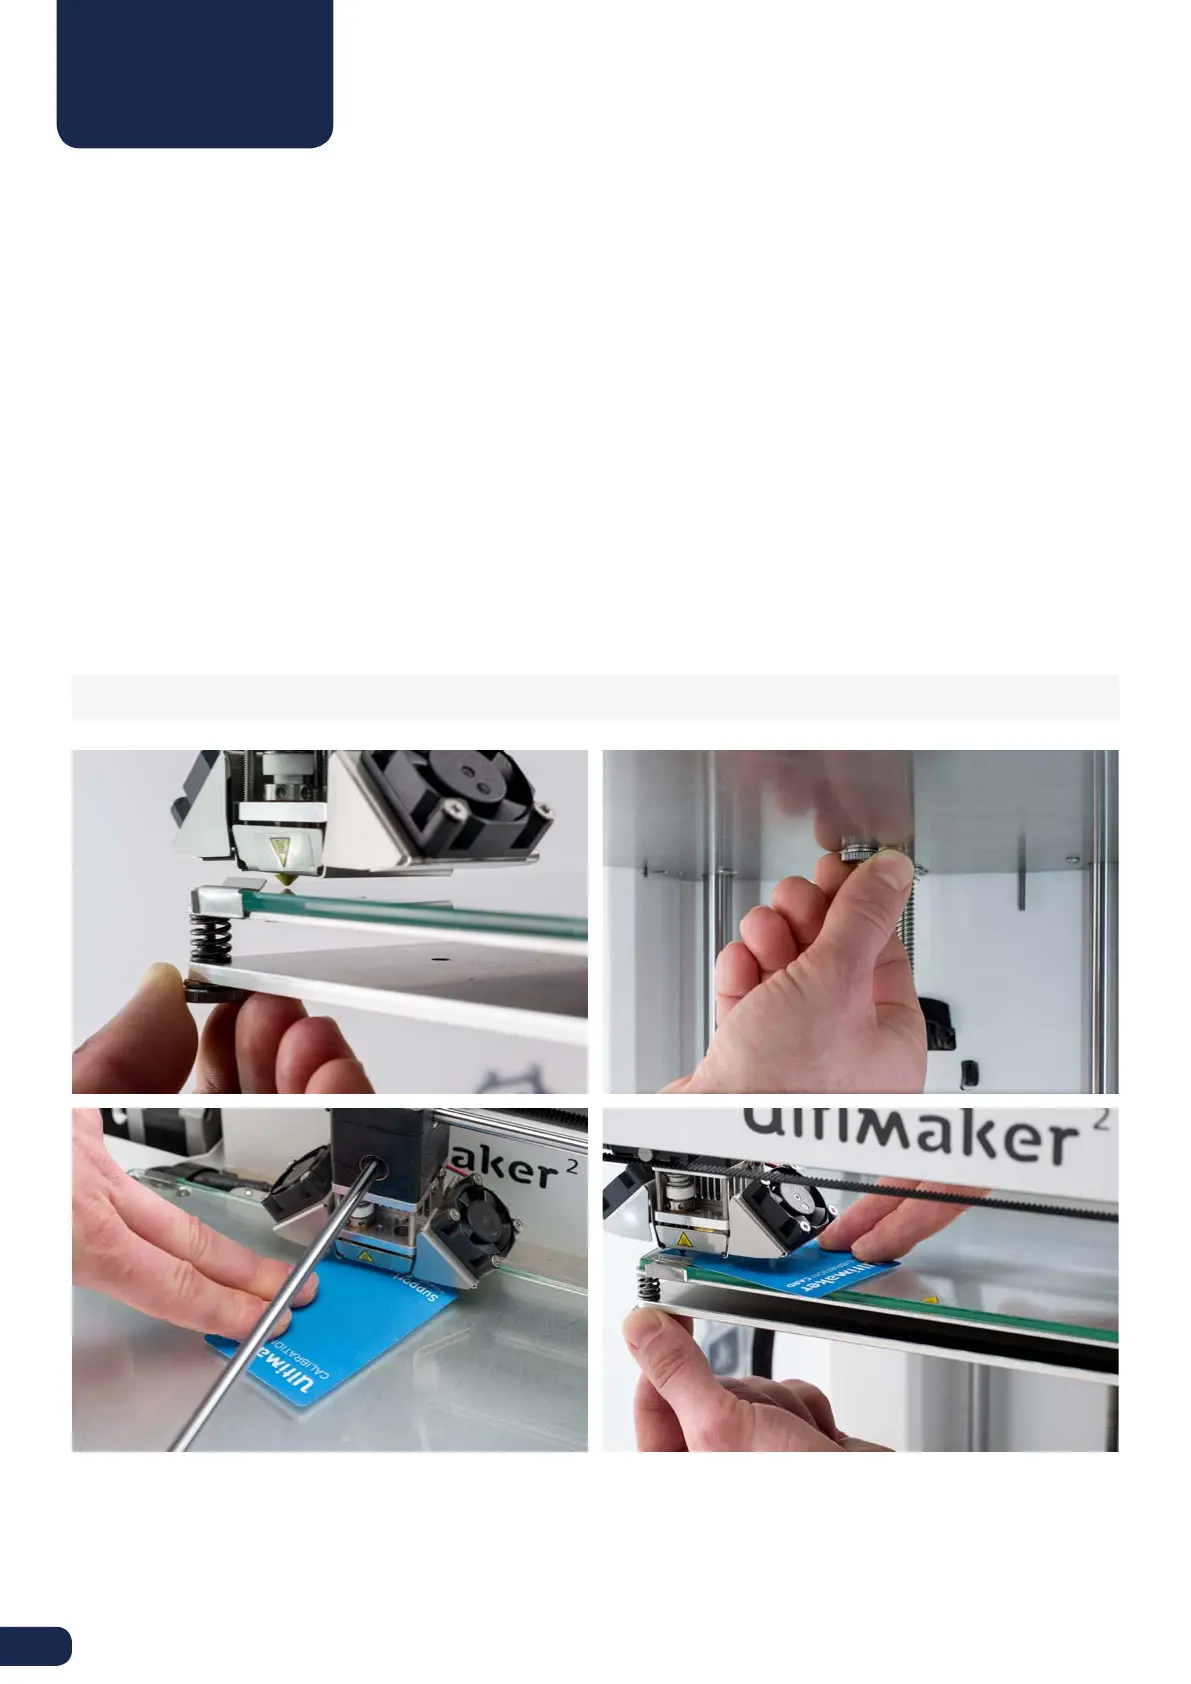
The basic steps for bed leveling are described below.
1. Go to “Maintenance” > “Build plate” to start the bed leveling process on your Ultimaker 2.
2. Wait for the Ultimaker 2 to do its homing procedure and continue when the print head is in the center at the back of
the build plate.
3. The first calibration step is to roughly level the build plate by rotating the button at the front of your Ultimaker 2 until
there is approximately 1 mm distance between the nozzle and build plate. The measurement here is not critical, just
make sure that the nozzle is close to the build plate without touching it.
4. Next, the same adjustment will be done on the front left and right side, but this time by turning the build plate
screws. If you turn them to the left the build plate will get closer to the nozzle.
5. The last step will be fine-tuning of the build plate with the “calibration card”. If necessary further adjustment can
be done by turning the build plate screws. Place the calibration card in between the nozzle and build plate on all 3
points and adjust the build plate screws until you feel slight friction when moving the card.
NOTE: Don’t push on the build plate while fine-tuning with the calibration card; this will lead to inaccuracies.
BED LEVELING