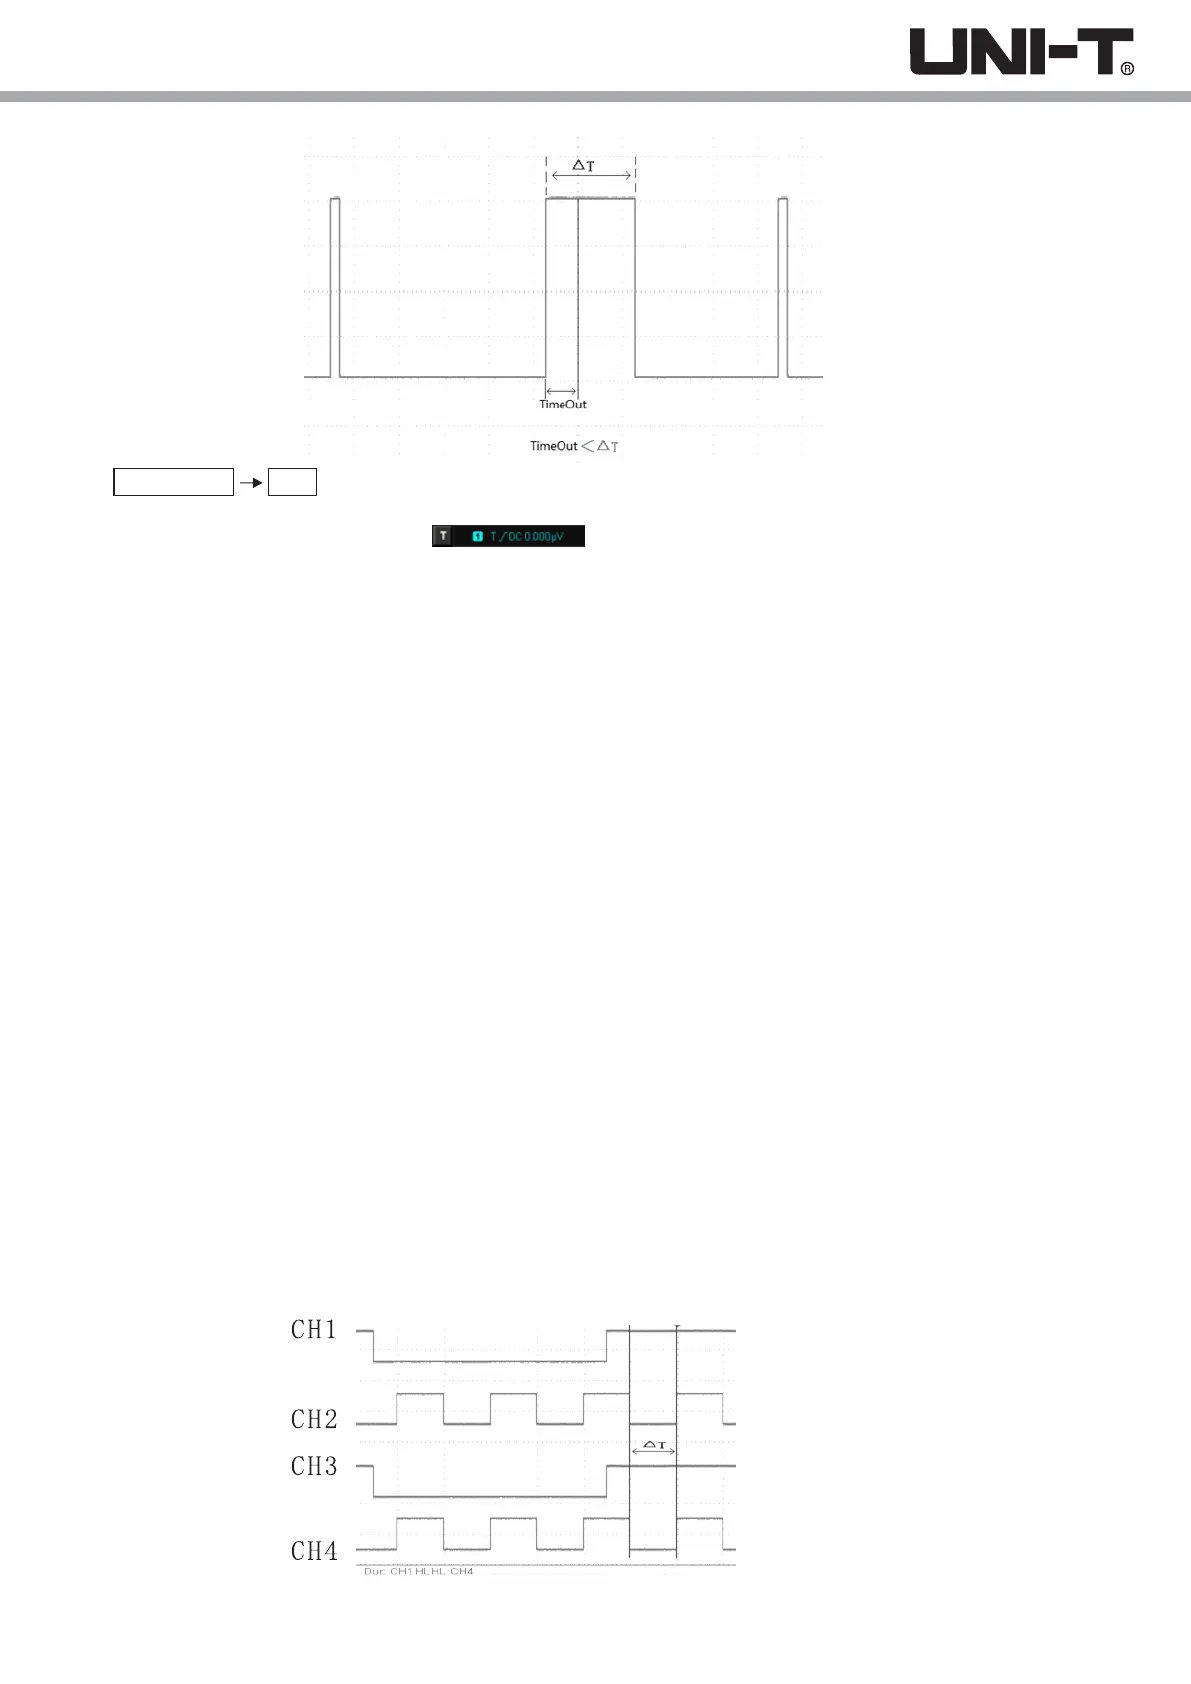
Press TRIG MENU type , and select timeout by the Multipurpose knob. You can also switch the trigger type by
consecutively pressing the type key, then press the Multipurpose knob to confirm.
At this time, the trigger setting information is displayed at the upper right corner of the screen, the trigger
type is timeout, the trigger source is CH1 and it is triggered at the rising edge, the trigger level is 0.00V.
Timeout Trigger Menu
Source:
Press the source button to select any of CH1, CH2, CH3, and CH4. The currently selected source is displayed at the upper
right corner of the screen.
Note: Only selecting the channel with connected signals as a trigger source can obtain a stable trigger.
Slope:
Press the slope key to select which edge the input signal will trigger on, you can select the rising edge, falling edge, and
any edge. The currently edge type is displayed at the upper right corner of the screen.
(1) Rising edge: Set to start timing when the rising edge of the input signal passes the trigger level.
(2) Falling edge: Set to start timing when the falling edge of the input signal passes the trigger level.
(3) Any edge: Set to start timing when any edges of the input signal pass the trigger level.
Timeout Time:
Adjust the Multipurpose knob to set the timeout time.
Trigger Setting:
Please refer to the Trigger Setting in the Edge Trigger section for more details.
5.10 Duration Trigger
With duration trigger selected, the oscilloscope identifies the trigger condition by looking for the duration of the specified
codes. The codes are the combination of channel logic "AND", and the value of each channel can be H (high), L (low), or
X (ignored). When the duration (△T) of the code meets a preset time, trigger occurs. As shown below.
Picture 5-7 Duration trigger
30
 Loading...