4-3. 벨트 설치 / Installing the belt
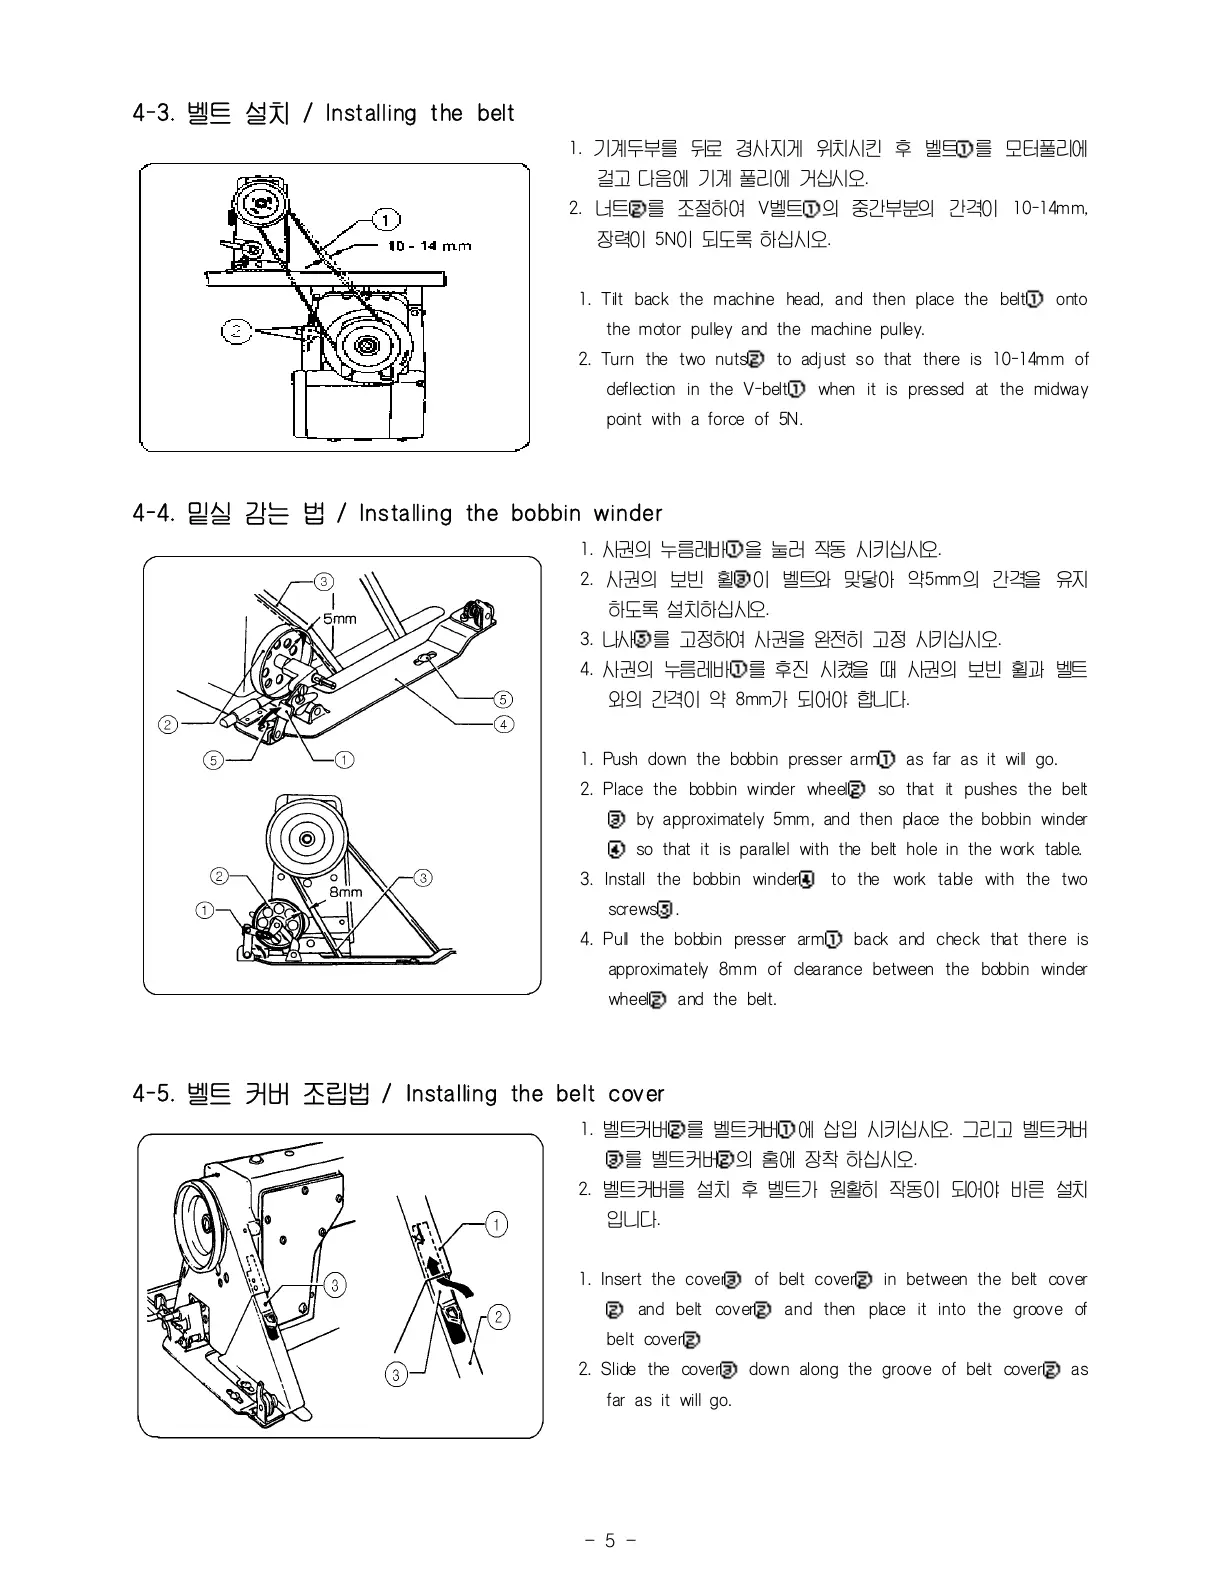
1. 기계두부를 뒤로 경사지게 위치시킨 후 벨트①를 모터풀리에
걸고 다음에 기계 풀리에 거십시오.
2. 너트②를 조절하여 V벨트①의 중간부분의 간격이 10-14mm,
장력이 5N이 되도록 하십시오.
1. Tilt back the machine head, and then place the belt① onto
the motor pulley and the machine pulley.
2. Turn the two nuts② to adjust so that there is 10-14mm of
deflection in the V-belt① when it is pressed at the midway
point with a force of 5N.
4-4. 밑실 감는 법 / Ins talling the bobbin winder
1. 사권의 누름레바①을 눌러 작동 시키십시오.
2. 사권의 보빈 휠③이 벨트와 맞닿아 약5mm의 간격을 유지
하도록 설치하십시오.
3. 나사⑤를 고정하여 사권을 완전히 고정 시키십시오.
4. 사권의 누름레바①를 후진 시켰을 때 사권의 보빈 휠과 벨트
와의 간격이 약 8mm가 되어야 합니다.
1. Push down the bobbin presser arm① as far as it will go.
2. Place the bobbin winder wheel② so that it pushes the belt
③ by approximately 5mm, and then place the bobbin winder
④ so that it is parallel with the belt hole in the work table.
3. Install the bobbin winder④ to the work table with the two
screws⑤.
4. Pull the bobbin presser arm① back and check that there is
approximately 8mm of clearance between the bobbin winder
wheel② and the belt.
4-5. 벨트 커버 조립법 / Installing the belt cover
1. 벨트커버②를 벨트커버①에 삽입 시키십시오. 그리고 벨트커버
③를 벨트커버②의 홈에 장착 하십시오.
2. 벨트커버를 설치 후 벨트가 원활히 작동이 되어야 바른 설치
입니다.
1. Insert the cover③ of belt cover② in between the belt cover
② and belt cover② and then place it into the groove of
belt cover②
2. Slide the cover③ down along the groove of belt cover② as
far as it will go.



 To Next Page