10. 표준 조정 / STANDARD ADJUST MENTS
★ 유지 및 점검 작업 시 반드시 숙련된 기술자에 의해 수행 되어야 합니다.
★
Maintenance and inspec tion of the sewin g machine should o nly be carried out by qualified pe rson nel.
★
전기 장치의 유지 및 점검 시에는 자사의 A/S센터 또는 숙련된 기술자에 의해 수행하여야 합니다.
★
Ask your Brother dealer of qualified electrician to carry out any maintenance and inspec tion of th e e lectric al
system.
★
만약, 필요에 의해 안전장치를 제거 했을 경우 반드시 제거 했던 위치에 재결합해야 되며 확인 후 올바르게 사용
해야 합니다.
★
If any safety devices have been removed, be absolutely sure to re-install to their original position and check
that they operate correctly before using the machine.
★
다음과 같은 경우에 전원을 OFF 시키거나 전원 코드를 뽑고 작업을 하십시오. 그렇지 않으면 실수에 의한 폐달
작동 시 상해의 원인이 됩니다.
①
점검 또는 유지를 위한 작업이 시행될 때.
②
로타리 가마등의 소모품을 교체 시.
★
Turn off the power switch and disconnect the powe r cord from the wall ou tlet at the f ollowi ng times,
otherwise the machine may operate if the treadle is p resse d by mistake, wh ich co uld resul t in inj ury.
①
When carrying out inspection, adjustment and mainten an ce.
②
When replacing consu mable parts such as the rotary hook.
★
전원 스위치에 조절 필요시 반드시 모든 안전장치를 착용해야 되며 세심한 주의를 필요로 합니다.
★
If the power switch needs to be left on when carrying out some adjustment, be extremely c areful to observe
all saf ety precau tions.
10-1. 실 장력 스프링 조정법 / Ad justing the thread tension spring
■
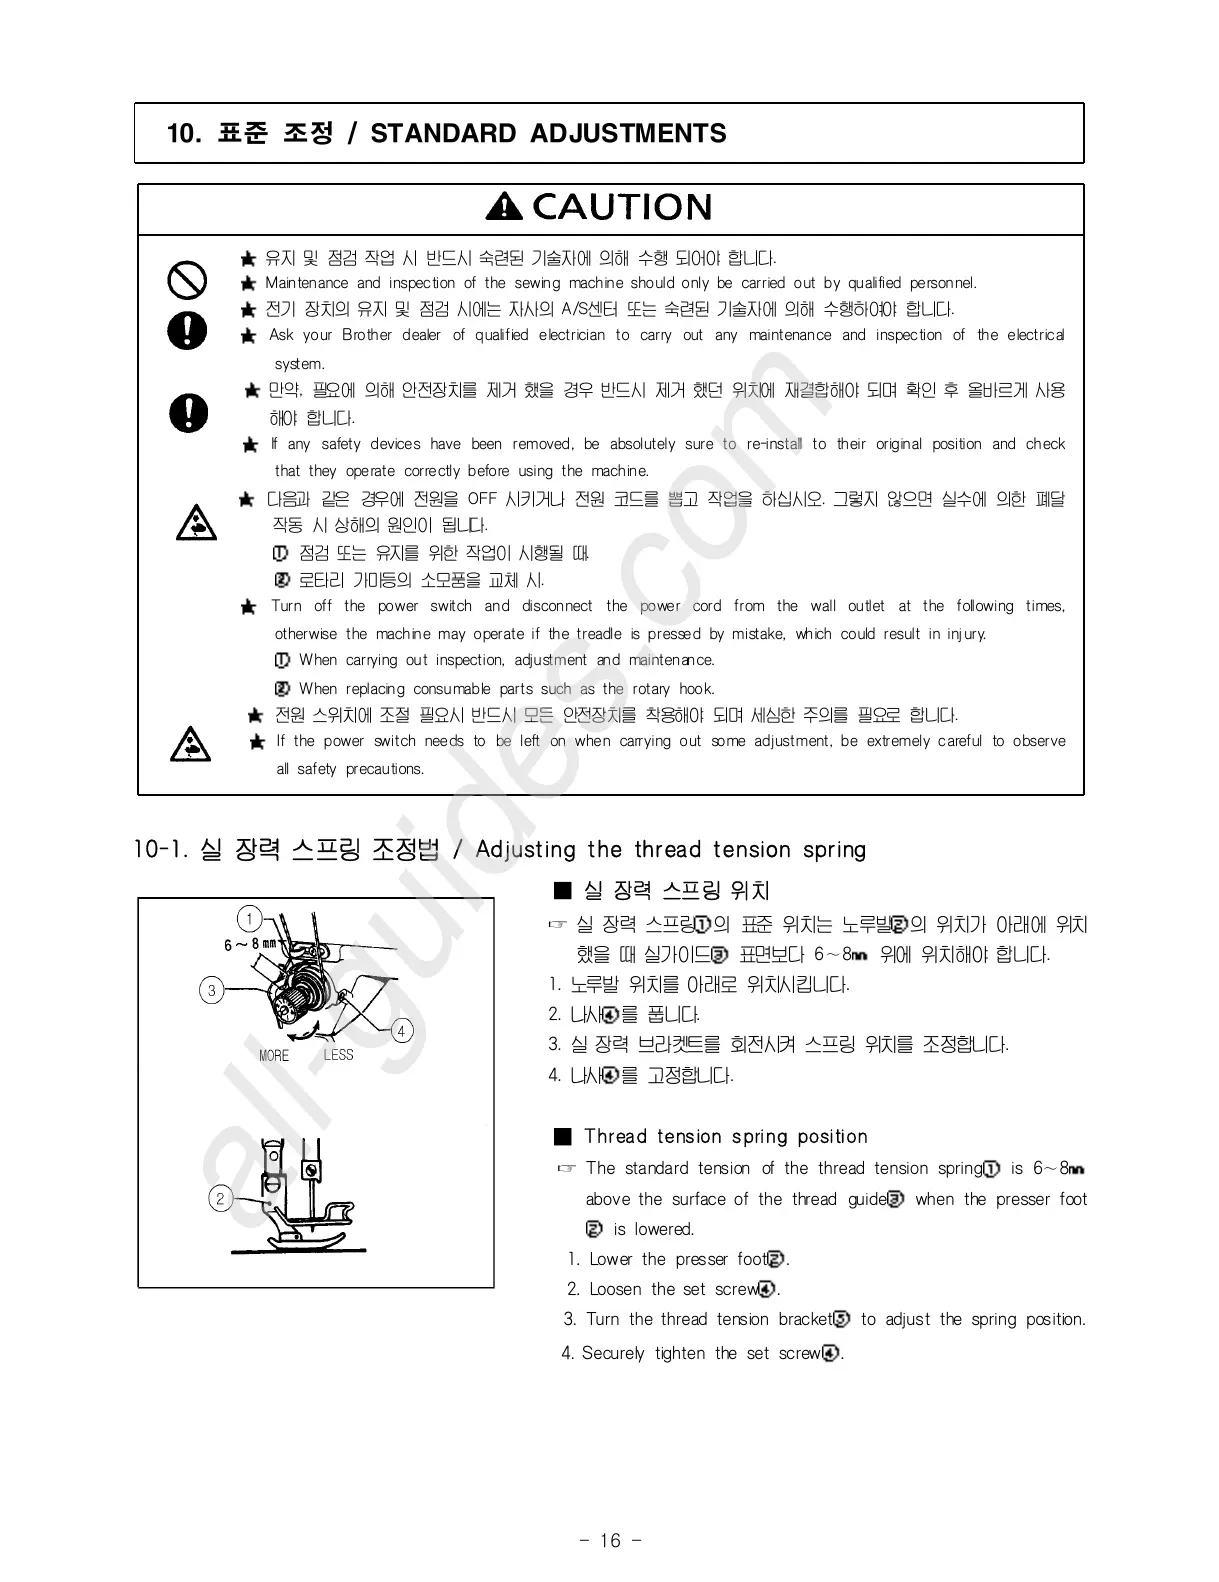
실 장력 스프 링 위 치
☞ 실 장력 스프링①
의 표준 위치는 노루발②의 위치가 아래에 위치
했을 때 실가이드③ 표면보다 6∼8㎜ 위에 위치해야 합니다.
1. 노루발 위치를 아래로 위치시킵니다.
2. 나사④를 풉니다.
3. 실 장력 브라켓트를 회전시켜 스프링 위치를 조정합니다.
4. 나사④를 고정합니다.
■
Thread tension s pring position
☞ The standard tension of the thread tension spring①
is 6∼8㎜
above the surface of the thread guide③ when the presser foot
② is lowered.
1. Lower the presser foot②.
2. Loosen the set screw④.
3. Turn the thread tension bracket⑤ to adjust the spring position.
4. Securely tighten the set screw④.



 To Next Page