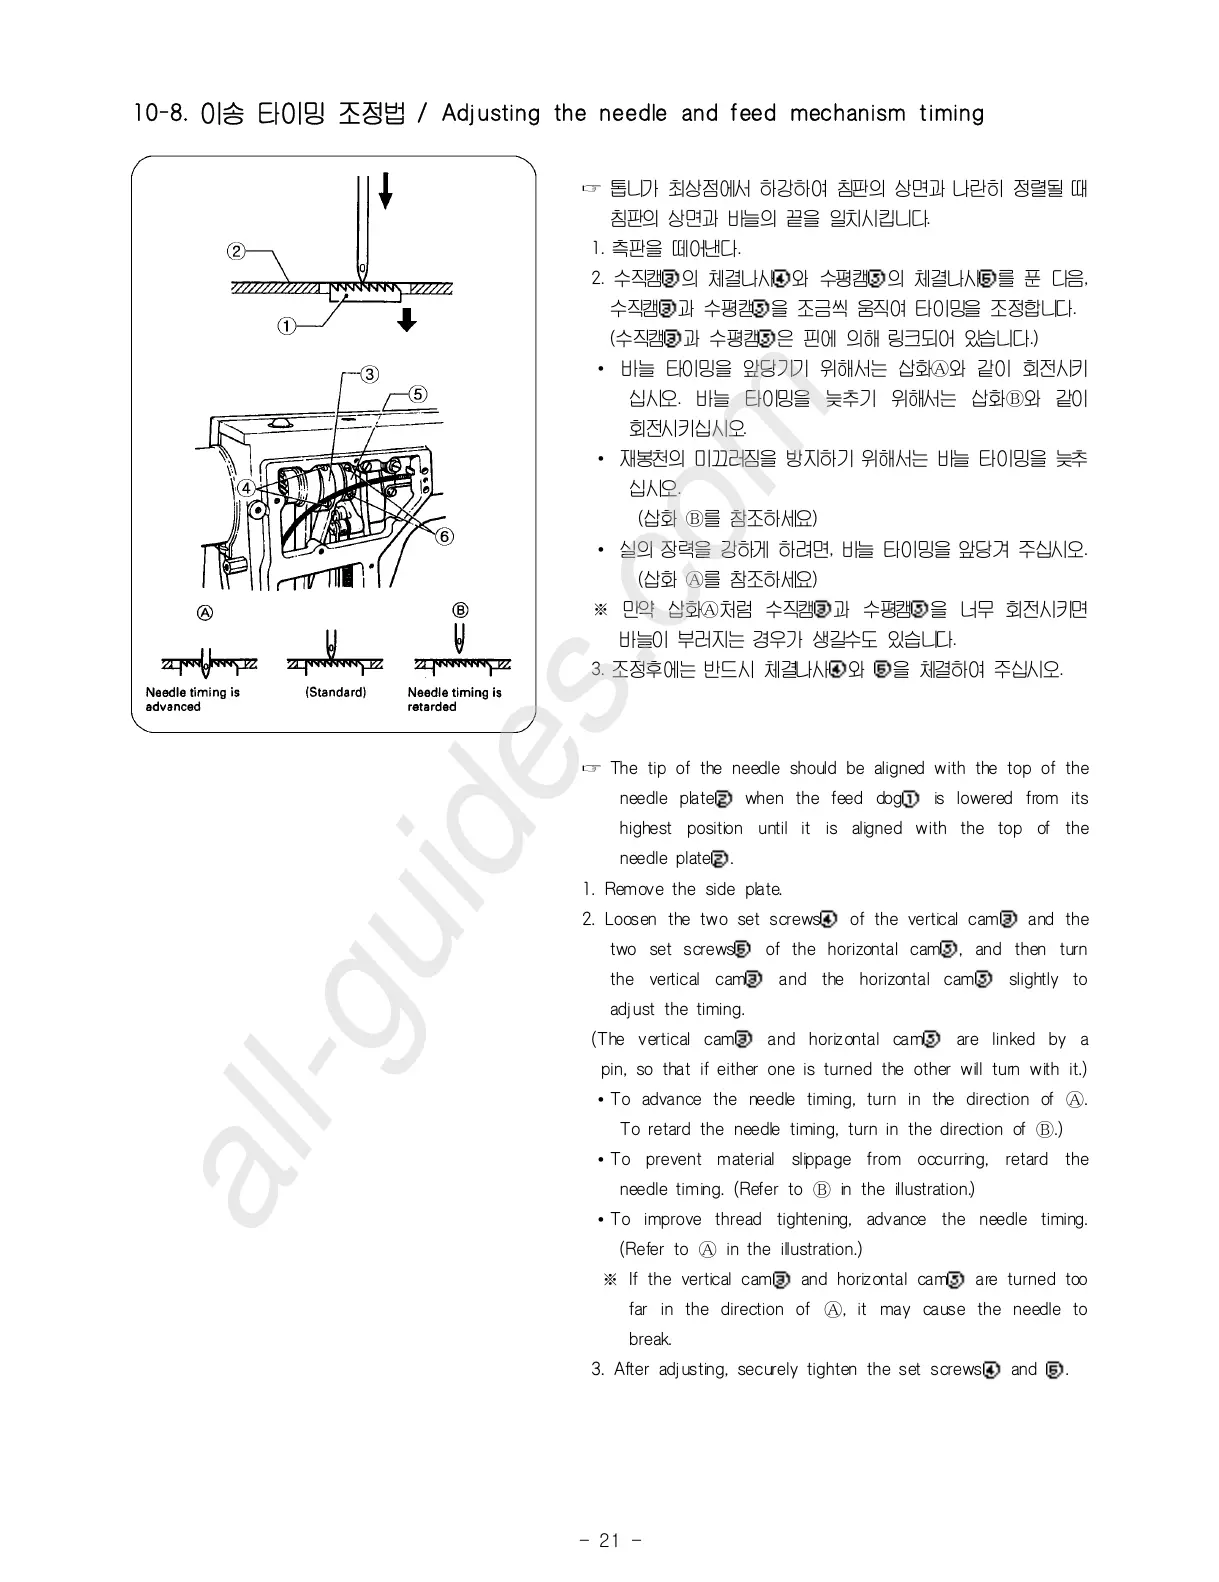
10-8. 이송 타이밍 조정법 / Adjusting the needle and feed mechanism timing
☞ 톱니가 최상점에서 하강하여 침판의 상면과 나란히 정렬될 때
침판의 상면과 바늘의 끝을 일치시킵니다.
1. 측판을 떼어낸다.
2. 수직캠③의 체결나사④와 수평캠⑤의 체결나사⑥를 푼 다음,
수직캠③과 수평캠⑤을 조금씩 움직여 타이밍을 조정합니다.
(수직캠③과 수평캠⑤은 핀에 의해 링크되어 있습니다.)
∙ 바늘 타이밍을 앞당기기 위해서는 삽화Ⓐ와 같이 회전시키
십시오. 바늘 타이밍을 늦추기 위해서는 삽화Ⓑ와 같이
회전시키십시오.
∙ 재봉천의 미끄러짐을 방지하기 위해서는 바늘 타이밍을 늦추
십시오.
(삽화 Ⓑ를 참조하세요)
∙ 실의 장력을 강하게 하려면, 바늘 타이밍을 앞당겨 주십시오.
(삽화 Ⓐ를 참조하세요)
※ 만약 삽화Ⓐ처럼 수직캠③과 수평캠⑤을 너무 회전시키면
바늘이 부러지는 경우가 생길수도 있습니다.
3. 조정후에는 반드시 체결나사④와 ⑥을 체결하여 주십시오.
☞ The tip of the needle should be aligned with the top of the
needle plate② when the feed dog① is lowered from its
highest position until it is aligned with the top of the
needle plate②.
1. Remove the side plate.
2. Loosen the two set screws④ of the vertical cam③ and the
two set screws⑥ of the horizontal cam⑤, and then turn
the vertical cam③ and the horizontal cam⑤ slightly to
adjust the timing.
(The vertical cam③ and horizontal cam⑤ are linked by a
pin, so that if either one is turned the other will turn with it.)
∙To advance the needle timing, turn in the direction of Ⓐ.
To retard the needle timing, turn in the direction of Ⓑ.)
∙To prevent material slippage from occurring, retard the
needle timing. (Refer to Ⓑ in the illustration.)
∙To improve thread tightening, advance the needle timing.
(Refer to Ⓐ in the illustration.)
※ If the vertical cam③ and horizontal cam⑤ are turned too
far in the direction of Ⓐ, it may cause the needle to
break.
3. After adjusting, securely tighten the set screws④ and ⑥.