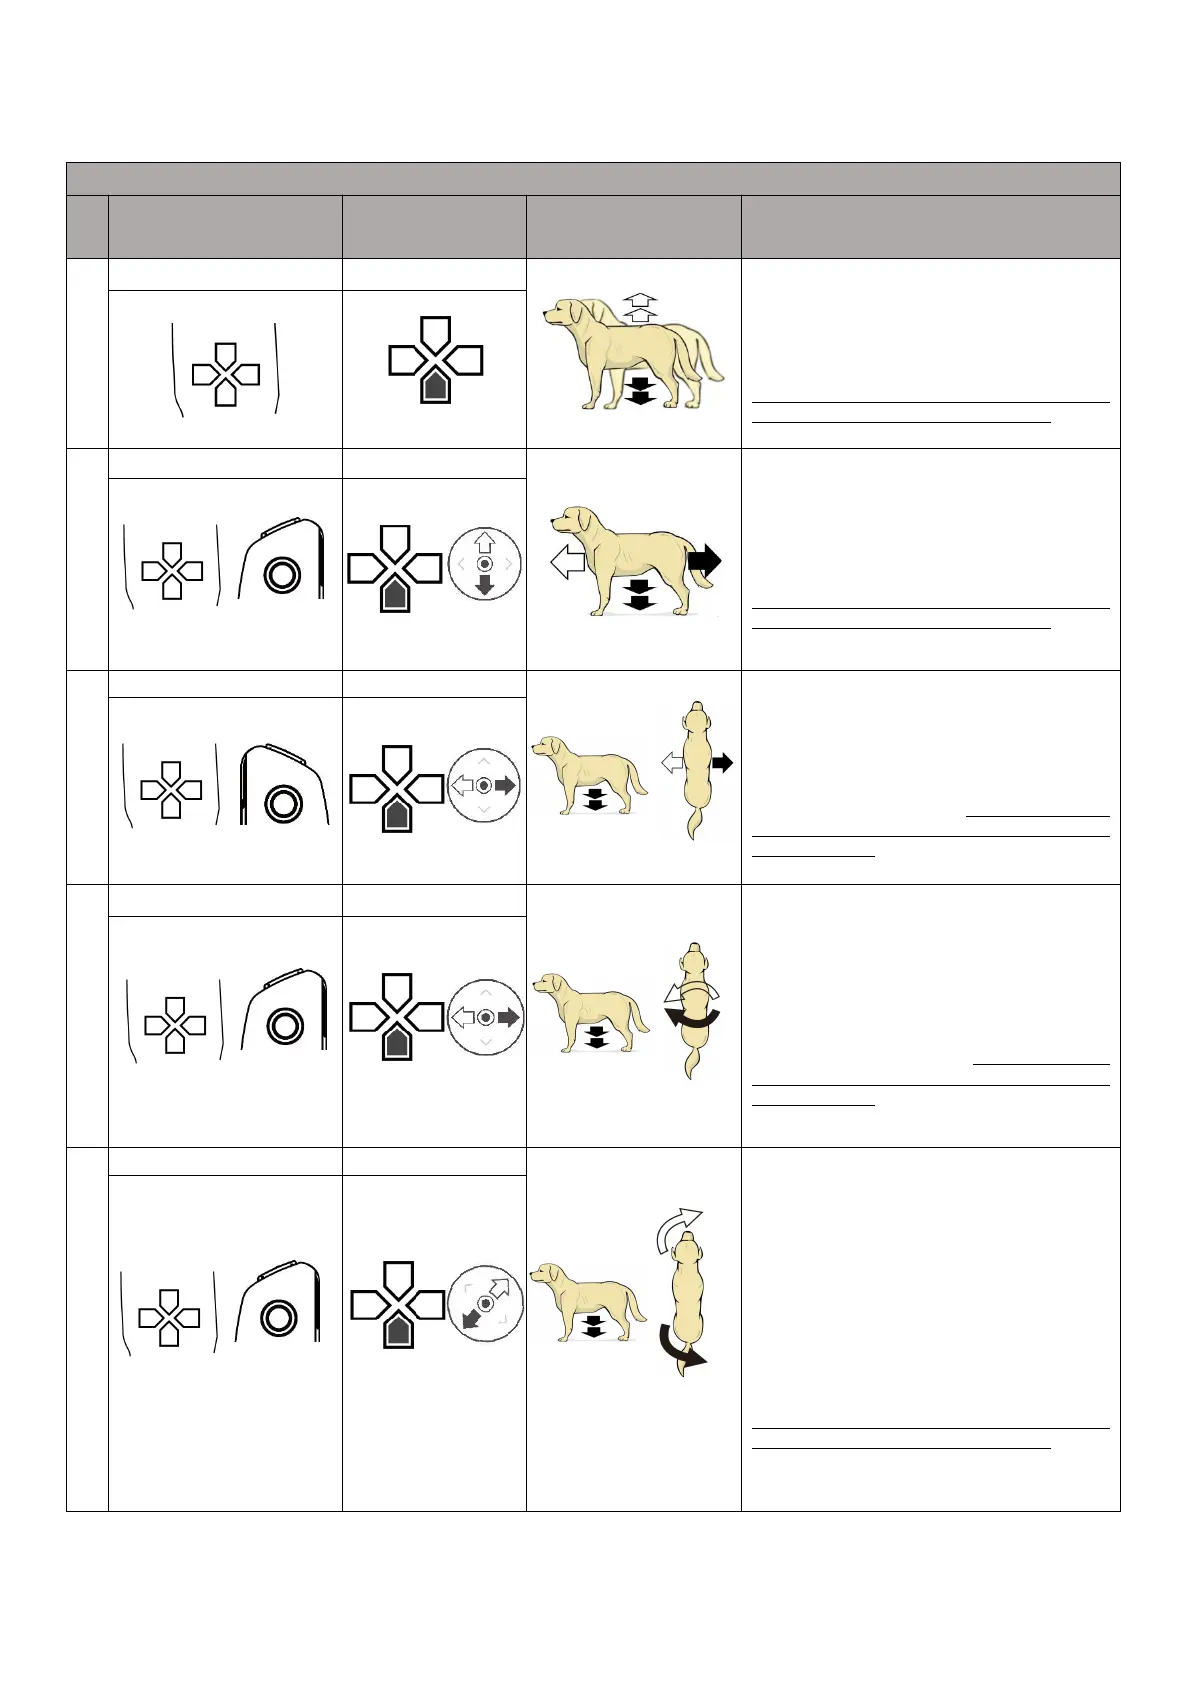
7.Actions that are not recommended under “Sport” and “SLAM” mode
The Position of Stick or
Button on Joystick
The left button is used to control the body lift and
squat when stepping.
In Sport and SLAM mode, press the up button, the
robot body will lift up. Press the down button, the
robot body will squat.
Note 1: This action is not recommended. Note 2:
Please refer to Table 6 for other precautions.
Left button and left Stick linkage is used to control
the robot crept forward and backward.
In Sport and SLAM mode, press the down button, the
robot body will squat. Push stick up, the robot crept
forward. Push stick down, the robot crept backrward.
Note 1: This action is not recommended. Note 2:
Please refer to Table 6 for other precautions.
Left button and right Stick linkage is used to control
the robot crept to the left and right.
In Sport and SLAM mode,, press the down button,
the robot will squat. Psuh stick to left, the robot crept
and moves to the left. Psuh stick to right, the robot
crept and moves to the right. Note 1: This action is
not recommended. Note 2: Please refer to Table 6 for
other precautions.
Left button and Left Stick linkage is used to control
the robot crept to turn counterclockwise and
clockwise.
In Sport and SLAM mode,, press the down button,
the robot will squat. Push stick to left, the robot crept
and turns counterclockwise. Push stick to right, the
robot crept and turns clockwise. Note 1: This action is
not recommended. Note 2: Please refer to Table 6 for
other precautions.
Left button and left Stick linkage is used to control
the robot crept to walk arc (circle)
In Sport and SLAM mode, press the down button, the
robot will squat. Push stick in the upper right
direction, and the robot will squat down to the right
front. If the Stick is kept, the robot will kneel forward
and circle clockwise. Push stick in the lower left
direction, and the robot will squat down to the right
rear. If the Stick is kept, the robot will squat back and
move counterclockwise.
Note 1: This action is not recommended. Note 2:
Please refer to Table 6 for other precautions.