ADVANCED SYSTEM OPERATION
Section 9-11
photographs are printed. For a more detailed explanation of the terms “grayscale”, “bitmap”,
“halftone”, or “dither”, please refer to the “Graphic Software Setup” section in this manual.
Halftone
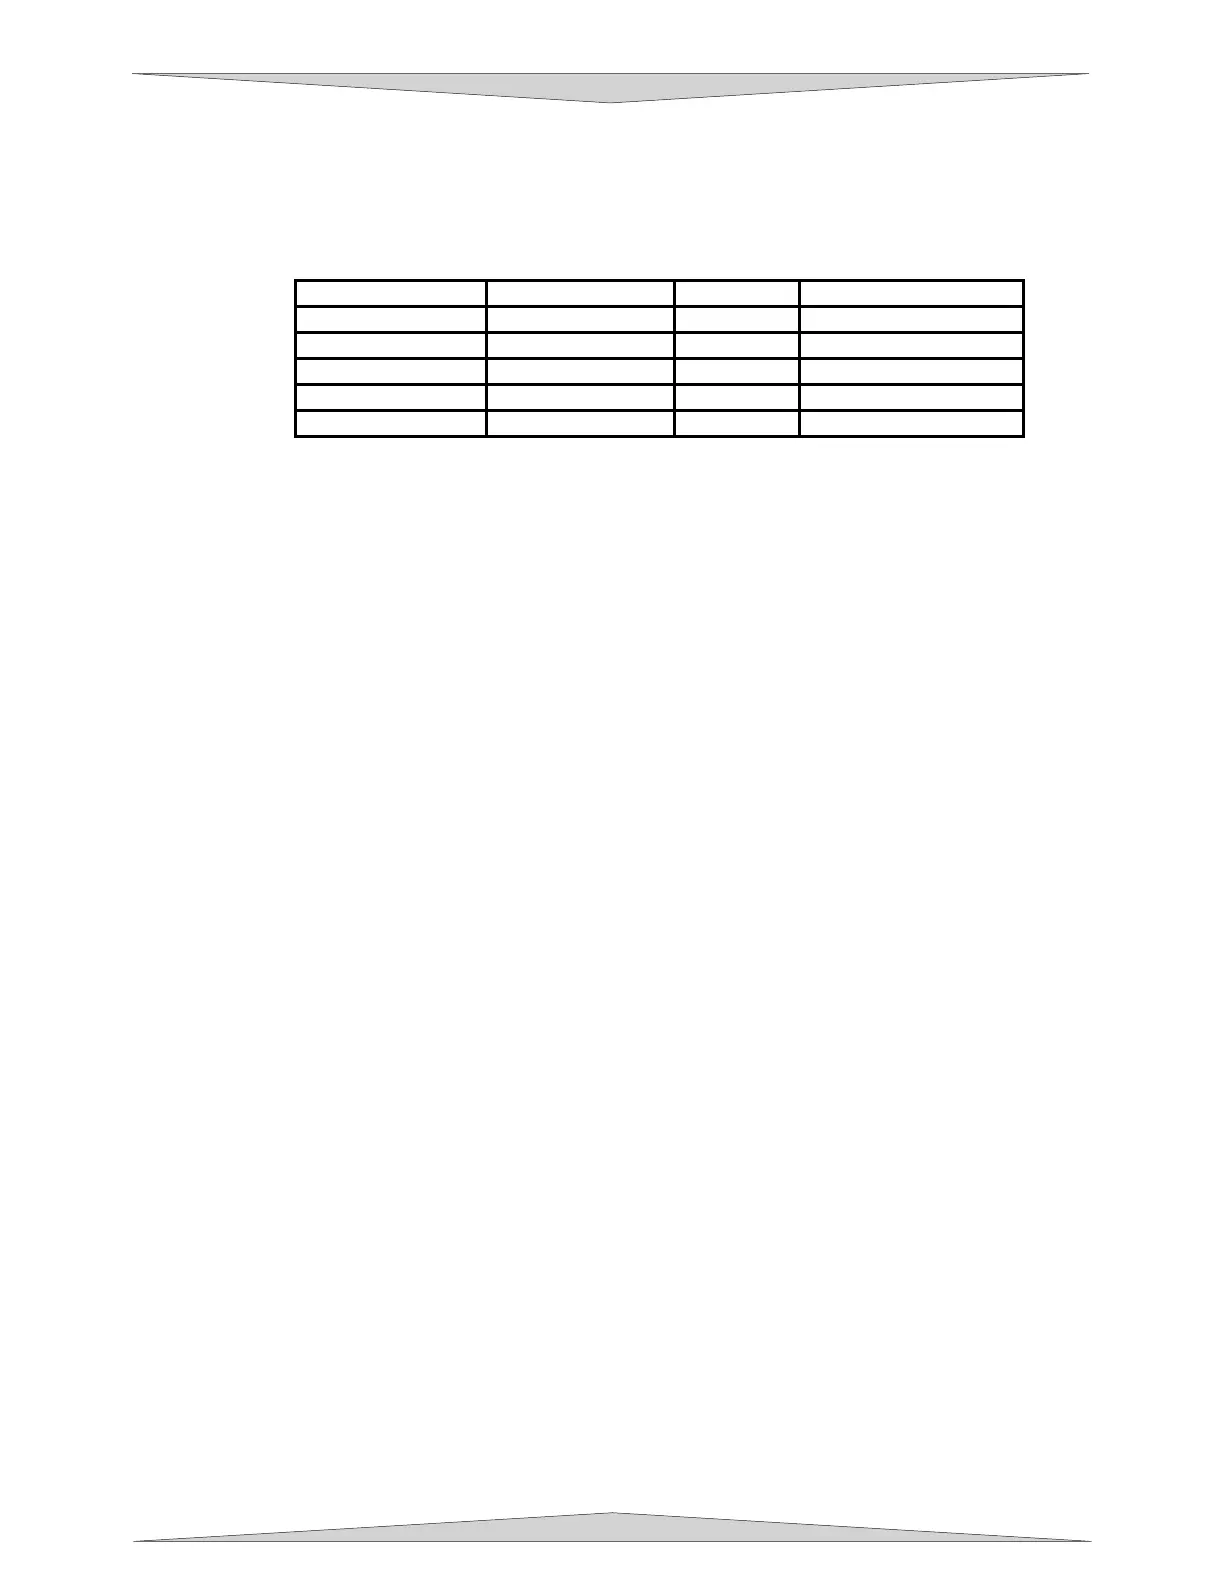
This halftone pattern generator converts grayscale bitmaps into a halftoned image based on
your Image Density choice in the driver.
IMAGE DENSITY ANGLE SHAPE LINES PER INCH
6 45 DEGREES ROUND 180
5 45 DEGREES ROUND 90
4 45 DEGREES ROUND 60
3 45 DEGREES ROUND 45
2 45 DEGREES ROUND 36
Error Diffusion
Unlike halftone, error diffusion scatters the black pixels in a random pattern to represent
shading. It uses the quantity of black dots instead of the size of the black dots to represent
the different shades of gray. The pattern created will be dependent on the quality setting that
you choose in the driver with the exception that there is no chart to reference. Higher quality
settings such as 5 will produce a more densely packed, higher dot quantity pattern whereas
lower resolution setting such as 2 will produce a loosely packed, lower quantity dot pattern.
NOTE: DO NOT use Error Diffusion when engraving rubber stamps otherwise dots will
appear in the background. Choose only Halftone.
Black and White Mode
This mode thresholds the image at 50% black. Each pixel that is greater than 50% black will
be converted into white and each pixel that is 50% black or less will be converted into black.
This effect is very similar to trying to duplicate a photograph using a photocopier.
Helpful Tip
Engraving grayscale bitmaps using a dithering pattern requires some practice and a bit of trial
and error to achieve perfection. It also requires some knowledge of bitmap editing software.
These images will visually appear different on one material as opposed to another material even
if you use the same driver settings. As a rule of thumb, use an Image Density setting of 5 using
halftone or diffusion pattern on harder materials such as marble, anodized aluminum or
microsurfaced engraver's plastic. Use an Image Density setting of 3 using the halftone or
diffusion pattern for softer materials such as wood or materials that you intend on engraving very
deeply.
Image Enhancement
These controls allow the user to “fine tune” the image which will enable the laser system to
produce the highest quality, highest detailed images at high or low speeds. Image Enhancement
may be used at any engraving speed and with any application material.
The following procedure may appear lengthy, but when you actually learn how to use the
controls, establishing the correct parameters is easy and quick. Once you have established
those parameters you can “SAVE” them in the ULS printer driver as .LAS settings and recall them
when needed. Many users choose to name these saved setting according to the application
material’s name. Before stepping you through the procedure we must first define the parameters.
NOTE: The Image Enhancement settings are designed to work with the BLACK pen color
in the printer driver. However, the other 7 pen colors of the printer driver will use the same
Image Enhancement settings. Keep in mind that those settings will have a different
resulting effect on if the other colors %power, %speed, and PPI are different than the black
pen color’s setting.