ASSEMBLING THE PLS
Section 4-8
The power connectors are labeled “Top” (6) and “Bottom” (7). It is very important that you plug in the
correct connector into the appropriate laser; otherwise the laser system will not function properly.
The power connectors are keyed so it will only insert one way. Single laser users should just leave
the bottom connector unplugged and out of the way. Close the rear cover slowly, making sure that
you do not pinch any wires, and push down on the latches until they “click”.
You are now done installing the laser tube(s) and need to Finalize the Connections.
Finalizing the Connections
Make the following connections in the exact order described otherwise static electricity can damage the
computer and/or the laser systems electronics.
1. Connect your 4-inch flexible rubber exhaust system hose to the 4-inch outlet found at the rear of the
laser system. Use a hose clamp so that it doesn’t fall off.
2. Connect the laser systems power cord and your computers power cord to a grounded electrical
source. International users may need to connect an adapter to the power cord to be able to plug it
into their power source. MAKE SURE THAT YOU ATTACH THE ADAPTER CORRECTLY TO THE
POWER CORD AND THAT YOUR POWER SOURCE IS PROPERLY GROUNDED (EARTHED)
OTHERWISE SERIOUS DAMAGE CAN OCCUR TO THE LASER SYSTEM. DO NOT POWER ON
EITHER DEVICE AT THIS TIME.
Having a 9 volt battery installed into the PLS is necessary to operate the
laser system. The laser system will not function without a battery or if
the battery is low in power. Keep a spare 9 volt battery at hand at all
times.
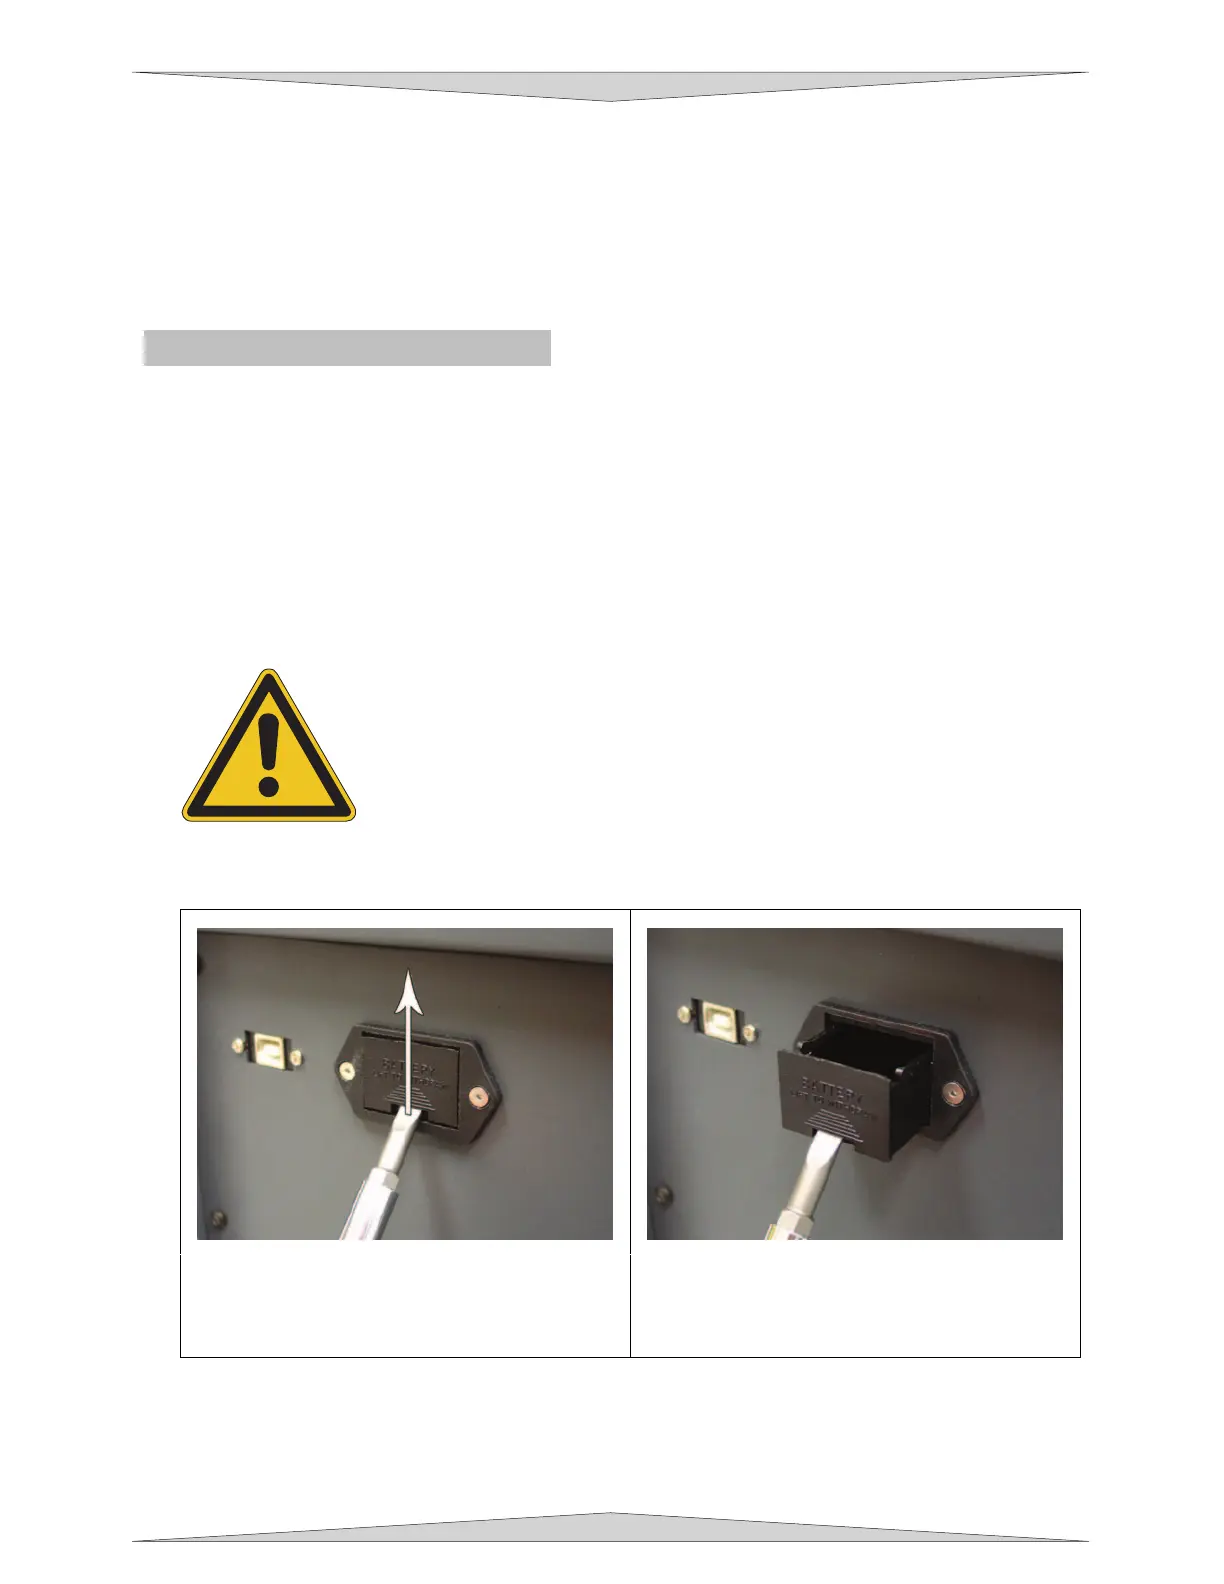
3. Install the Thermal Sensor battery into the PLS system.
a. Remove the Thermal Sensor battery holder
from the side of the PLS by inserting a
small screwdriver in the hole and GENTLY
push upward.
b. Once you push upward pull the screwdriver
towards you to withdraw the battery holder.
c. Insert the 9 volt battery provided into the black battery holder according to the diagram inside
the encasing.
d. Reinsert the battery holder into the cavity until it makes a “click” sound.