ASSEMBLING THE PLS
Section 4-9
4.
USB 2.0 High Speed (only)
The laser system comes equipped with a high quality 6-foot USB cable. Please use this cable and do
not substitute it with any other. Connect the printer cable directly from your computers USB port to
the port in the rear of the laser system. DO NOT USE ANY ADAPTERS, EXTENSION CABLES,
SWITCH BOXES, ZIP DRIVE, OR ANY DEVICE BETWEEN THE COMPUTERS USB PORT AND
THE PORT ON THE LASER SYSTEM OTHERWISE DAMAGE TO THE COMPUTER OR THE
LASER SYSTEM CAN OCCUR AS WELL AS FILE TRANSMISSION PROBLEMS.
a. Connect the USB cable provided between the USB port of the computer and the USB port on
the side of the PLS. Do not use a USB cable longer than 6 feet (2 meters).
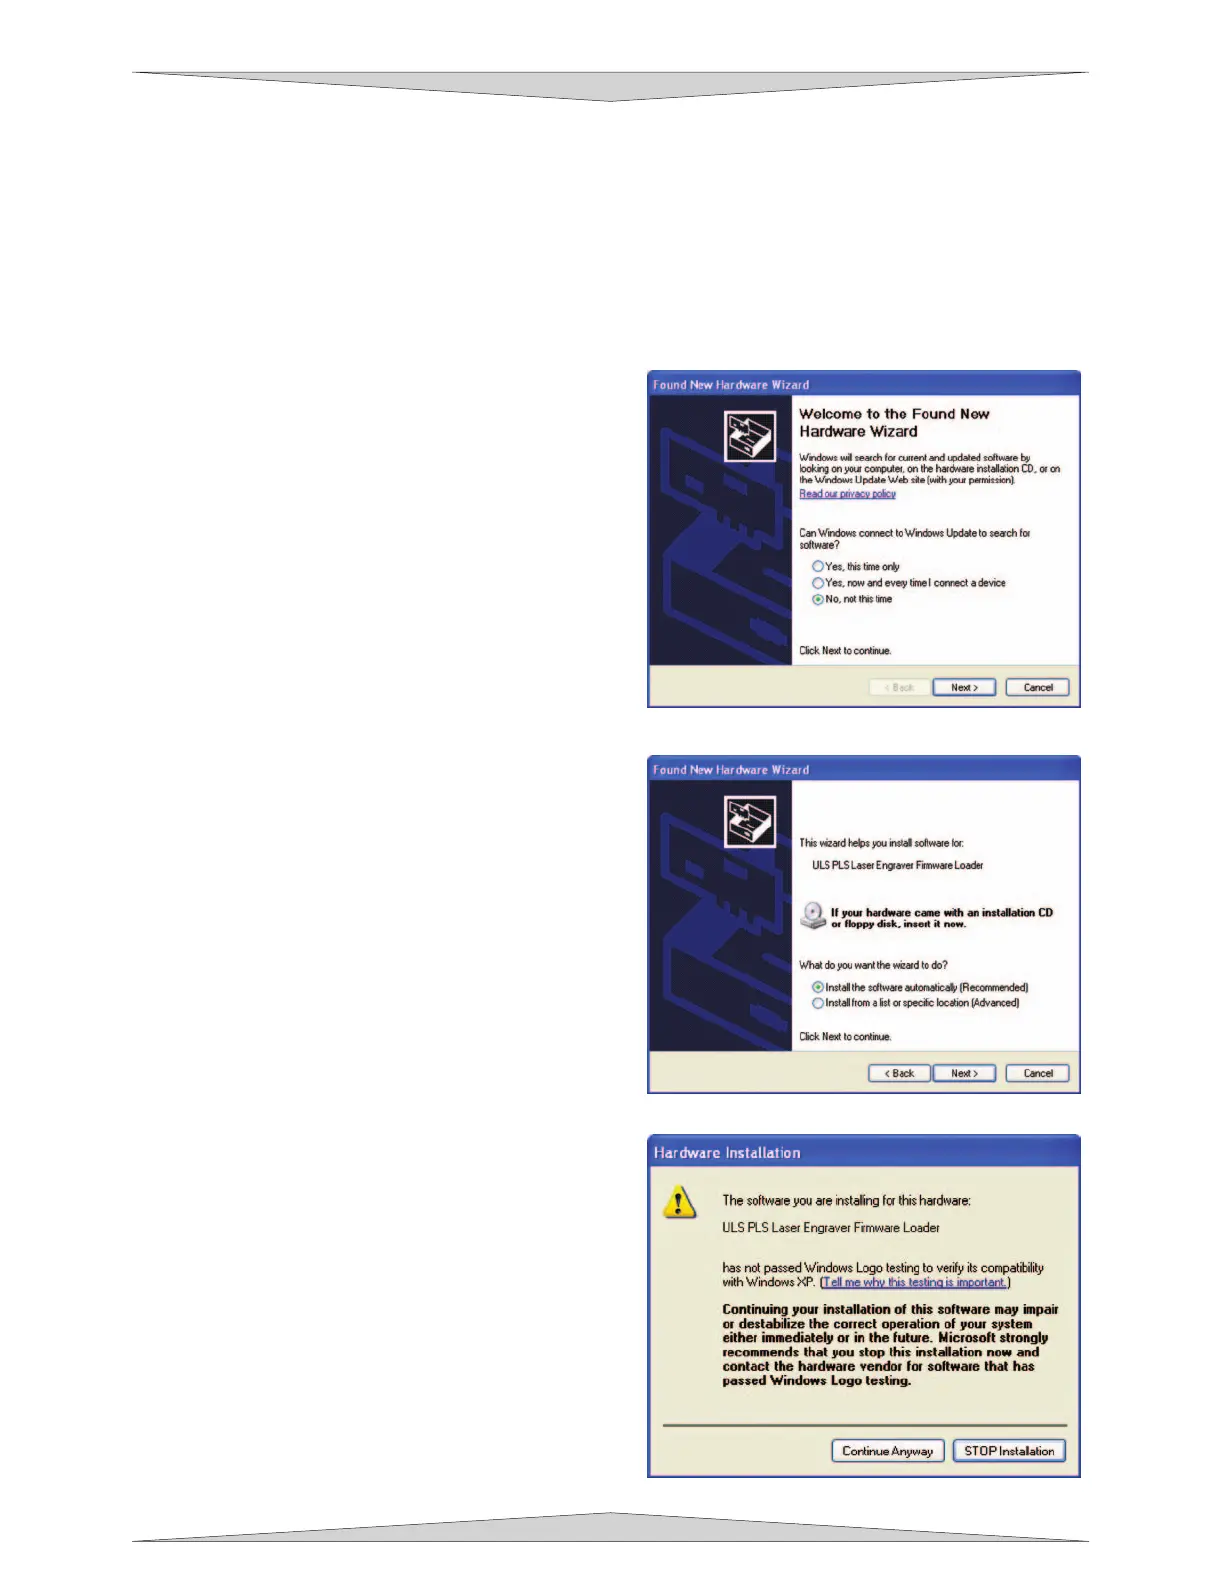
b. After connecting the USB cord, the Found
New Hardware Wizard will open. You will be
asked if Windows should connect to the
Windows Update to search for software.
Select “No, not at this time”. Then click
“Next” to continue.
c. Select “Install the software automatically”.
Then Click “Next” to continue. You DO NOT
need to insert the Software Installation CD-
ROM.
d. A message will appear, “The ULS PLS
Engraver Firmware Loader has not passed
Windows Logo testing”. Select “Continue
Anyway”. Do not be concerned. Installing
the ULS Firmware WILL NOT harm your
computer in any way! The firmware will
begin to load.