Section 6-3
Section 6
Basic System Features
From the Universal Control Panel menus and buttons to the PLS Keypad and basic printer driver
features, this section describes many of the features of the laser system. If you have done so already,
power ON your computer and let it boot up completely BEFORE powering ON the laser system otherwise
your laser system can “lock up” when attempting to run the first file and the only way to clear this error is
to power the system OFF and then ON again. You do not need to turn on your exhaust system at this
time.
The Universal Control Panel (UCP)
The Universal Control Panel on the computer provides access to all of the controls necessary for cutting
and engraving operations. When the laser system has finished initializing and homing, and if all the doors
are closed the red light on the Keypad will be illuminated and ready to accept files.
Once you have installed the UCP using the installation disk, a blue square-shaped icon
(Figure 1) will appear in the lower right corner of your Windows taskbar. This icon
indicates that the UCP is active. It will automatically activate itself every time you
power on your computer. If for any reason the UCP is deactivated you can reactivate it
by double-clicking on the shortcut (Figure 2) found on your computers desktop screen.
You can access the UCP at anytime by left-clicking once on the icon in the taskbar.
The following describes the features of each tab of the UCP:
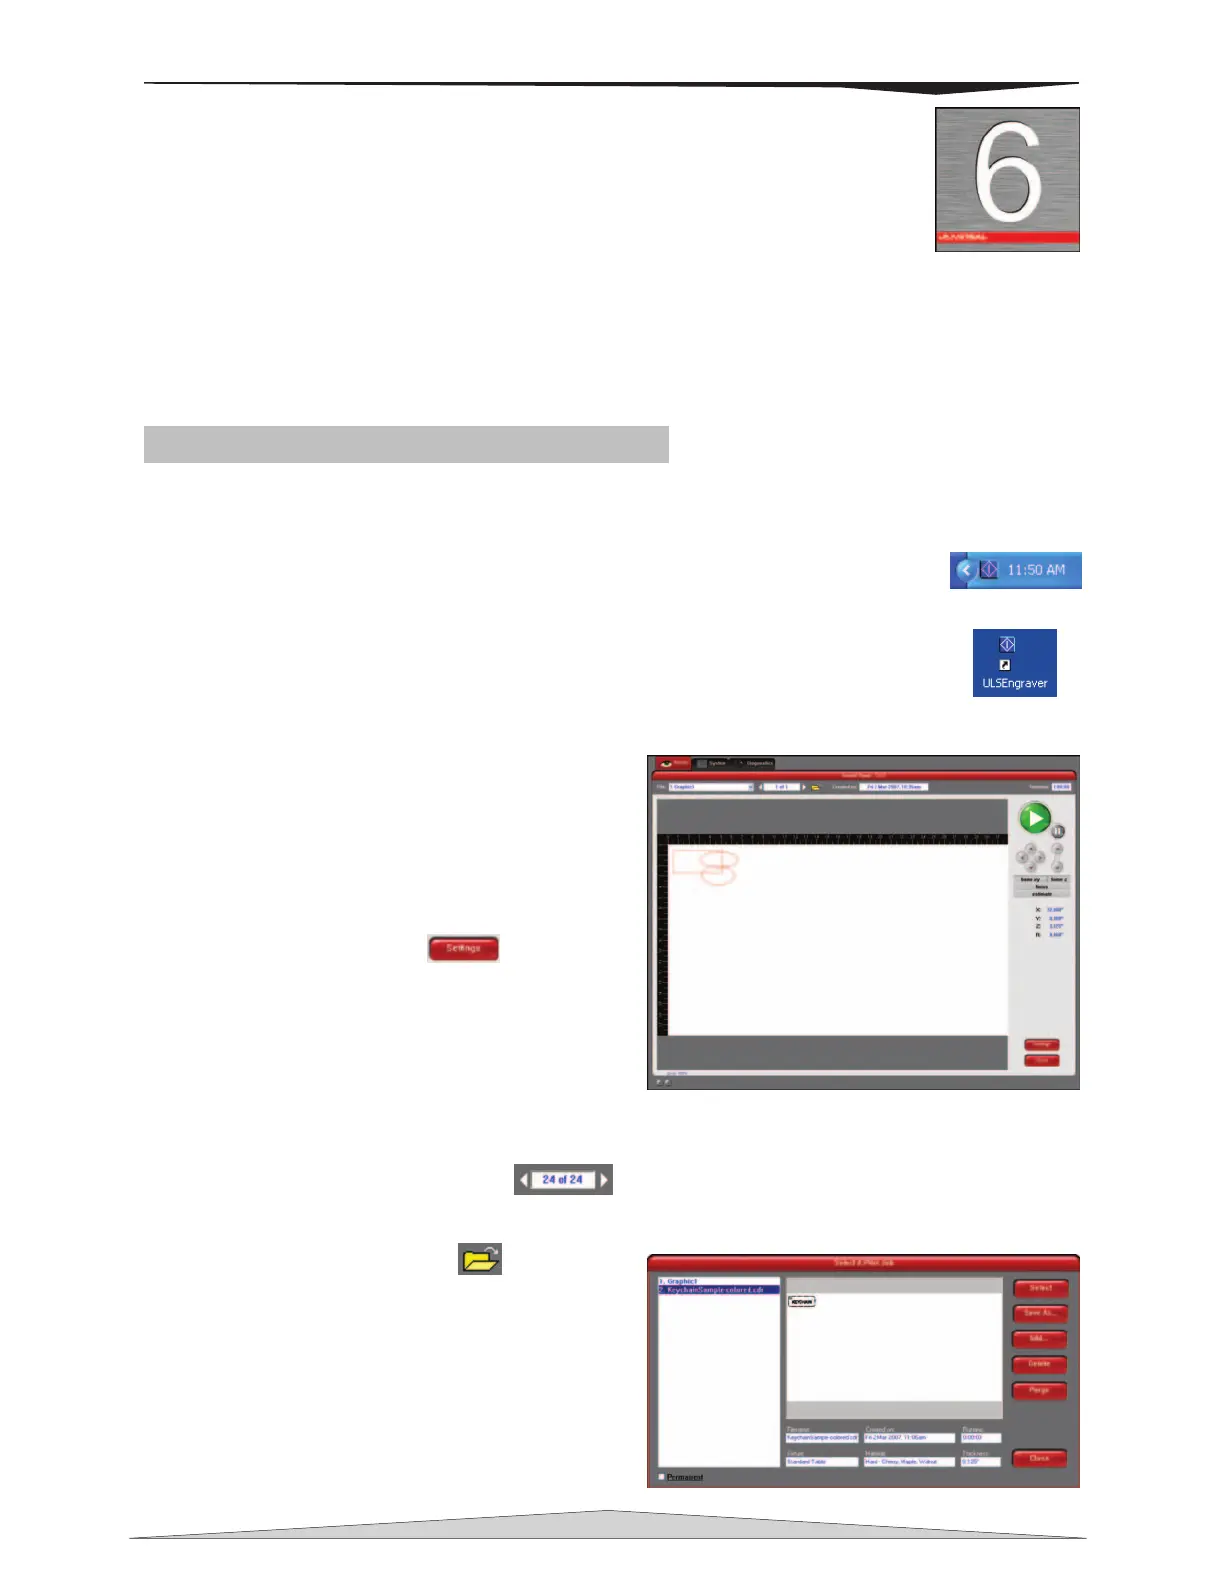
Viewer Tab
Selecting this tab will allow you to preview your file and
control features of the laser system.
• Shows a preview window of the currently selected
job.
• The cursor becomes a magnifying glass (Zoom
Tool) if you pass it over the preview window. Left-
clicking your mouse zooms in and right-clicking
zooms out.
• Clicking the Settings button
takes you
back to the printer driver. If mistakes where made
or would like to make additional changes clicking
this button allows for those changes. Further
information about the printer driver can be found in
Section 6-7 of this manual.
File Management
Displays the name of current job, the number of files stored, the date and time it was stored on your
hard drive, and the run time near the top of the window.
o The print job navigation buttons
allow you to preview the print jobs stored on your
hard drive. If you navigate through the files using the UCP the file name on the Keyboard display
changes accordingly and visa versa.
o The “open folder” button
displays and
allows you to select your print jobs in a file
management style. It also allows you to delete
print jobs stored from your hard drive, and
save print jobs as .efm files.
The PURGE button deletes ALL cached
print jobs stored on your hard drive.
If the Permanent box is marked this
indicates that the selected file will not be
deleted from your hard drive even after
clicking the PURGE button.
Figure 1
Figure 2