GRAPHICS SOFTWARE SETUP
Section 3-11
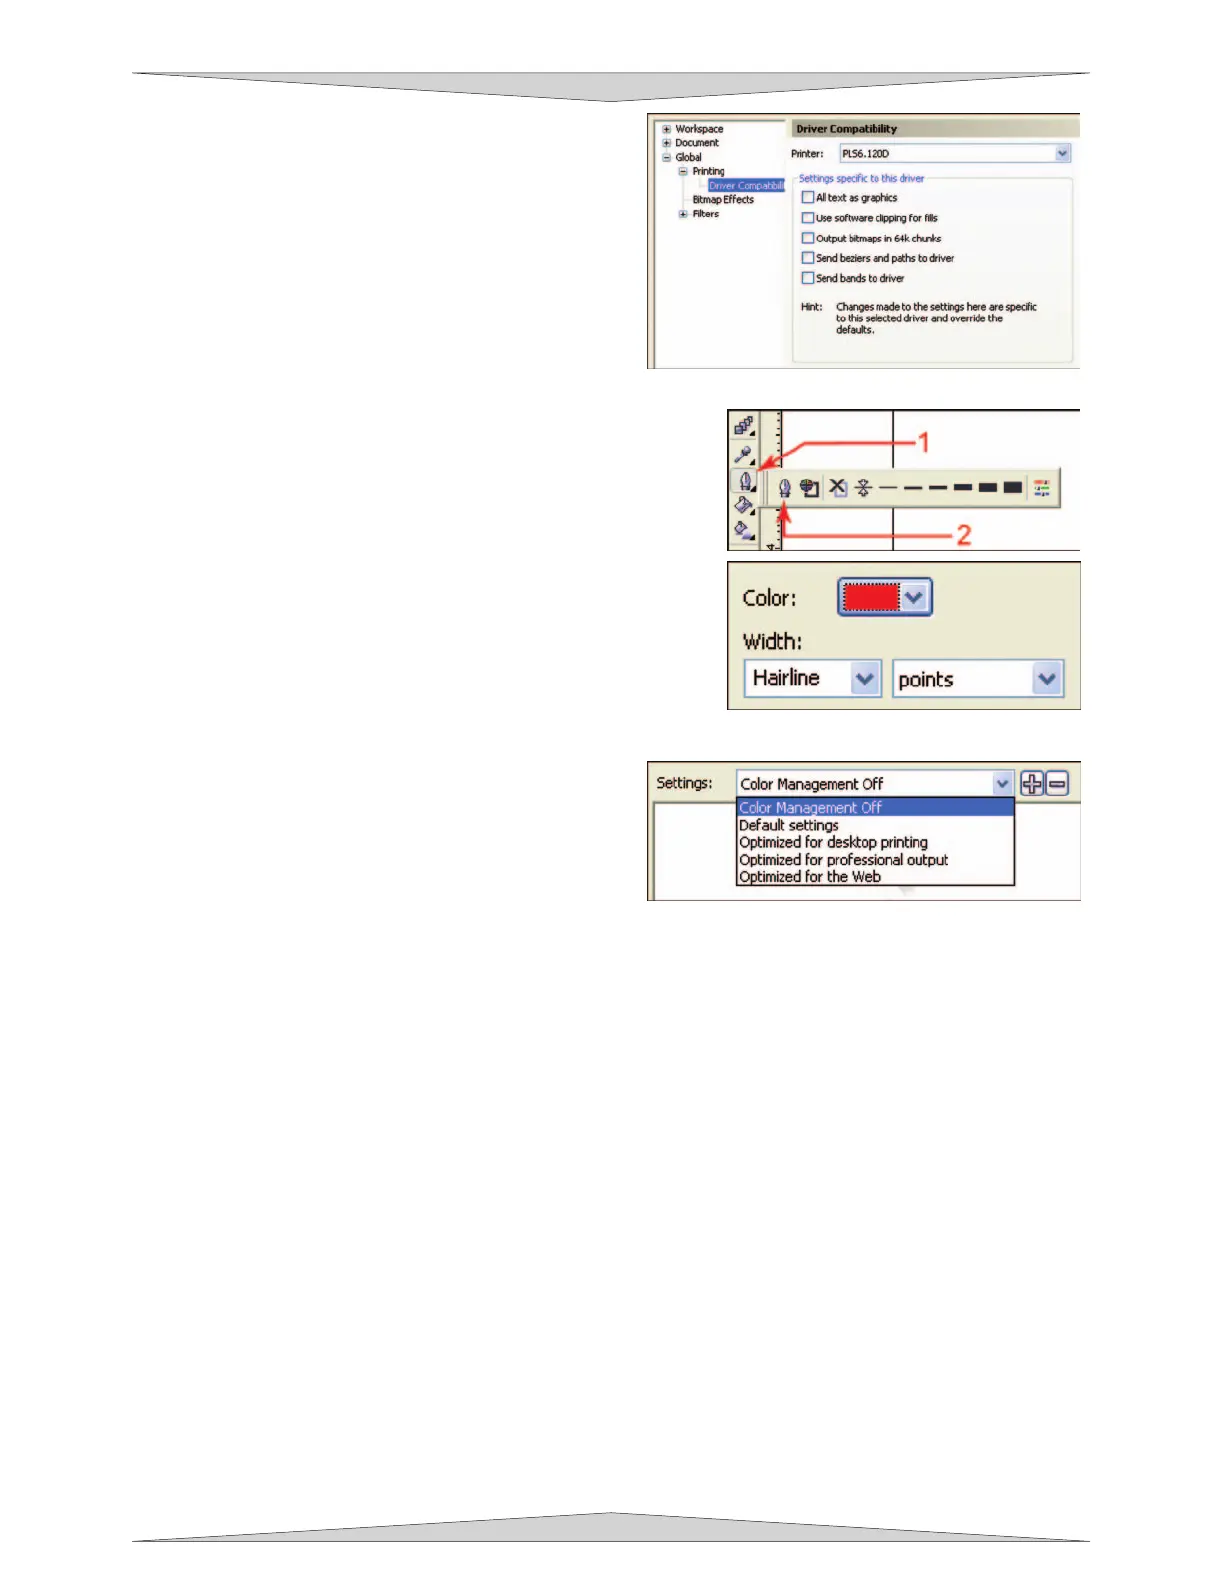
10. While still in the “Options” dialog box, double-click
on “Global” to expand the list. Double-click on
“Printing” to expand the list. Now click on “Driver
Compatibility”. Make sure that the laser system's
name is displayed in the printer drop-down list. In
the settings specific for this driver dialog box,
make sure that ALL the check boxes are
UNCHECKED. Now click on “OK” to close the
“Options” dialog box.
11. The next step is to set the default value for the line width
and color when drawing graphic objects. To do this, click on
the outline tool (1), then the outline pen dialog in the flyout
(2). With “Graphic” being the only one selected, click “OK”.
Click the down arrow in the Color dropdown box to expand
the list and click on the color red. Click the down arrow in
the “Width” dropdown box to expand the list and click
“Hairline”. The units can be “Inches”, “millimeters” or
anything else you prefer. Click OK to close the Outline Pen
dialog box.
12. In the top menu, click “Tools”, and then click
“Color Management”. Click on the down arrow to
expand the “Settings” dropdown list. Click “Color
Management Off”, and then click “OK”.
13. Finally, at the top of the screen, click on “Tools”, then “Save settings as Defaults”.
14. The setup defaults for CorelDRAW X3 are now complete. Whenever you start a new document, all of
the default settings that we had setup will automatically apply to the new document.
Remove the Software Installation CD-ROM from your CD-ROM drive and store it either back into
the pocket of the rear cover of the manual or in a safe place.
Next proceed to section 4 for laser system
assembly.