ASSEMBLING THE PLS
Section 4-3
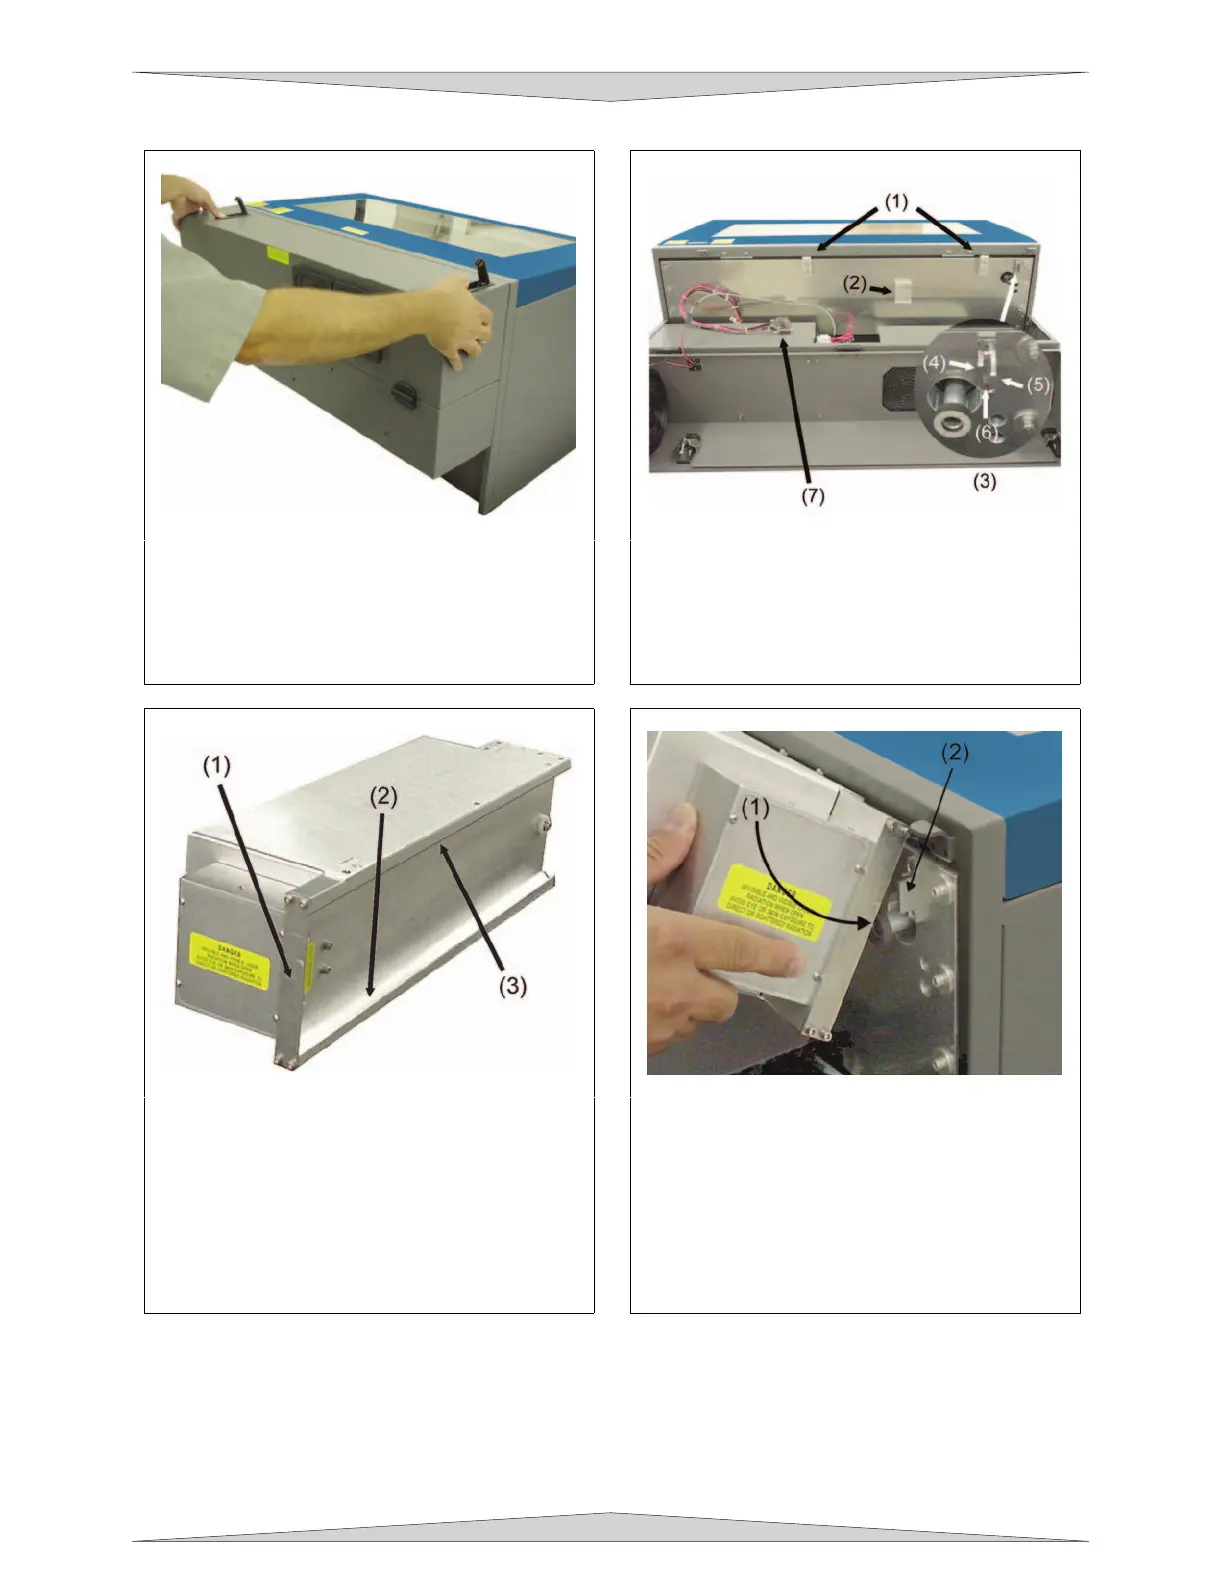
Laser Cartridge Installation
1. Make sure that your power cord IS NOT
plugged in at this time. Press on the
backside of the two hinges to release the
latch. Gently fold back the rear cover.
2. Visually locate the two mounting blocks (1),
the laser latch (2), alignment fork (3), and
power connector (7). Notice that the
alignment fork has two plates, one small (4)
and one large (5). Locate the gap between
the two plates (6).
3. Observe the “V” groove along the upper (3)
and lower (2) part of the laser cartridge and
the alignment plate (1) at the end.
4. Pick up the laser cartridge by the sides and
tilt it downward on a 30-degree angle.
Mount the cartridge onto the mounting
blocks by placing the upper “V” groove on
top of the mounting blocks. Slide the
cartridge to the right until the OUTER EDGE
of the alignment plate contacts the INSIDE
EDGE of the large plate of the alignment
fork.