ASSEMBLING THE PLS
Section 4-6
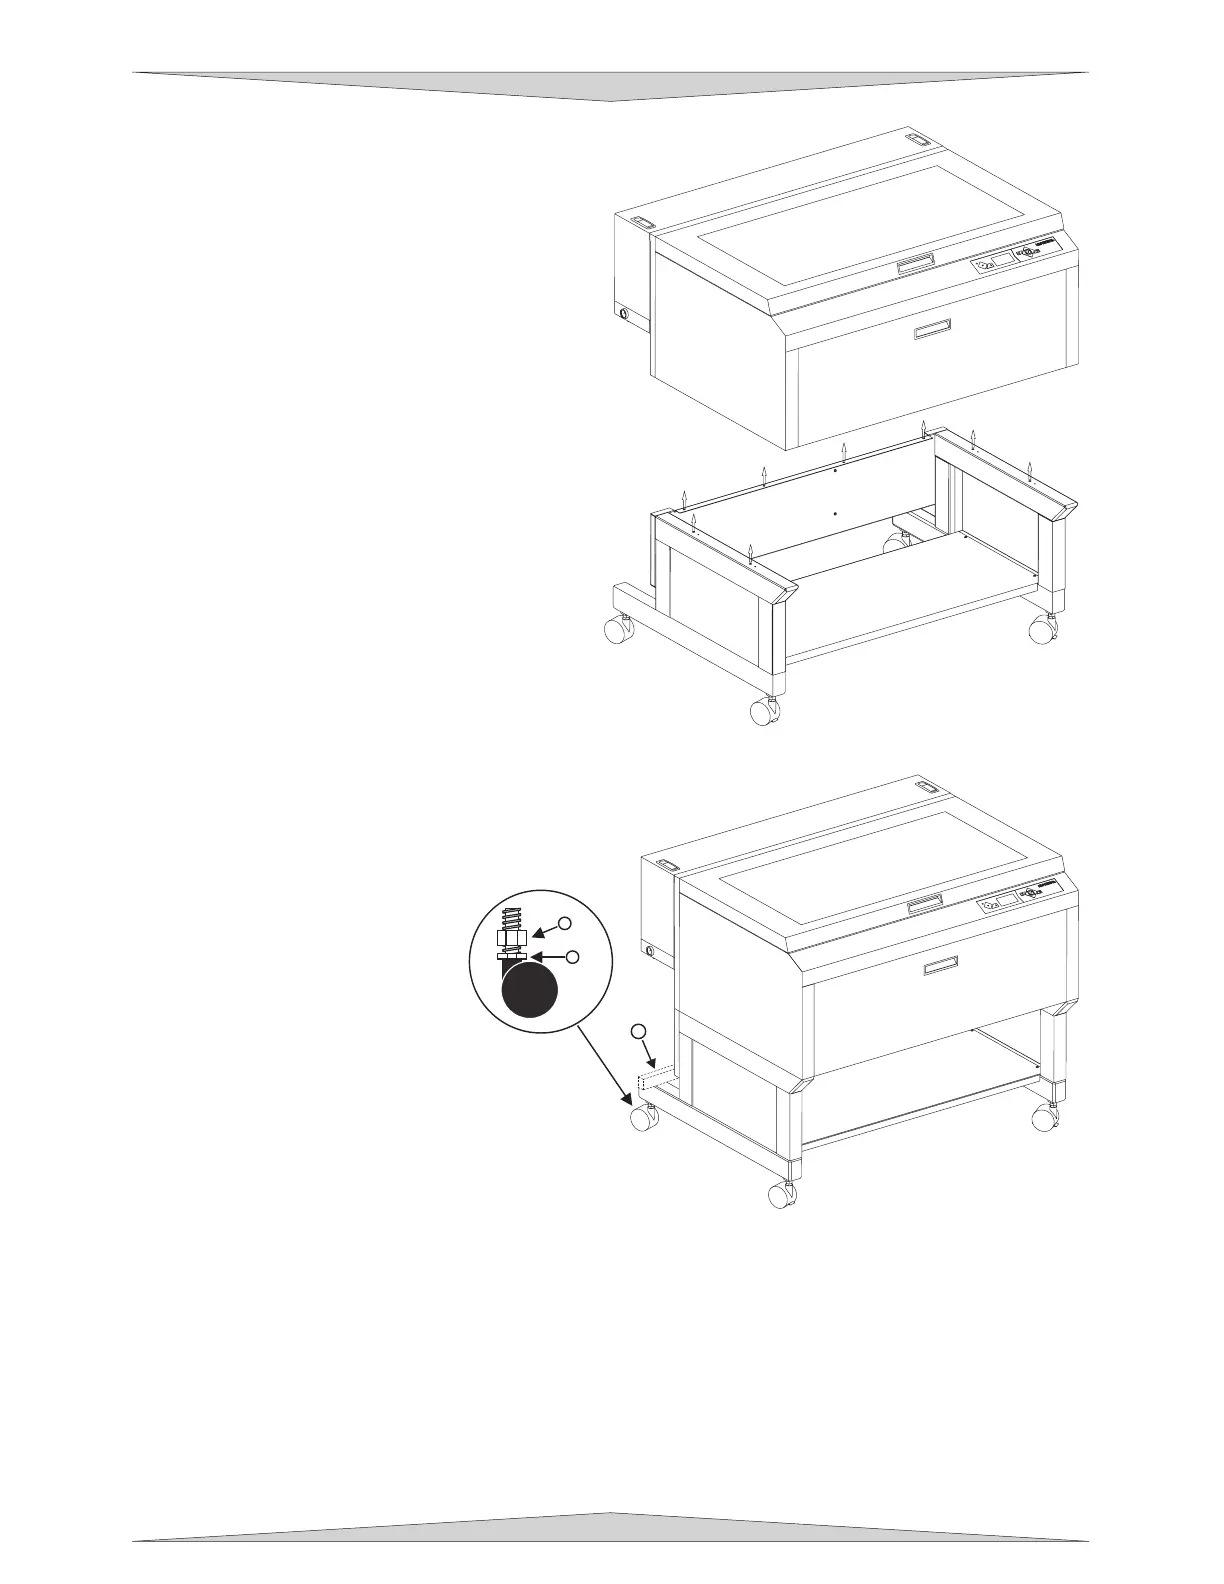
10. Remove the eight (8) screws, flat washers,
and lock washers that attach the cart stand to
the laser system from the bottom.
11. Lift the laser system straight up, clearing the
cart stand.
12. Place the laser system face down on the
dolly and roll it through the doorway. If you
do not have a dolly, you will need to carry it
through.
13. After you get the laser system and the cart
stand through the door, carefully line up the
laser system and place it back on top of the
cart stand. Be careful not to pinch your
fingers.
14. Attach your screws, flat washers, and lock
washers. Gently push the cables back into
the cavity, re-connect the five connectors, re-
attach the cover plate, close the rear cover,
and push down on the latches until they
“click”.
Leveling the System
Move the laser system to the
desired operating location. If the
floor underneath the laser system,
at this location, is uneven, the
casters must be adjusted.
Uneven flooring can cause
mechanical problems with the
operation of the motion system,
which can seriously affect
engraving or cutting quality.
1. Place a bubble level across
the back (1) legs. Adjust the
caster height using the
adjustment screw (2) until the
rear parts are level with
respect to each other. Once
the system is level, secure all
casters by tightening the nut
(3) up against the cart leg.
2. Open the top door and remove the rubber band that is holding the arm in place.
3. If you haven’t already done so, remove any remaining packing materials, accessories or any other
items that may be located inside the cabinet or on top of the engraving table.
4. Gain access to the rear of the laser system to install the laser cartridge(s).
2
3
1