BASIC SYSTEM FEATURES
Section 6-8
Air Assist
If you have the Air Assist accessory on the laser system you can activate it through this option. You are
able to turn on Air Assist for Raster Engraving, Vector Marking, and Vector Cutting. If you activate this
feature adjust the air flow according to your desired results. If the laser system does not come equipped
with Air Assist turn OFF the feature.
Material
The NEW button allows you to add a custom Category and Material to the printer driver. The EDIT button
gives you the opportunity to modify the selected Material by creating a copy of the original.
NOTE: This part of the Materials Database requires you to have knowledge of the Manual Control
features. You can learn about the Manual Control Tab in Section 9 of this manual.
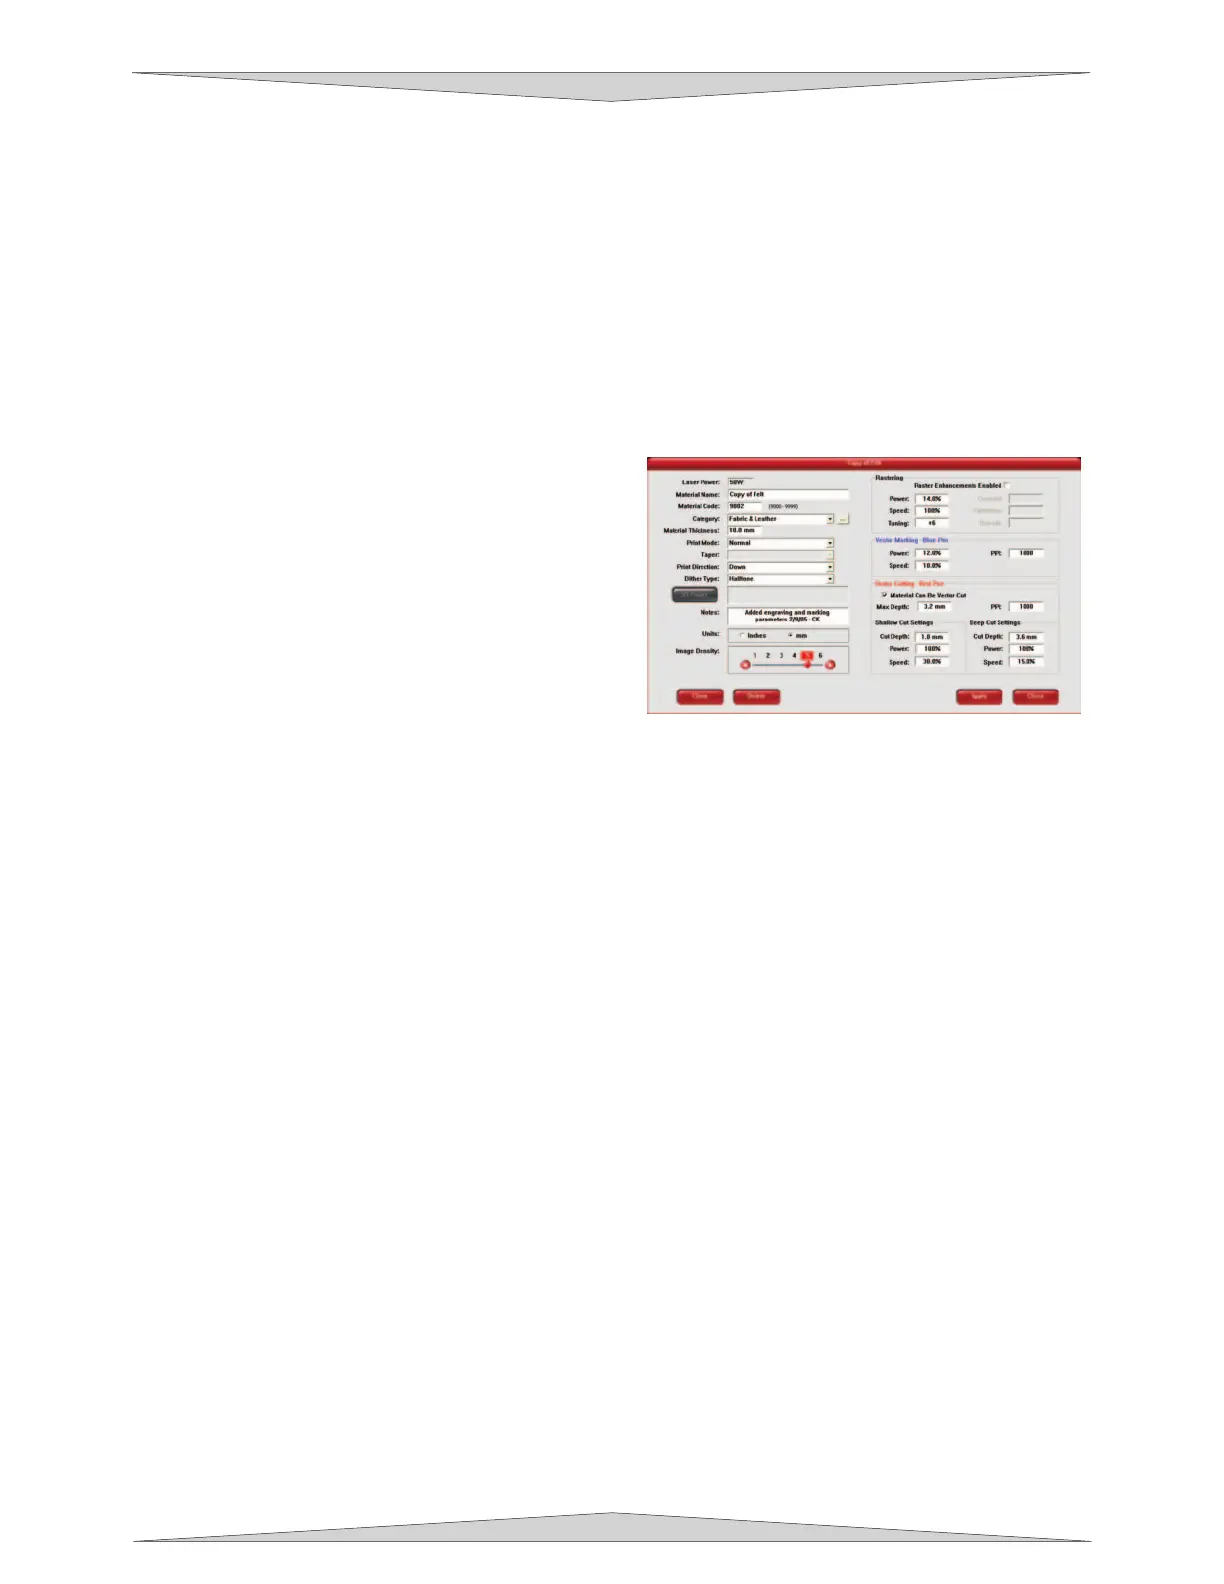
Material Editing
This feature gives you further control over the
Materials Database and has similar features as
the Manual Control Tab in the printer driver
(Section 9). Custom categories and materials can
be added and deleted. They can also be modified
to your specific requirements. Once you have
added the new material the printer driver will add
the new material to the list. This new material will
be available for you to use for future jobs.
To access this window you will need to select a
current category or material and click the NEW or
EDIT button. The Materials Editing window and the Manual Control Tab have similar features. You
can refer to Section 9-4, Manual Control Tab, for further explanation on these features.
Material Code
The Material Code box will automatically me made when making a new material and category.
You can add a custom Material Code from 9000-9999 if desired.
Taper
This drop down menu is activated when Print Mode is set to Rubber Stamp. This feature is
similar to the one in the Raster sub-tab for Rubber Stamping.
3D Power
This button can be activated by setting the Print Mode to 3D. This feature can be modified
similarly to the Raster sub-tab for 3D.
Vector Marking - Blue Pen
These settings are similar to the ones on the Raster Sub-Tab under the Manual Control Tab.
Vector Cutting - Red Pen
This section of the Material Editor window allows the user to input preliminary numbers for the
Material Editor to properly calculate future power and speed settings. To properly configure the
Vector Cutting - Red Pen section you will need to vector cut 2 materials in the laser system so the
Material Editor can calculate the appropriate percentage amounts for different thicknesses.
If the material being added to the Material Editor can be vector cut check the empty box called
“Material Can Be Vector Cut” and input the percentages it asks for.
The Shallow Cut Settings and Deep Cut Settings sections are similar to one another. First
measure two identical material types but of different thicknesses for example a 1/8” piece of
acrylic and a ½” of acrylic. Input the thinnest material measurement in the Cut Depth box of the
Shallow Cut Settings. Next, type in the thickest material measurement in the Cut Depth box of
the Deep Cut Settings section. The Power and Speed in both settings refer to the least amount
 Loading...