EasyManuals Logo

UP mini 2 User Manual

UP mini 2
55 pages
To Next Page IconTo Next Page
To Previous Page IconTo Previous Page
Page #21 background imageLoading...
Page #21 background image
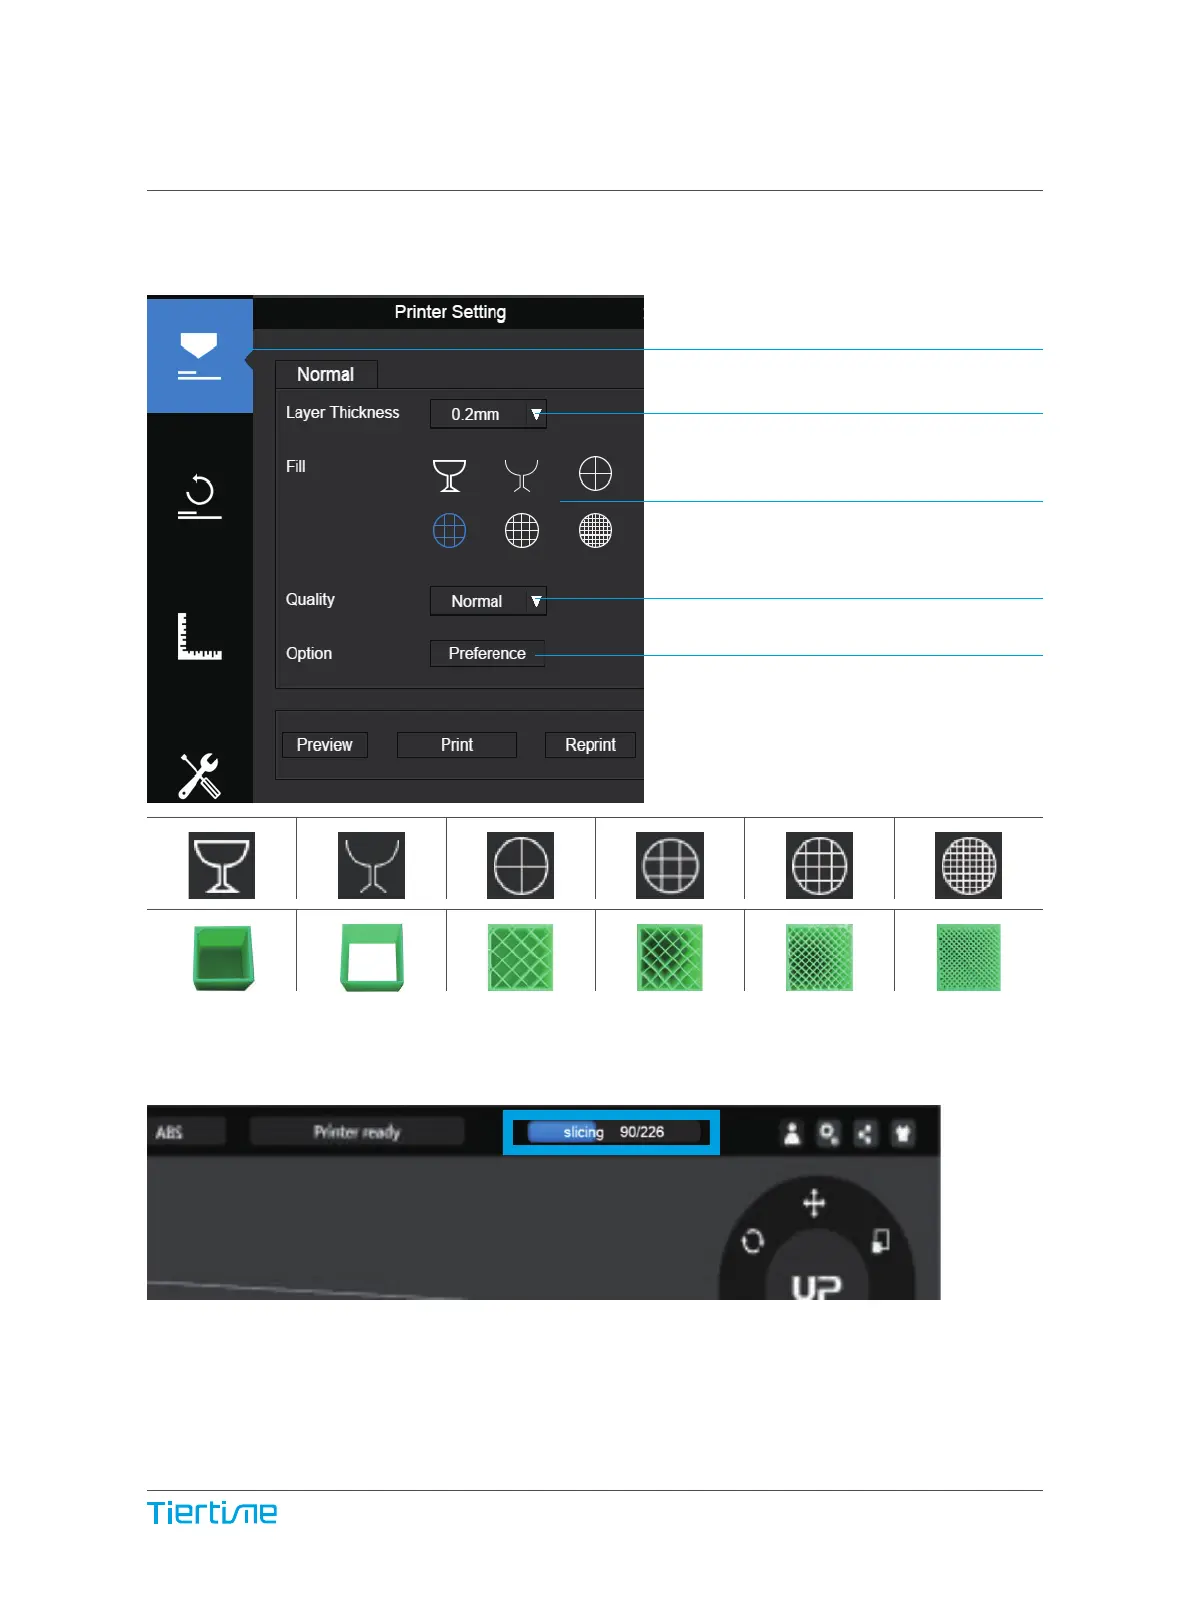
Click print button to open
the print interface
Set Layer Thickness
Select Infill Type
Select Print Quality/Speed
Advanced Options
Shell: No infill,
normal wall.
Surface: No
top and bottom
layers, no infill,
single perimeter.
Hollow Big Hole Loose Fill Solid Fill
Print a Model
Make sure printer is connected to computer throug USB or WIFI ( go to page 25 for
details about WIFI setting)and loaded a model.
When the UP software is slicing or sending data to the printer, progress displayed on
the status bar on top of the software interface. Do not unplug the USB cable as this
will disrupt the data transfer and result in a print failure. The USB cable can be
unplugged after the data transfer is finished.
19

Questions and Answers:

Question and Answer IconNeed help?

Do you have a question about the UP mini 2 and is the answer not in the manual?

UP mini 2 Specifications

General IconGeneral
Build Volume120 x 120 x 120 mm
Filament Diameter1.75 mm
Nozzle Diameter0.4 mm
Print MaterialABS, PLA
ConnectivityUSB, Wi-Fi
Heated BedYes
EnclosureYes
TouchscreenYes
Print TechnologyFDM (Fused Deposition Modeling)
Print SpeedUp to 100 mm/s
Power Requirements100-240V, 50-60Hz
Weight8 kg

Related product manuals