Do you have a question about the UP mini 2 and is the answer not in the manual?
Guidelines for optimal printer operation regarding temperature and humidity.
Details on regulatory compliance like FCC and ROHS.
Steps to remove protective foams from the machine before use.
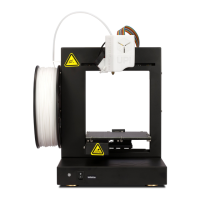
Identification of parts visible on the front of the UP mini 2.
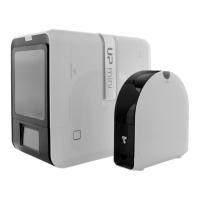
Identification of parts visible on the back of the UP mini 2.
Opening covers and identifying the print head components.
Sliding the print head into slots and plugging in the cable.
Overview of the primary menus and their functions within the software.
Detailed functions of the initialization button on the printer and touch screen.
Steps for installing the filament and guiding tube into the printer.
Extruding filament and checking for proper plastic extrusion from the nozzle.
Connecting the printer via USB to access Wi-Fi settings in UP Studio.
Choosing a Wi-Fi network and entering the password within UP Studio.
Setting up private Wi-Fi access and navigating the printer tab in UP Studio.
Configuring surface layers, angles, and support structures for printing.
Selecting raft, support, and other print options like unsolid models or thin walls.
Using the calibration interface to adjust platform correction values.
Steps to initialize the printer and place the calibration card on the platform.
Adjusting platform height for optimal friction and setting the final nozzle height.
Choosing an image and setting parameters for conversion to a 3D model.
Generating the 3D model from the image and preparing for printing.
| Build Volume | 120 x 120 x 120 mm |
|---|---|
| Filament Diameter | 1.75 mm |
| Nozzle Diameter | 0.4 mm |
| Print Material | ABS, PLA |
| Connectivity | USB, Wi-Fi |
| Heated Bed | Yes |
| Enclosure | Yes |
| Touchscreen | Yes |
| Print Technology | FDM (Fused Deposition Modeling) |
| Print Speed | Up to 100 mm/s |
| Power Requirements | 100-240V, 50-60Hz |
| Weight | 8 kg |