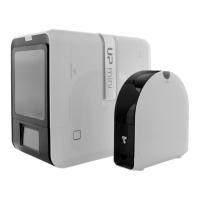
Platform too high, nozzle is
pinning Calibration Card
onto platform, Lower the
platform slightly.
Just right, can feel some
resistance when moving the
paper.
Platform too low, no resist-
ance at all when moving
Calibration Card, raise the
platform slightly.
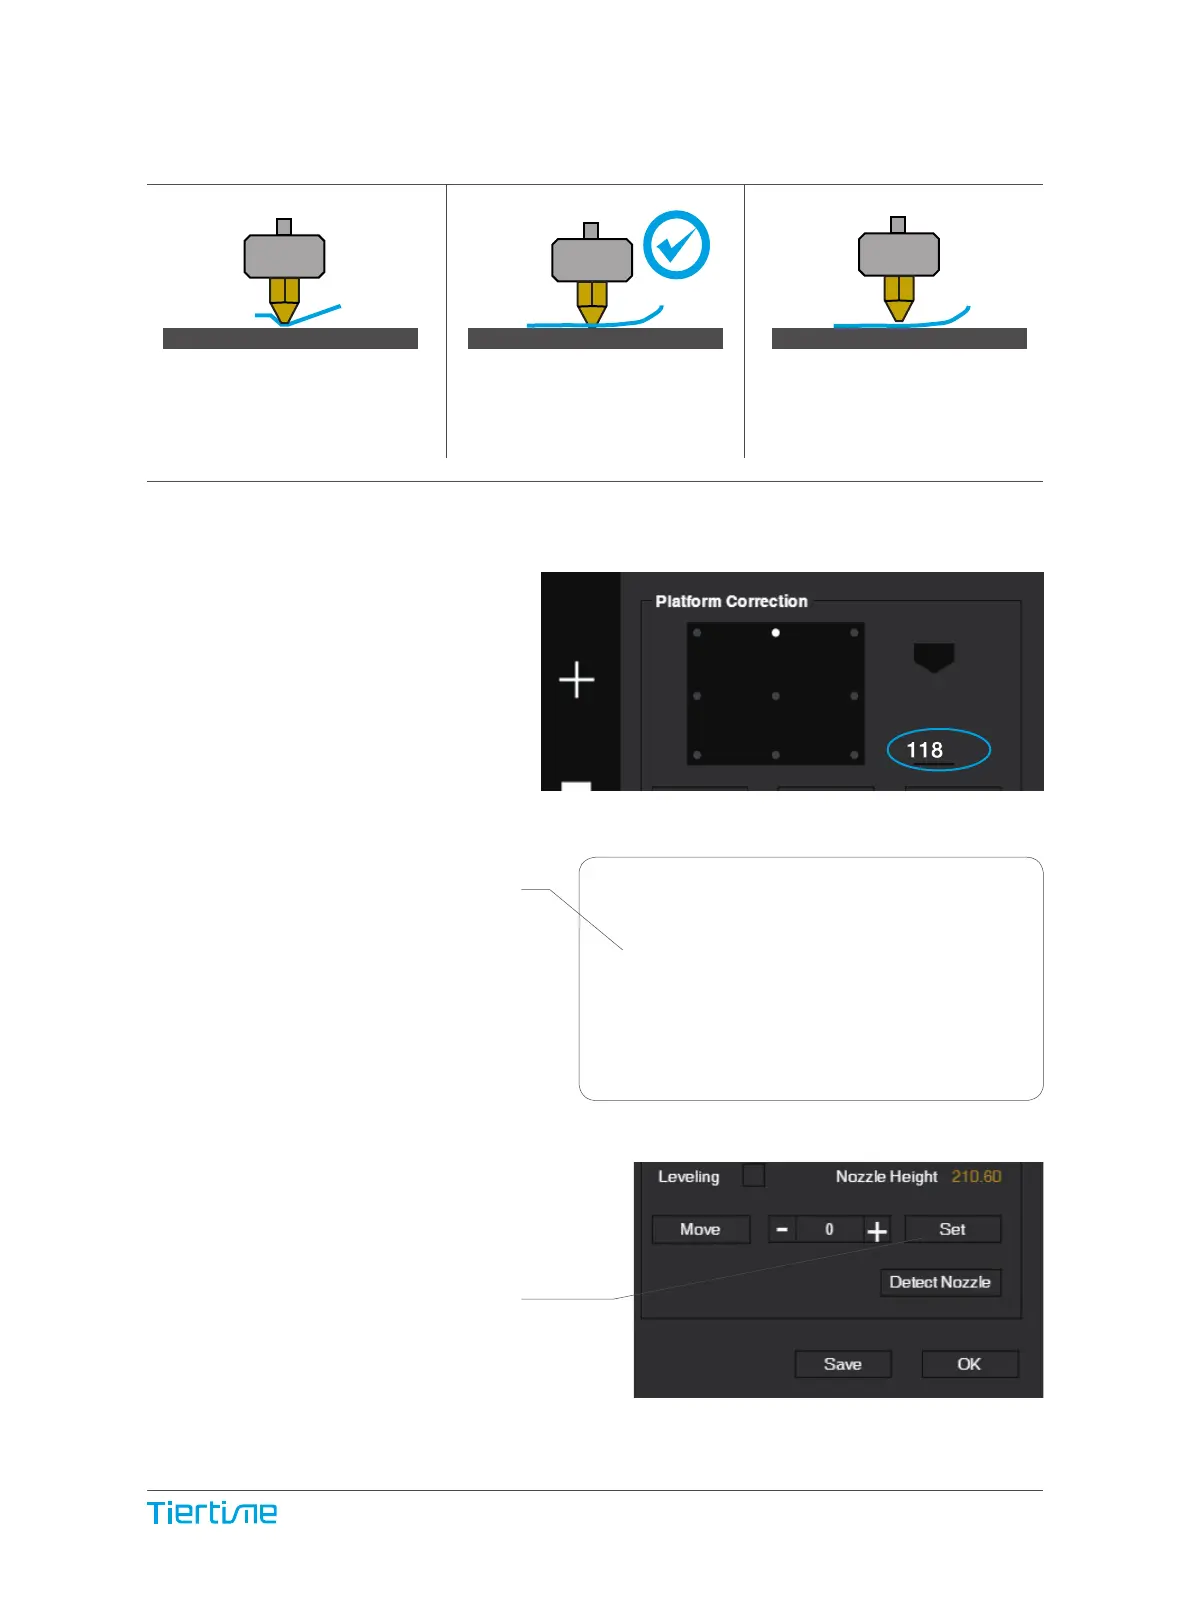
5\ When the ideal platform height
is obtained, record the platform
height value. Repeat steps 1–5 for
all of the other eight positions and
note their platform height values.
6\ When you have obtained the
platform height values for all nine
positions, find the lowest value
among all the values.
In this example, the first cali-
bration point has the lowest value
and is thus the highest point on the
platform. (The highest point of the
platform require minimum amount
of travel to reach the nozzle).
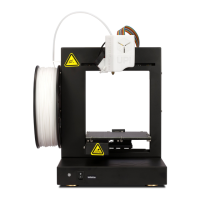
7\ Move the platform to the posi-
tion with lowest platform height
value as determined in Step 6 and
click the "Set" button. This will set
this point as the "Nozzle Height".
Platform Values at 9 calibration points
(hypothetical):
1: 118
4: 118.6
7: 118.8
2: 118.5
5: 118.9
8: 118.9
3: 118.7
6: 119
9: 118.8
44