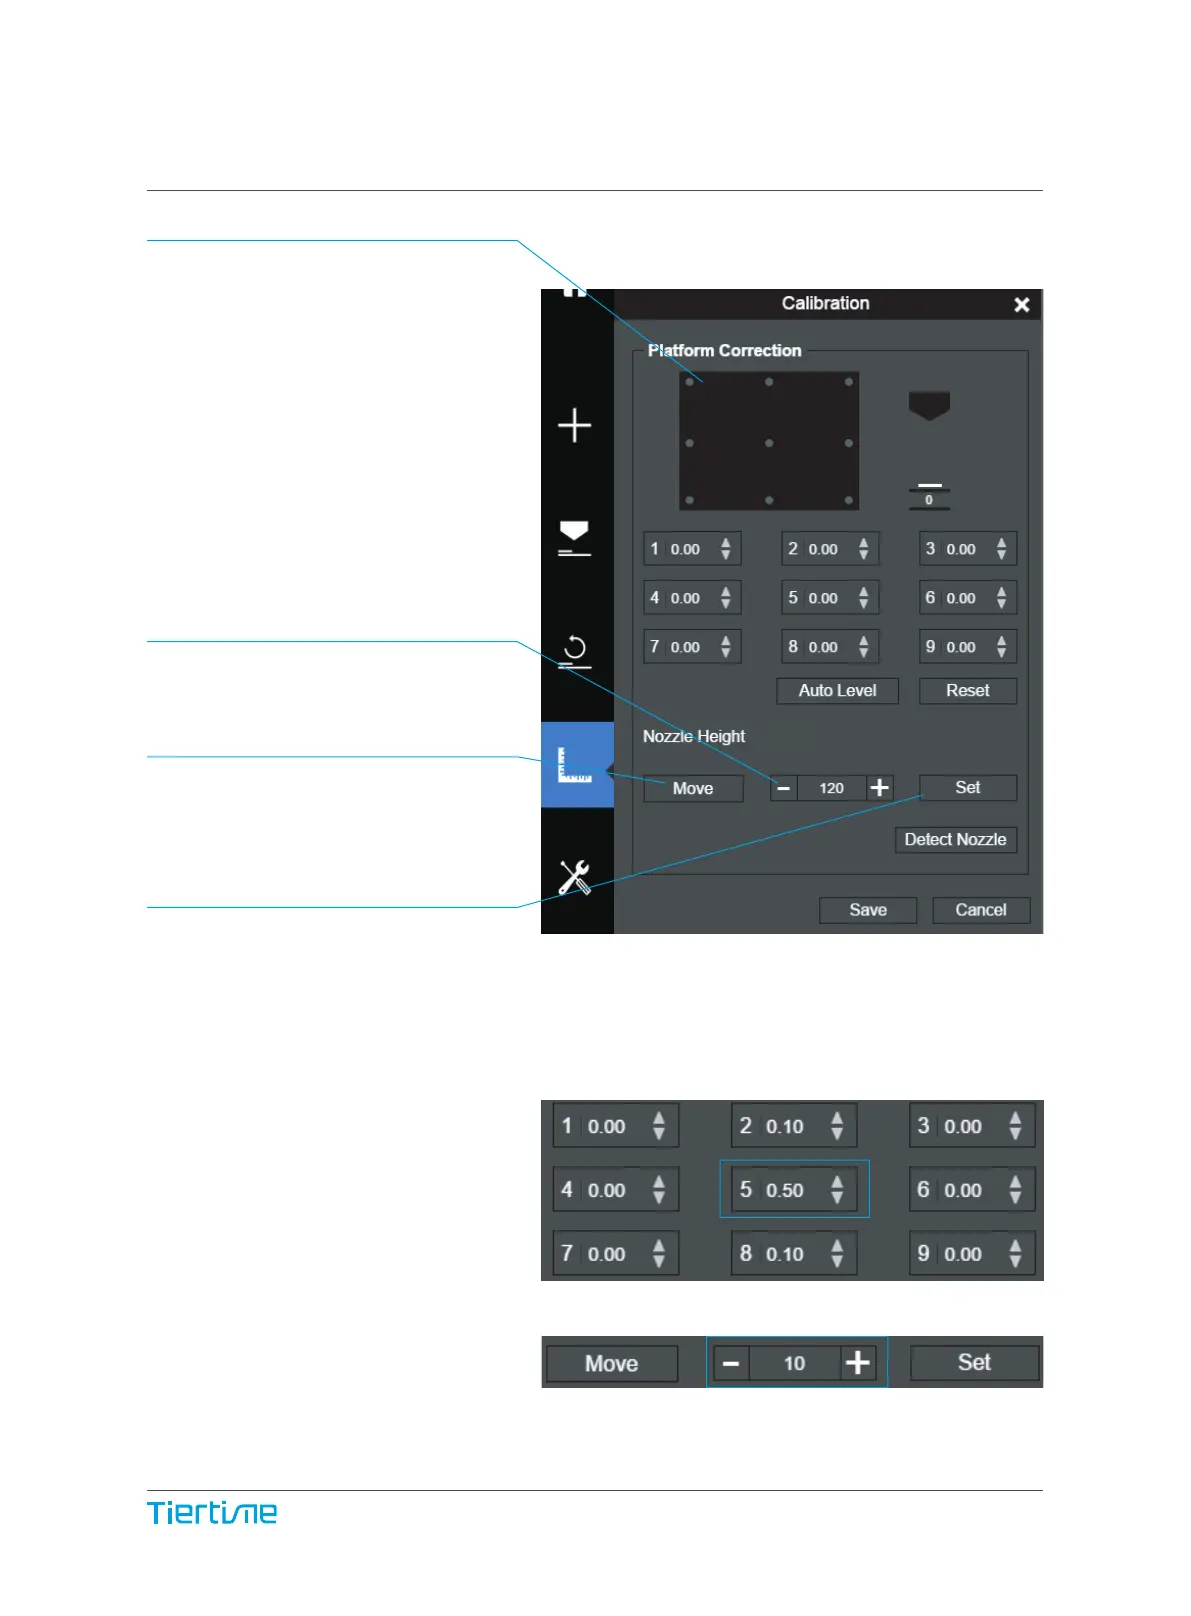
Manual Calibration
The 9 buttons represent platform
calibration point.
The dropdown menu beside the
button is for setting the leveling
compensation values. After check-
ing the leveling check box and click-
ing these buttons, the nozzle will
move to the corresponding posi-
tions and move up based on the
compensation value.
Moves the platform up/down: click
the +/- buttons to move the platform
up and down.
For sending the platform to a specif-
ic height, input the value in the text
field between + and - and then click
“Move” button.
Click "Set" buttonto save currently
platform height as nozzle height.
So if user click the 9 buttons, the
printhead will move to correspond-
ing position and platform will move
to a height that equal to “value in the
text field” PLUS the “compensation
value”
For example, high lighted button 5
has a compensation value of 0.5
and the text field has a number of
10, so when click button 5 the
platform will go to 10.5mm.
120.90
42