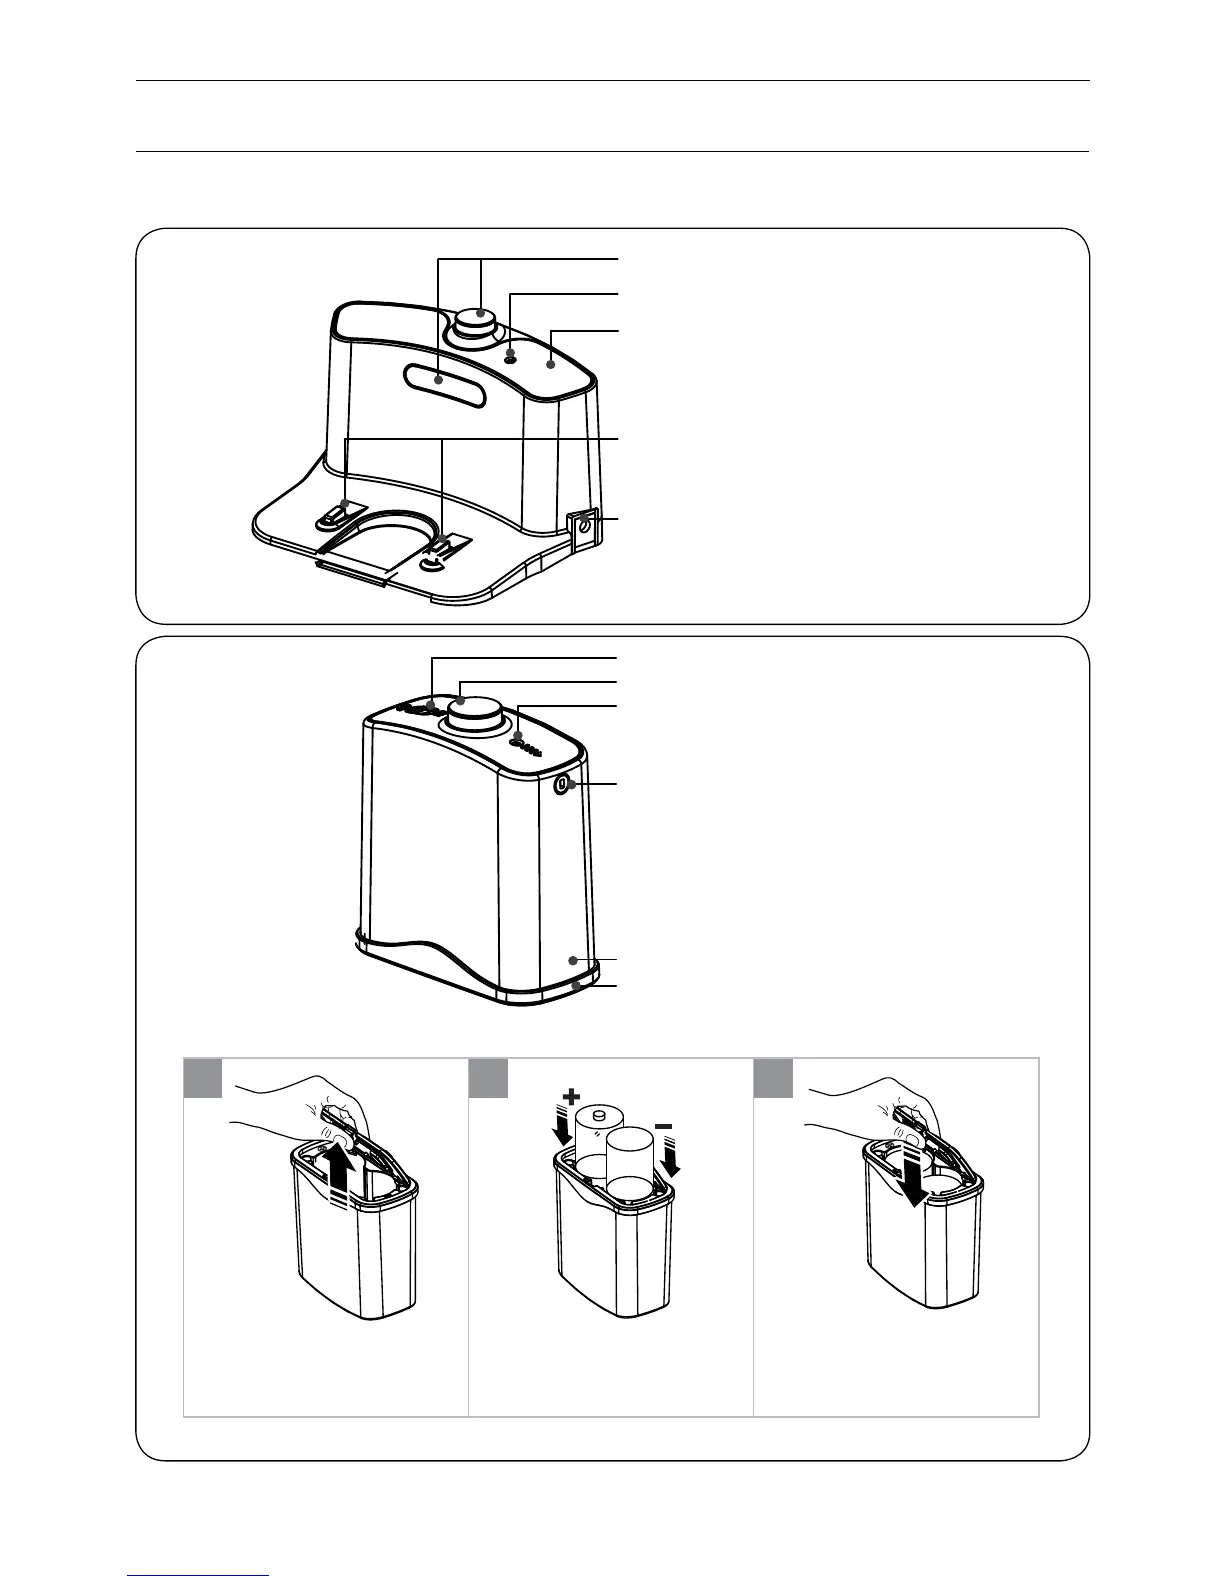
Power Supply Socket
Charge Connecting Point
Top Cover
Signal Light
Infrared Signal Transmitting Window
Bottom Cover
Side Cover
Signal Window
Signal Light
Infrared Signal Transmitting Window
Power Switch
Installing virtual wall battery
Lift the cover of the virtual wall;
Install two R20/D type batteries
into the virtual wall as shown by
the figure.
After inserting the tip of the
cover into the slot, push the
other end to close it until it clicks
into place.
■
1 2 3
Note: If not used for long time, please pull the batteries out.
Product Parts
Charging home base & Virtual wall
5