5 Set-up
24 Set-up instructions 0020200969_07
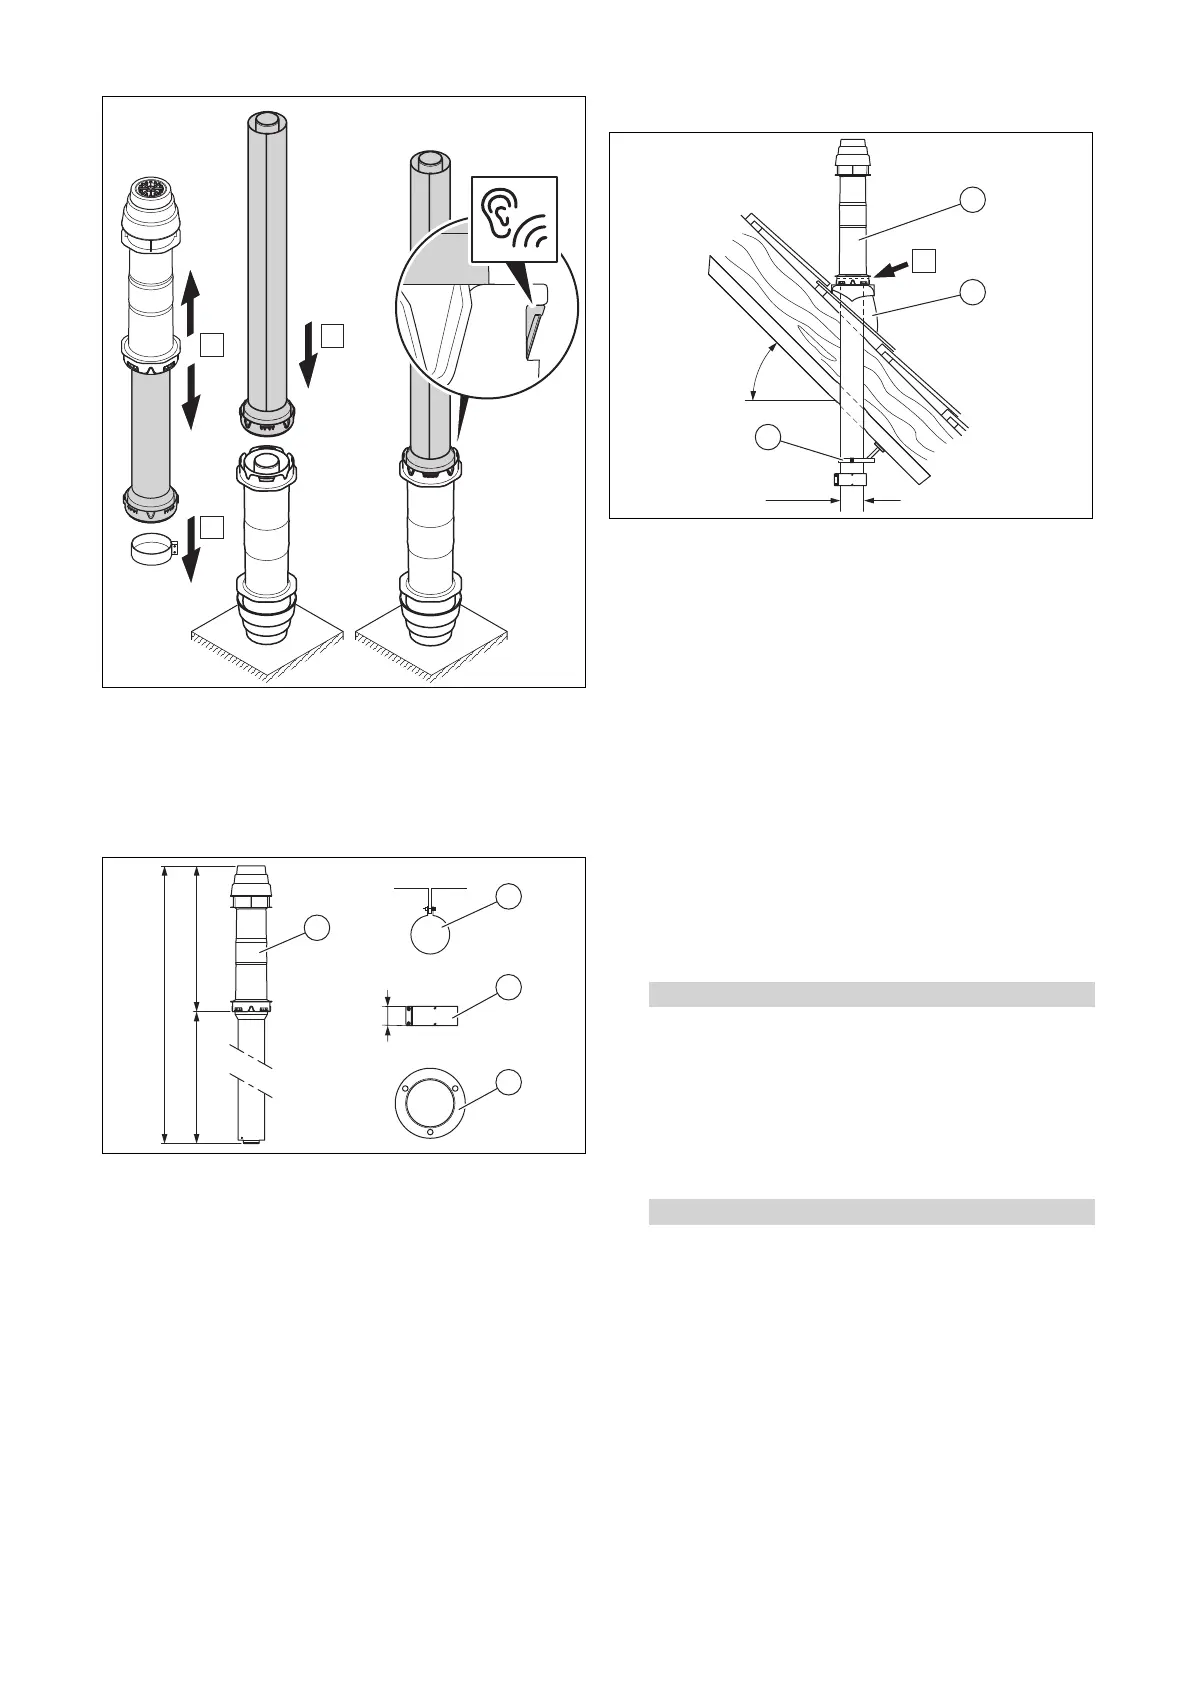
▶ Assemble the vertical roof duct.
– Ensure that you hear the lower part click into place in
the upper part.
5.5.2.2 Scope of delivery article number 0020223472
(black, with collar)
1 Vertical roof duct
2 Fixing bracket
3 48 mm air pipe clamp
4 Cover plate
5.5.2.3 Installing the pitched-roof duct
A Position of the internal
flue pipe seal
1. Determine the installation site of the roof duct so that
there is sufficient distance behind the product in order
to connect the product to the heating installation.
2. Insert the pantile (2).
3. Insert the roof duct (1) through the pantile from above
and push it down until the cover plate is seated firmly.
– Ensure that the internal flue pipe seal lies above the
roof.
4. Align the roof duct vertically.
5. Secure the roof duct to the roof construction using the
fixing bracket (3).
6. Connect the roof duct to the product using extensions,
elbows and, if required, a sliding sleeve. If you do not
insert a sliding sleeve, you must always install the 48
mm clamp directly on the product.
7.
Alternatives 1:
Condition: Roof duct with extension
▶ Install the extensions. (→ Page 29)
▶ Install the 45° elbow. (→ Page 32)
▶ Install the 87° elbow. (→ Page 33)
▶ Install the sliding sleeve. (→ Page 28)
▶ Connect all of the pipe joints with air pipe clamps.
(→ Page 38)
7.
Alternatives 2:
Condition: Roof duct without extension
▶ Install the sliding sleeve. (→ Page 28)