5. To set the value for the 0.0 V output signal, select 0.0 V and press Set. If the analog output is on, turn it off.
Set the low value using the arrow buttons. To select the sign for the value, press +-. To confirm the setting,
press OK.
6. To set the value for the 1.0 V output signal, select 1.0 V and press Set. Set the high value using the arrow
buttons. To select the sign for the value, press +-. To confirm the setting, press OK.
7. To activate the analog output and to return to the basic display, select Analog output on/off and On. The wave
icon appears in the upper left corner of the basic display.
8. To deactivate analog output, go to Menu > Functions > Analog output - Analog output on/off and press Off.
Recording and viewing data
Recording data
With MI70, you can record transmitter measurement data over a certain period at chosen intervals. These recordings are
saved in the MI70 memory and are available even after MI70 is disconnected from the transmitter. To start recording,
select the Record function key in the basic display, or navigate to the recording menu: Main menu > Recording/Viewing >
Record data.
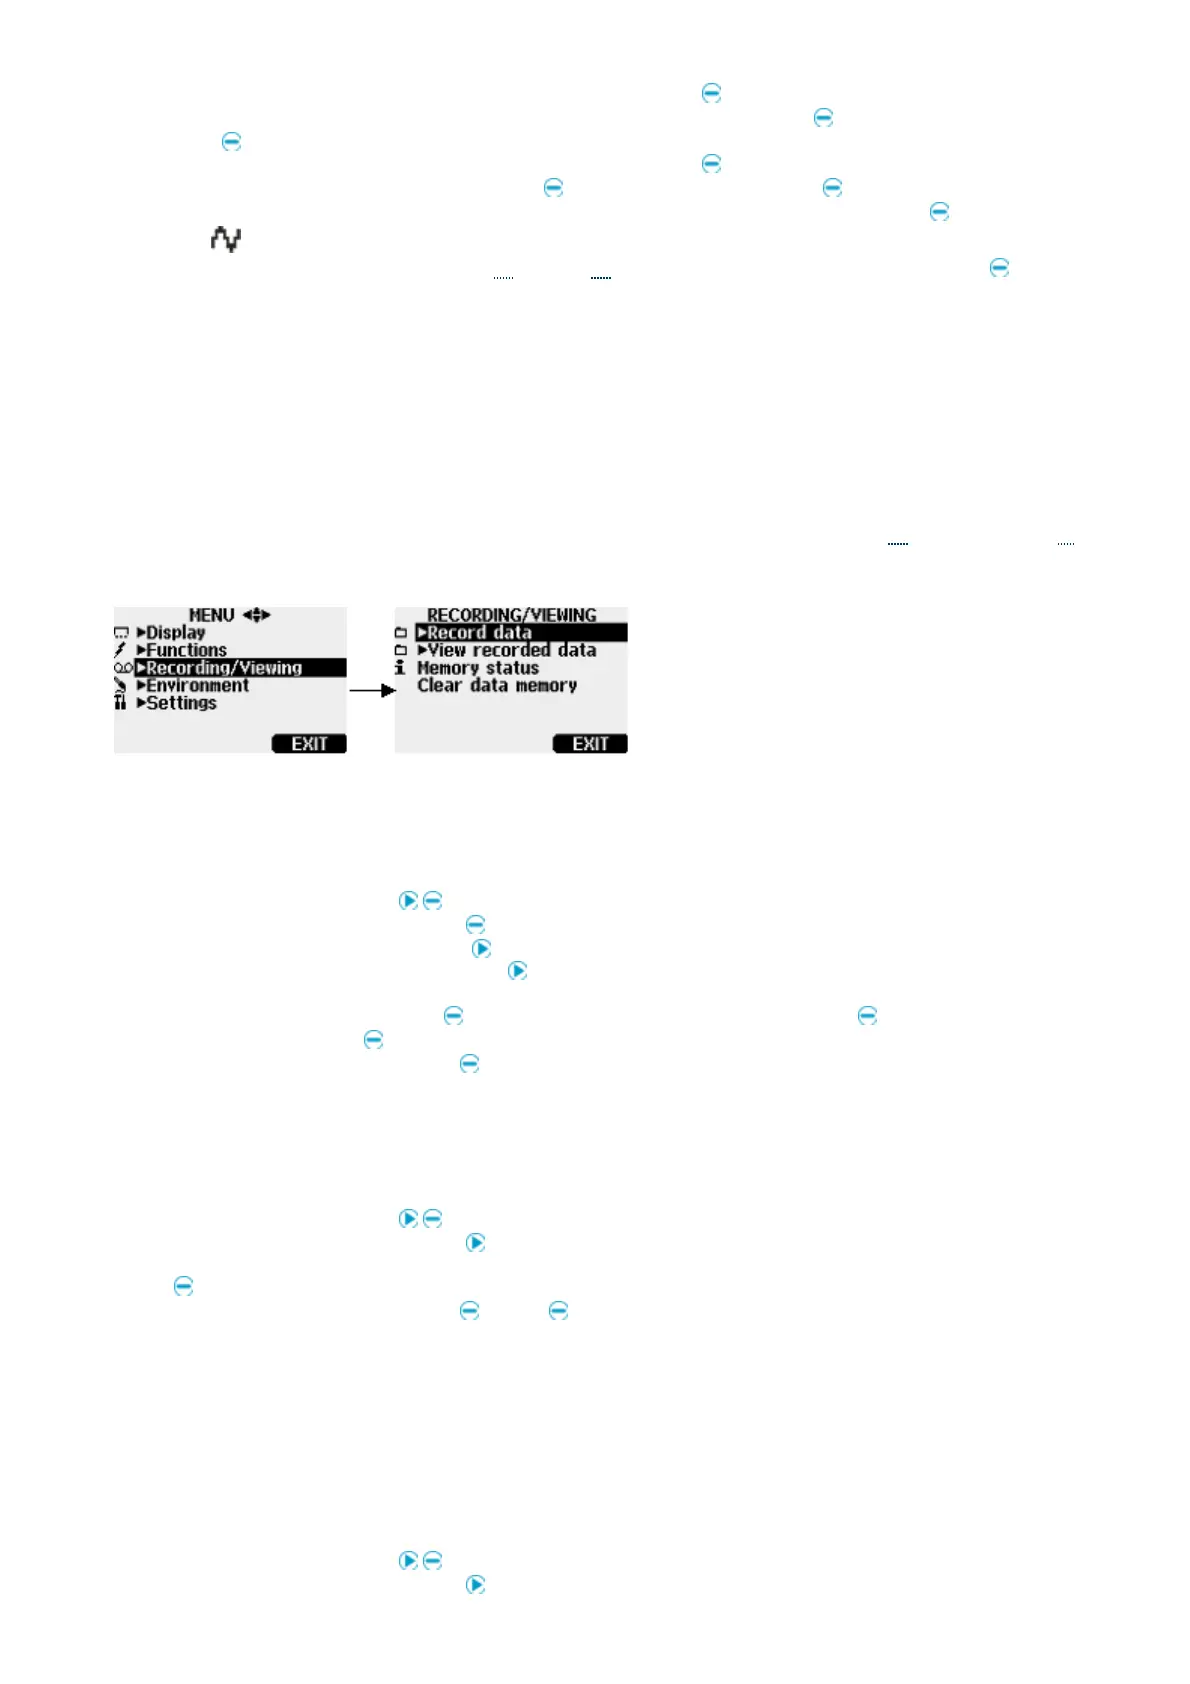
Figure 1. Recording/Viewing menu
Viewing recorded data
1. Open the menu by pressing Open.
2. Select Recording/Viewing and press .
3. Select View recorded data and press .
4. Select the file you want to view and press . The files are identified according to the starting date and time of
recording.
5. To go to the graphical view, press Graph. To view the recording time stamps, press Times. To return to the
recording values, press Values.
6. To return to the basic display, press Exit.
Checking MI70 memory status
1. Open the menu by pressing Open.
2. Select Recording/Viewing and press .
3. To view the amount of memory that is in use and the estimated free space left, select Memory status and press
Show.
4. To return to the basic display, press OK and Exit.
The estimate of available free space is calculated for the current number of active parameters. If you
change the displayed parameters, the estimate will change accordingly.
Clearing data memory
1. Open the menu by pressing Open.
2. Select Recording/Viewing and press .