7 8
9 10
15
Valcom, Inc.
5614 Hollins Road
Roanoke, VA 24019
USA
P. 540-563-2000
F. 540-362-9800
www.valcom.com
Valcom, Inc.
5614 Hollins Road
Roanoke, VA 24019
USA
P. 540-563-2000
F. 540-362-9800
www.valcom.com
Flag Mount Installation
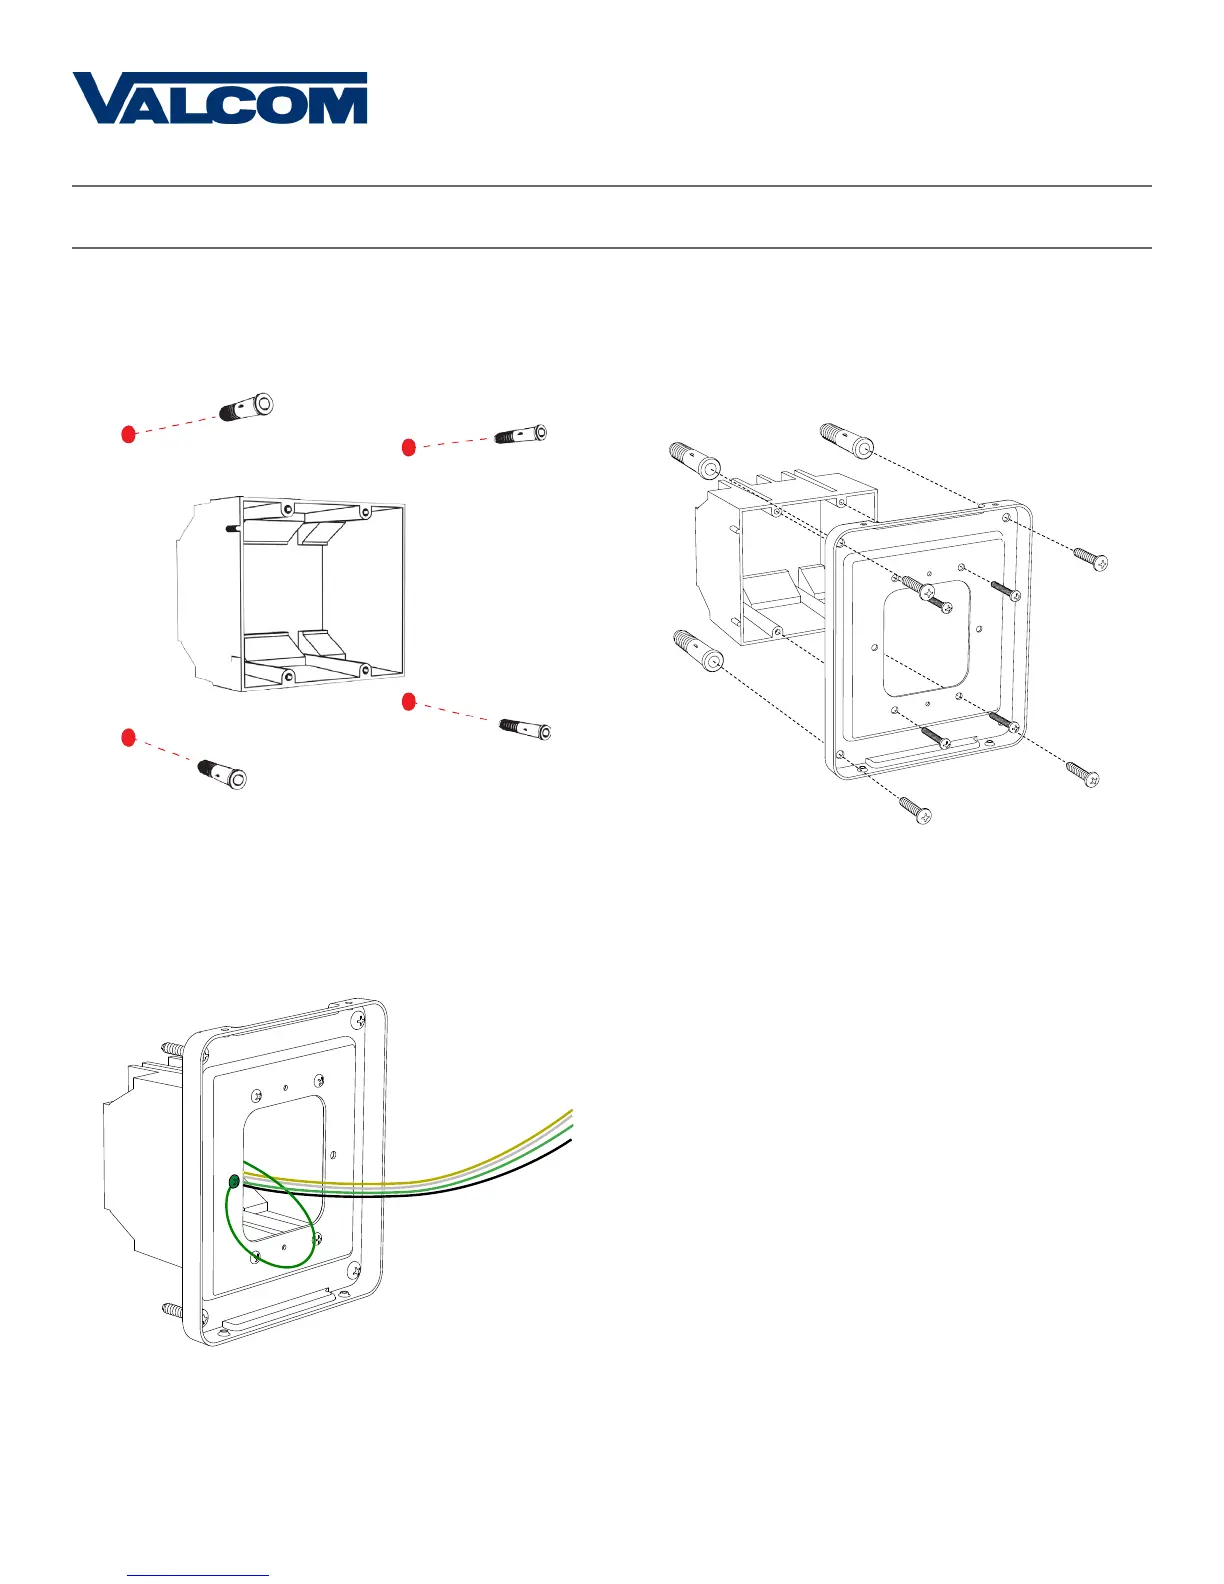
7) Remove the mounting plate and drill the four
holes that were just traced. Insert the four wall
anchors into the holes.
9) Thread any wiring through the mounting plate,
and attach a grounding wire to the mounting plate
using one of the larger centered holes and the
#10-32x3/8 screw.
8) Reattach the mounting plate, this time using all
four long, silver #6-32x1 screws, then insert the
four #8 screws through the mounting plate and into
the anchors.
10) Use a screwdriver to remove one of the end caps.
The selected end cap should match the position of
the orientation of the clock on the mounting pole;
for example, if you wish to attach the clock to the
pole in a ceiling-mount configuration, then the top
end cap should be removed. The end cap and screw
that was used to secure it will not be needed again
during this installation.