7
Step
3:
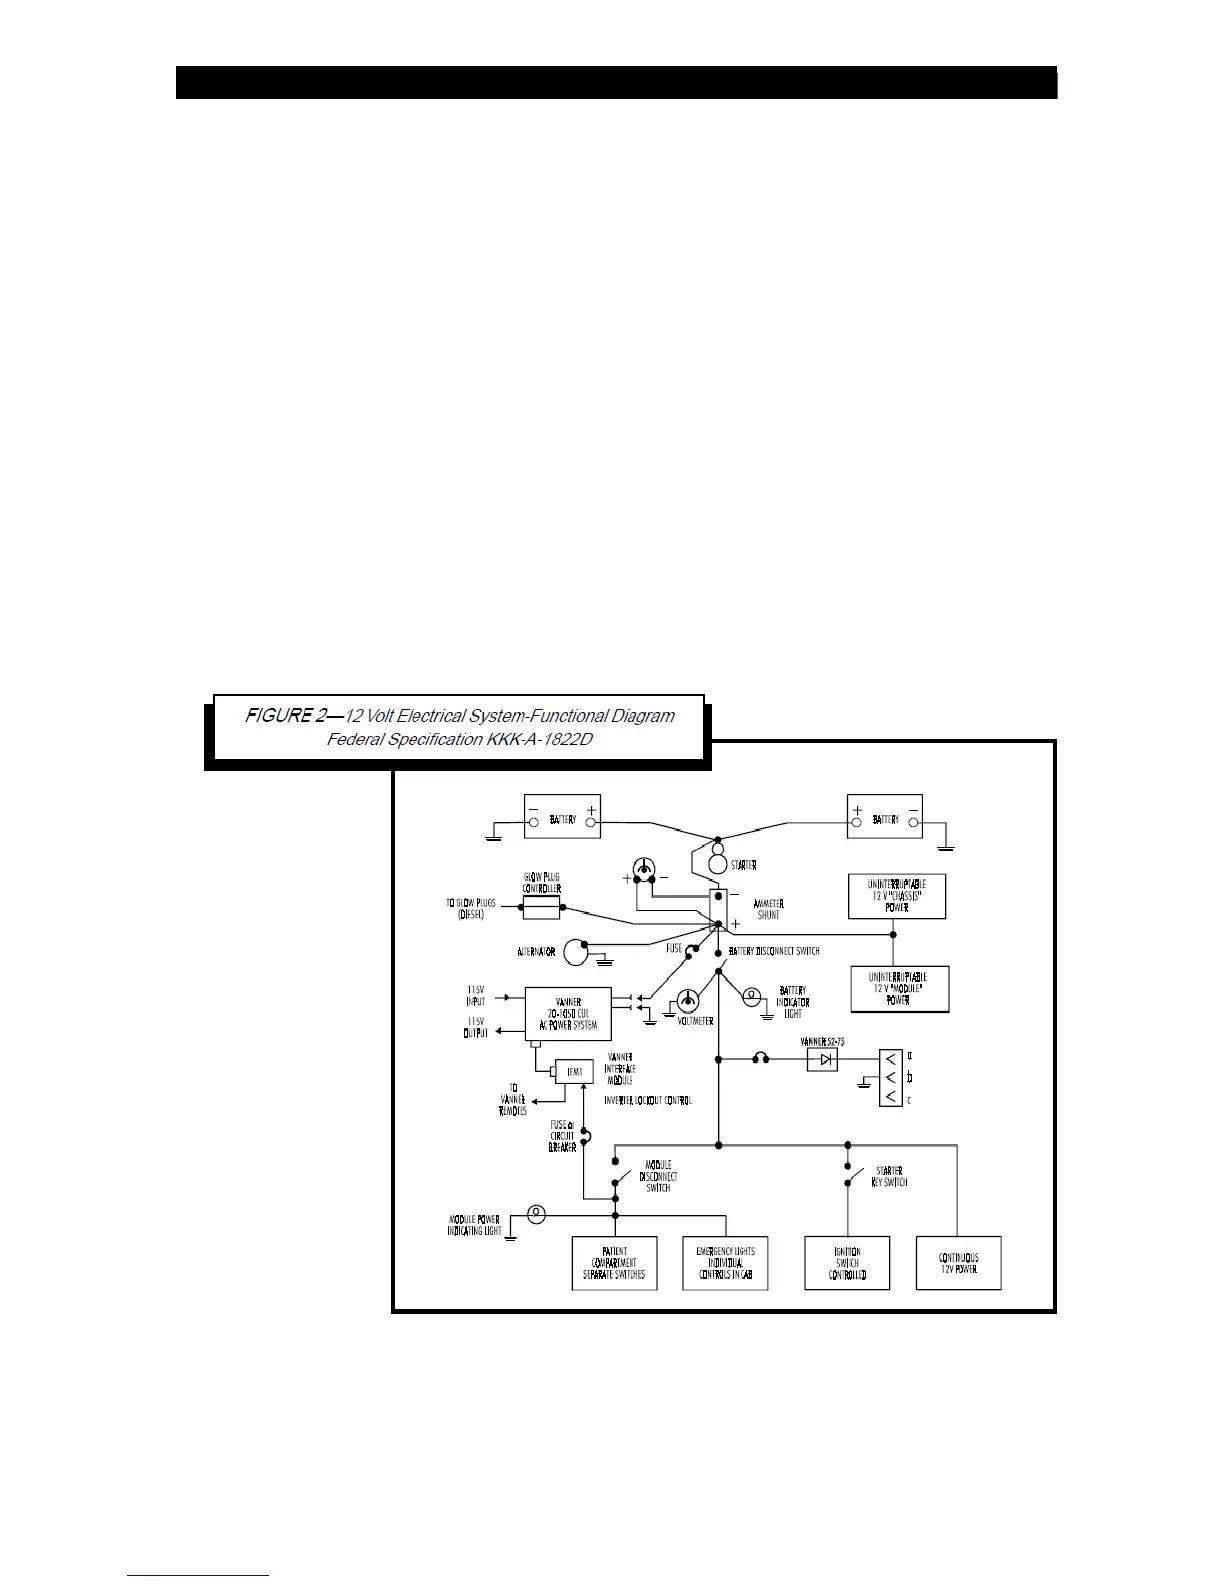
Connect the Battery Disconnect Switch.
Connect the +12 V lead from the Module Disconnect Switch circuit to the inverter
lockout Pin 1 (ignition switch or battery disconnect switch). The
+12 V lead from the Battery Disconnect Switch must be fused with an inline fuse or
circuit breaker of 2 Amps or less. See Figure 3.
Step 4: Wire the Remote Switch (p/n D06781) to Pins 2 through 5.
Red to Pin 2, Black to Pin 3, Green to Pins 4 and 5. If no remote switch is used,
two jumpers must be installed. The first jumper connects Pin 2 to Pin 3,
the second jumper connects Pin 4 to Pin 5. See Figure 3.
Step 5: Connect the Inverter Remote Status Display Panel (Optional).
Connect the gray, green, and red wires from the inverter panel, through the OEM
harness, to the IFM1 Module, Pins 6 (grey), 7 (green) and 8 (red).
Step 6: Connect the Charger Remote Display Status Panel (Optional).
Connect the brown, white, and black wires from the charger panel, through the OEM
harness, to the IFM1 Module, Pins 9 (brown), 10 (white) and 11 (black)