5
Wire Color Codes
White-Phase 1
Red -Phase 2
Black-Phase 3
Green-Ground
No Neutral is used
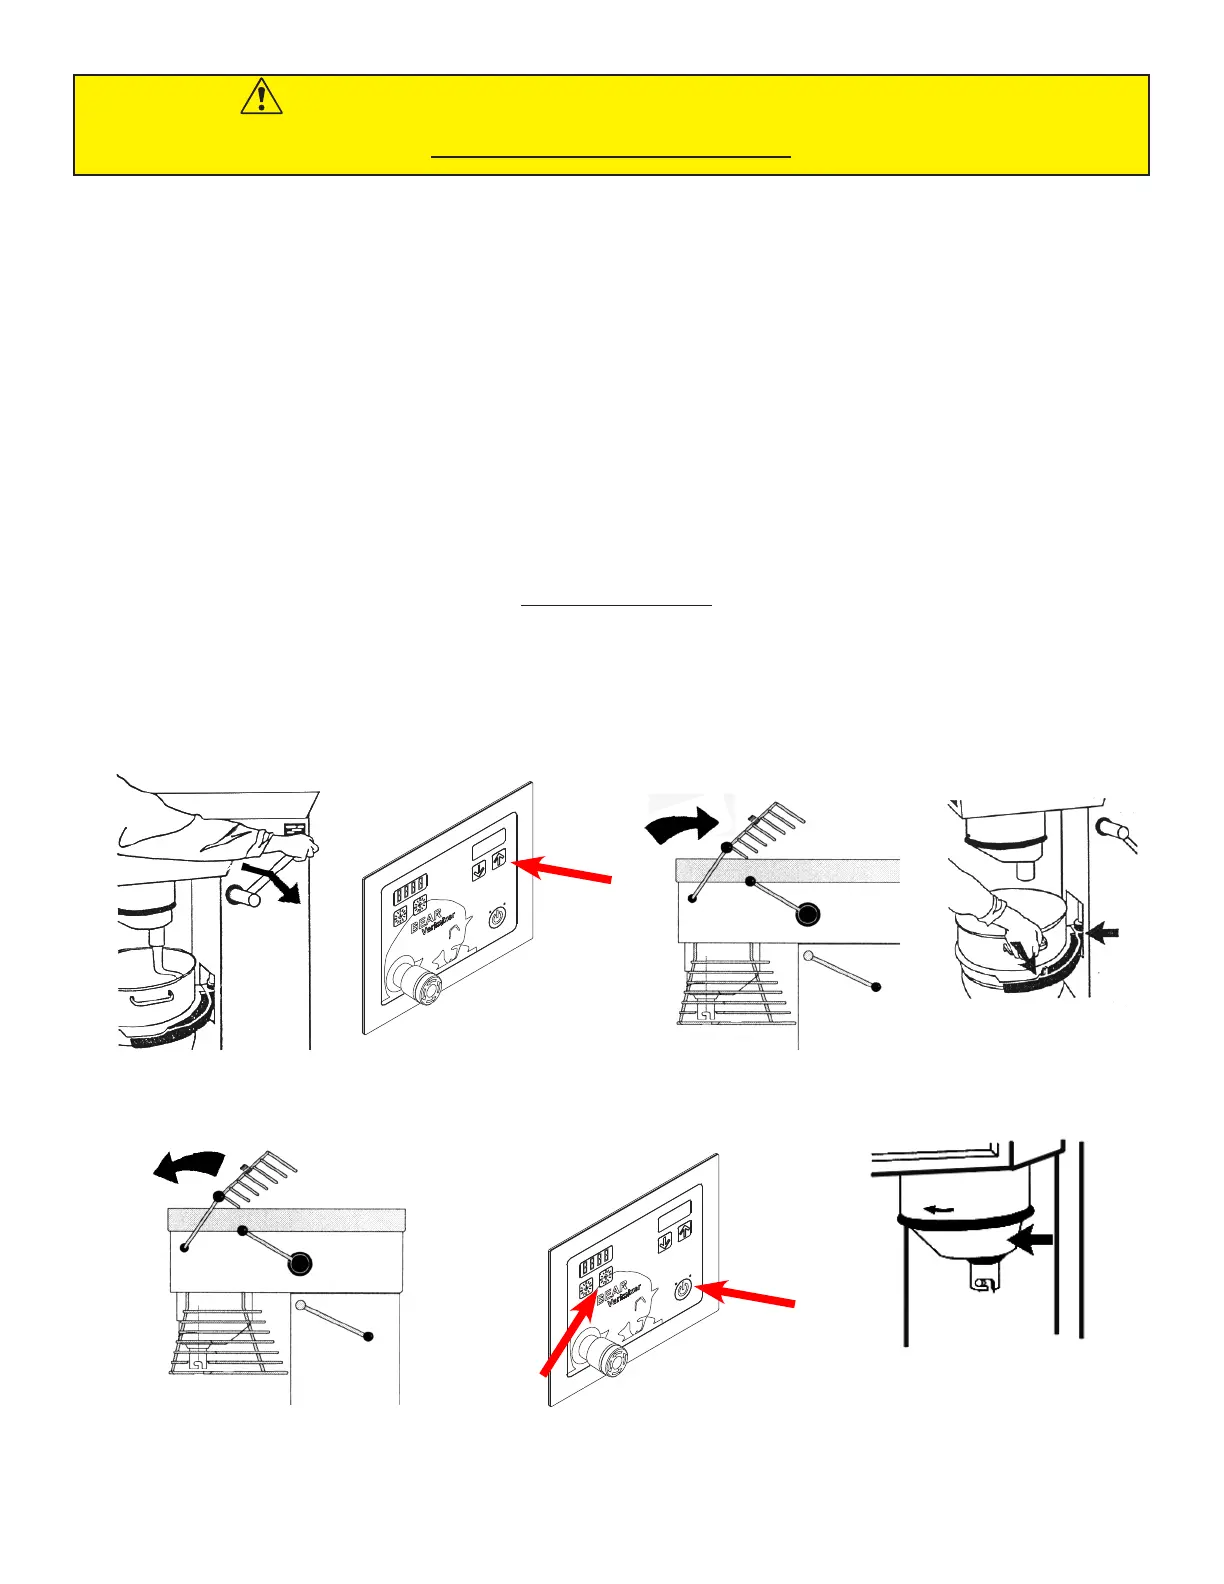
1. Lower the bowl using the bowl lift lever or pres
the button for bowl lift on the front panel.
4. Close bowl screen and raise
the bowl arms into the up
position.
5. Set timer to 10 minutes and
push “start” .
6. Insure cover is rotating in
the correct direction.
2. Open the bowl screen.
3. Remove the bowl
and tools.
Read this page entirely BEFORE beginning installation.
UNDER NO CIRCUMSTANCES ARE THE SPEED LEVER, BOWL LIFT LEVER, OR THE BOWL
ARMS TO BE USED TO MOVE THE MIXER INTO PLACE. DAMAGE WILL RESULT TO THE UNIT.
IT IS RECOMMENDED THAT THE TOP LID BE REMOVED BEFORE MOVING THE UNIT.
The mixer must be mounted with the rubber feet, which neutralize both shaking and rusting.
Spacers can be inserted under the mixer’s feet if the floor is uneven. The mixer can be bolted to the
floor if desired.
Before the mixer is connected to power, it should be checked that the voltage and frequency on the
rating plate is correct in relation to the place of installation. The rating plate is located on the rear
right side of the mixer. The electrical connection box is located at the top rear of the mixer.
Electrical and grounding connections must comply with applicable portions of the National Electrical
Code and/or other local electrical codes.