36 August 2022
Vasa SwimErg User’s Manual
PART 3 - Maintenance & Troubleshooting
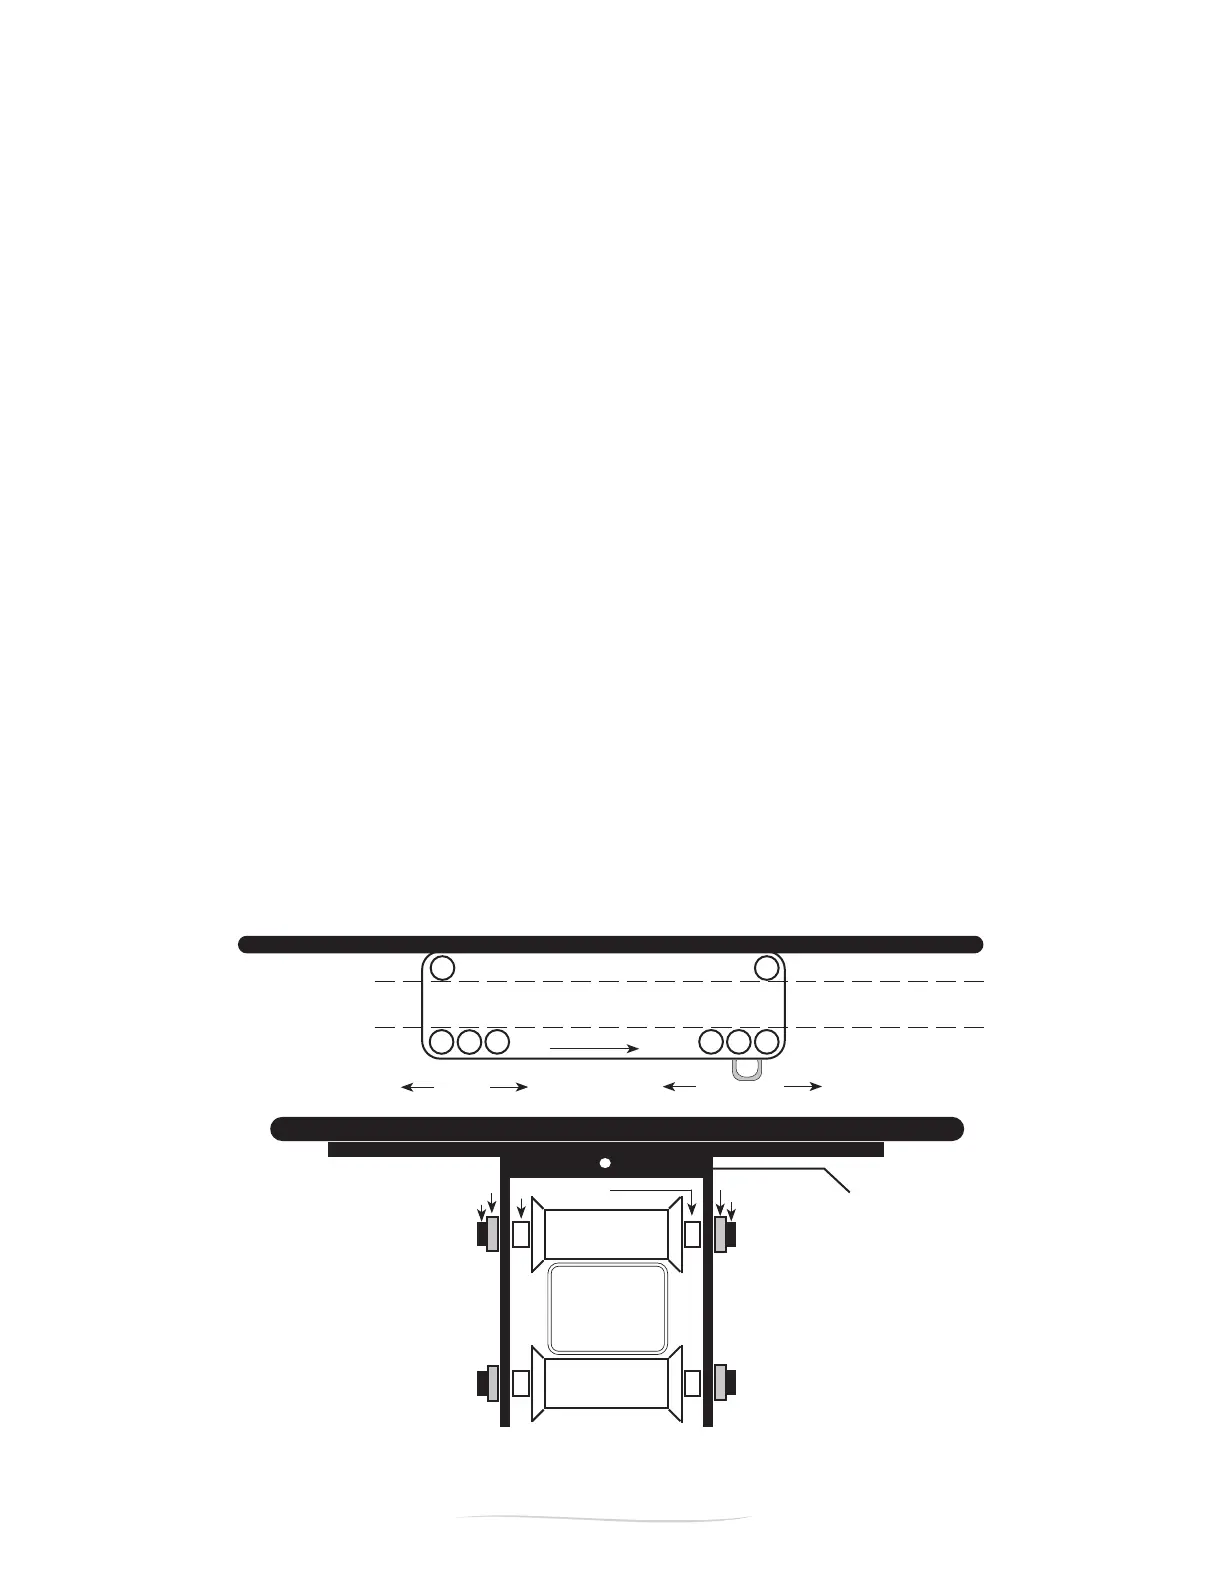
upper front roller
lower front roller
MONORAIL
lower rear roller
upper rear roller
front of machine
looser t tighter t
tighter t looser t
UBOLT
SIDE VIEW OF SEAT CARRIAGE WITH PADDED BENCH (not drawn to scale)
upper seat
roller
lower seat
roller
rubber washer
3” hex cap screw
rubber washer
nut
END VIEW OF
SEAT CARRIAGE
MONORAIL
cross section
viewed from
end of machine
seat spacers
PADDED BENCH
PADDED BENCH
SEAT CARRIAGE
SEAT ROLLER INSTALLATION AND ROTATION
1. Remove the rear stanchion from the monorail:
a. Remove any stretch cords you may have attached.
b. Loosen the socket set screw on the corner of the rear stanchion sleeve using the 3/16” hex key allen
wrench.
c. Loosen and remove the monorail screw and nut (2 1/2” button head screw).
d. Pull the monorail out of the rear stanchion and SLOWLY lower the monorail and the rear stanchion
to the ground.
CAUTION: The seat carriage and bench will roll forward, make sure to lower the monorail
slowly to avoid pinching your hands.
2. Hold the monorail in one hand and hold the middle underside of the seat carriage and remove the
assembly from the monorail.
3. Place the padded bench / seat carriage assembly upside down so the rollers are visible.
4. Use two 7/16” wrenches (or adjustable wrenches) to loosen the nut and screw which holds each
of the four seat carriage rollers in place. IMPORTANT: Note the position of the spacers and rubber
washers for re-assembly. See drawing below.
5.Installthenewrollers,rotatetherollers,ormovetherollersforatighterorloosert,makingcertain
that the spacers and washers are positioned exactly as they were before removing them (see drawing
below). Tighten the nuts until you see the rubber washer just begin to compress.
NOTE: Avoid over-tightening, as this will place side pressure on the bearings and can cause
premature wear. Tighten the nuts until you see the rubber washer just begin to compress. To
test tightness, spin the roller - the roller should roll freely, but should not be able to spin freely
for more than 2-3 seconds.
6. Replace the seat carriage on the monorail then replace the rear stanchion onto the monorail. Replace
and tighten the monorail screw and nut. Tighten the socket set screw on the rear stanchion sleeve with
the 3/16” hex key allen wrench.