8 August 2022
Vasa SwimErg User’s Manual
V A S A
V A SA
MONORAIL
hex jam nut
➌
insert and tighten
2 1/2” button
head screw and
hex jam nut
tighten socket set
screw with 3/16”
hex key wrench
1. lift front end upright
2. slide monorail into front stanchion sleeve
3. install 2 1/2” bolt with locking nut
4. secure set screw
Figure A Figure B
1/2” screw
(x2)
5. attach wheel bracket
Figure C
➊
➋
➎
➍
a
4
4
b
Insert MRA Bracket
(Tighten the set screw in the Front
Frame stanchion head against the
MRA bracket and monorail)
PART 1 - Assembly
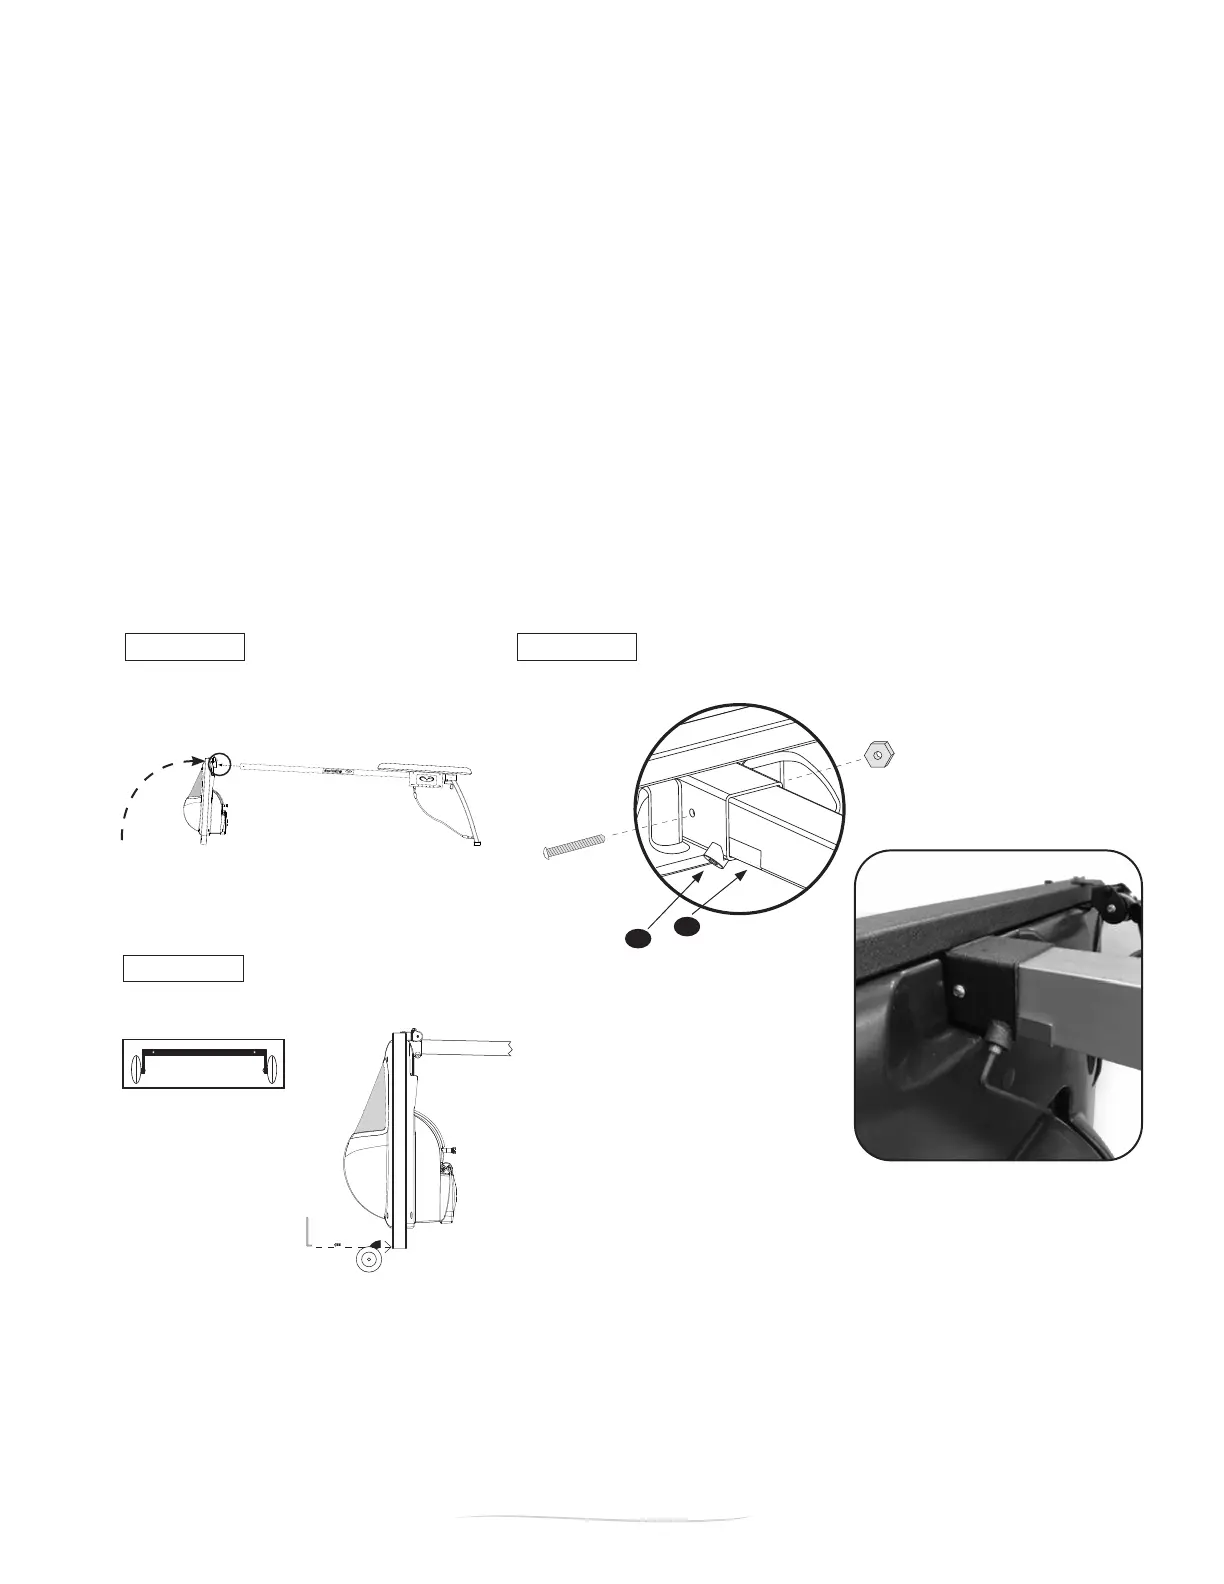
STEP 6: ATTACH FRONT END ASSEMBLY TO MONORAIL & ADD WHEEL BRACKET
6.1. Insert the monorail into front end assembly sleeve (Figure A). Align the holes. Be sure to have a
secure hold on the frame so it does not fall over.
NOTE: You may need to loosen the socket set screw on the corner of the front SwimErg assembly
(Figure B) using the 3/16” hex key allen wrench.
6.2. Insert one 2 1/2” button head screw through the sleeve and the monorail (Figure B). Thread and tighten
one hex jam nut with 5/32” allen wrench and 7/16” wrench.
6.3. Insert MRA bracket into sleeve. Then tighten the socket set screw against monorail using the 3/16” allen
wrench. This will secure the monorail to the inside of the sleeve so that it won’t loosen or rattle while in use
(Figure B). IMPORTANT: IF THE MONORAIL REINFORCEMENT ANGLE (MRA) DOES NOT FIT INTO
THE FRONT FRAME, DO NOT FORCE IT OR INSTALL IT. IT IS NOT A REQUIRED COMPONENT OF
THE SWIMERG.
6.4. Install the Wheel Bracket Assembly (located in Box #1) on the bottom of the front of frame (Figure C).
Use two 1/2” button head screws and 5/32” allen wrench to attach.
1-3. POST ASSEMBLY SAFETY CHECKLIST