15
3.2 Installation, Preparation and Operation of Vathin Electronic
Endoscopes
See the "User's Manual of Vathin Electronic Endoscopes".
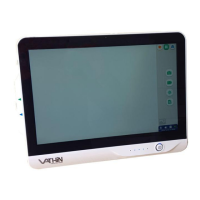
3.3 Operating DVM-A1 Digital Video Monitor
The product can by operated only by a physician who has received clinical endoscopy training. Therefore, no
clinical endoscopy procedure is explained or discussed in this manual. This manual only provides the basic
operations and precautions related to the product.
Warning:
If you suspect the product malfunctions in any time, stop and inspect it immediately. Always follow the
steps given below. Using a defective digital video monitor may cause injury.
If the endoscope image disappears or the image freezes and cannot be restored, turn off the product and
wait for about 10 seconds, and then turn it on again.
If any other abnormality occurs or is suspected, stop using the product immediately, and slowly pull out
the endoscope from the patient according to the user's manual of the endoscope. Then take the remedial
measures as described in Chapter V. If the problem still exists, contact Vathin Medical.
The white balance adjustment is required to restore the original color tone. Every time you replace the
endoscope, be sure to adjust the white balance for accurate color reproduction.
When the loss of built-in power supply under normal working condition will cause the machine to fail to
work normally, the medical electrical equipment must be connected to the appropriate external power
supply.
3.3.1. Power-on: Short press the power button to turn on the product. After the boot animation is over,
the Basic Function interface will appear by default.
3.3.2. Basic function interface: This interface is used mainly for photo-shooting, video recording, white
balance adjustment, patient information editing and other operations.
If no endoscope is connected, the connection prompt animation will appear on the screen, and the function
icons below are grayed out, indicating that all are available.
Once the endoscope is connected, the real-time image will be displayed on the screen, and the icon on
the upper right corner is checked, as shown in the figure below.