17
Used to indicate the available memory. A prompt will be given
in case of insufficient memory.
Used to indicate the remaining battery capacity.
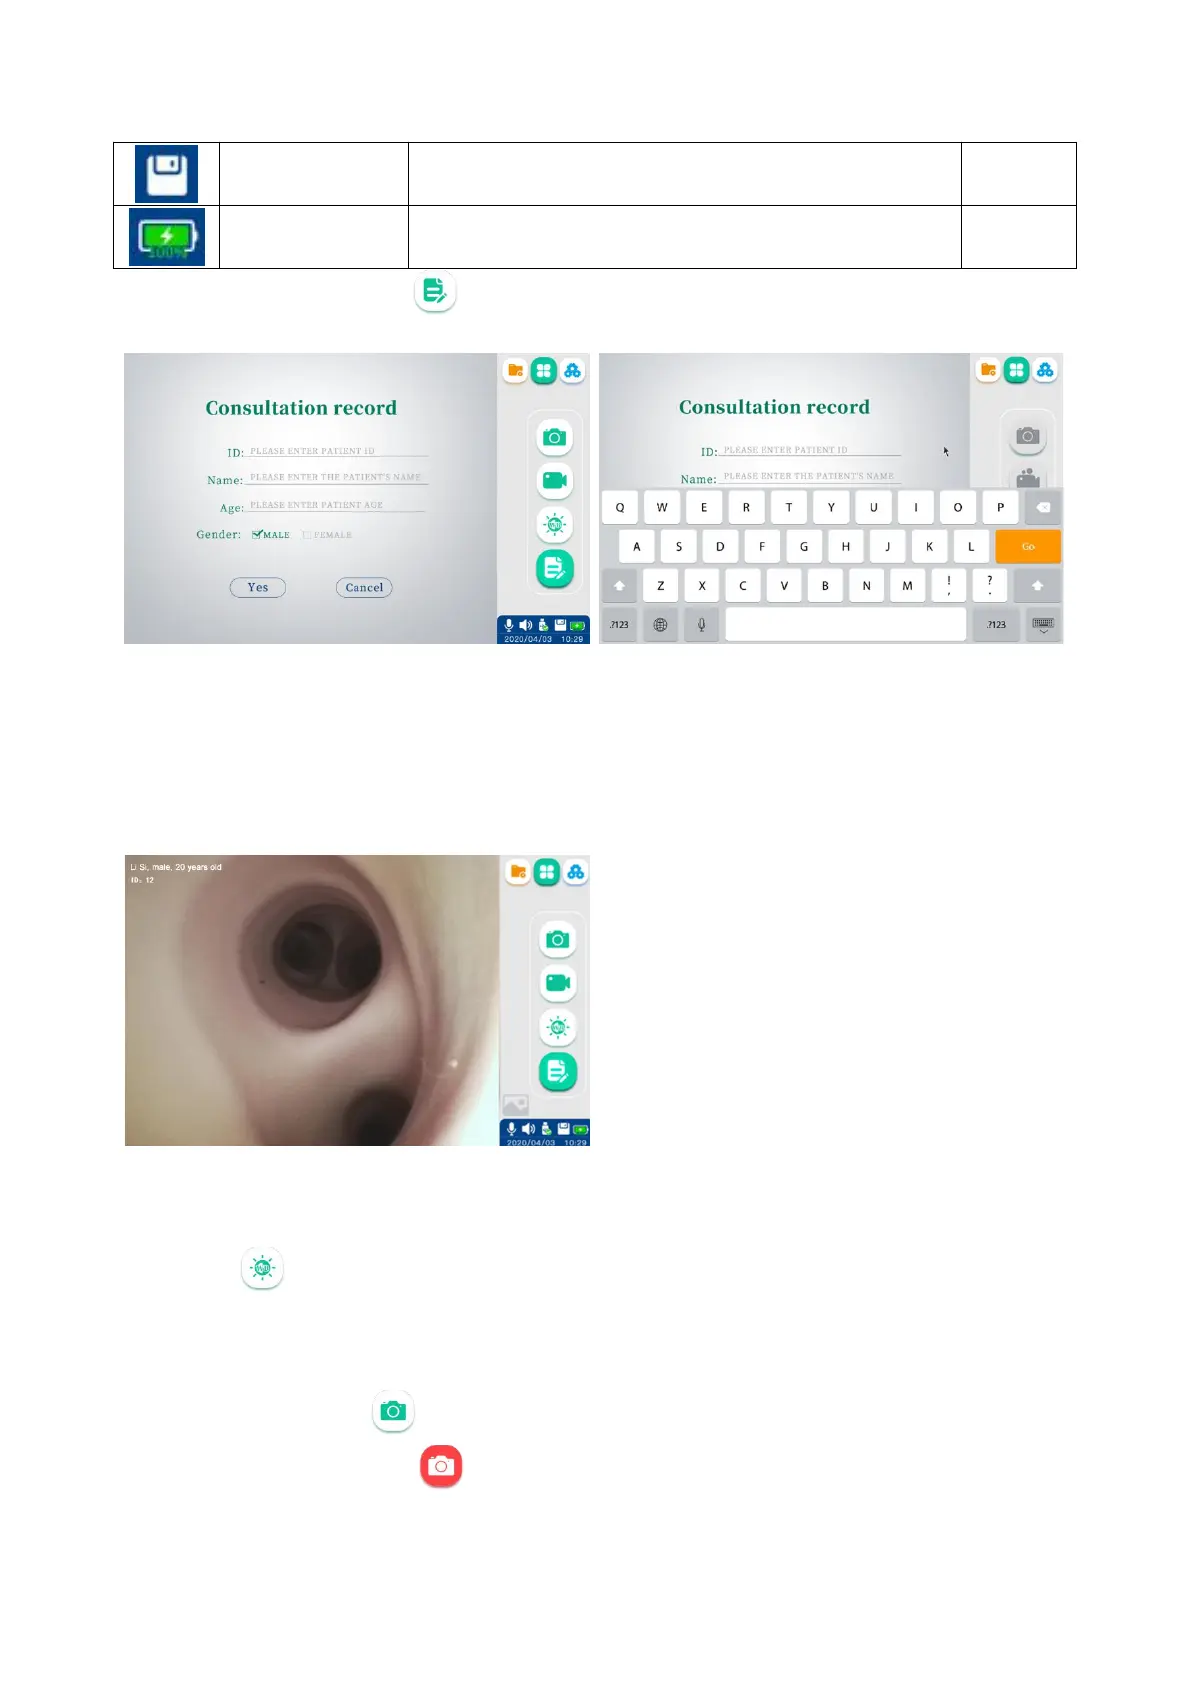
3.3.2.1. Patient information: Tap to enter the Patient Information interface; tap in the input box, and
the keyboard will appear for you to edit the patient information.
In addition to using the touch screen, you can connect an external device through the USB 3.0 interface:
1) You can connect a keyboard and a mouse to operate the product.
2) You can connect a scan head to scan the patient information QRcode/barcode for information entry.
After setting up the patient information, tap "Yes", and the the Basic Function interface will appear
automatically with the patient information displayed on the upper left corner.
3.3.2.2. White balance: If you need to use the product indoors in a hospital, turn on the lighting (with an
intensity not less than 200 lx), and aim the endoscope insertion end at the white gauze. Keep the end
of the endoscope insertion end about 10 mm away from the white gauze. Select the white balance
icon on the screen, and the screen will change accordingly.
Vathin Medical does not provide any accessories (e.g. white cap) for white balance. The physician may use the
white gauze for white balance operations.
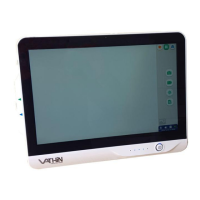
3.3.2.3. Photoshooting: Keep the Vathin endoscope as still as possible to prevent obscure images during the
photoshooting. Tap or press the button on the handle of the endoscope for photoshooting,
and the icon will turn red and the screen will flash with a prompt "The photo has been saved
successfully". The image has been updated, and you can tap the preview icon to view it.