K6/K6N Vacuum Packaging Machine
Maintenance
2002-04-25 Art. no. 519.340 Page 45/56
Replacing welding wire and cutting wire
§ Removing the Teflon strip as described above.
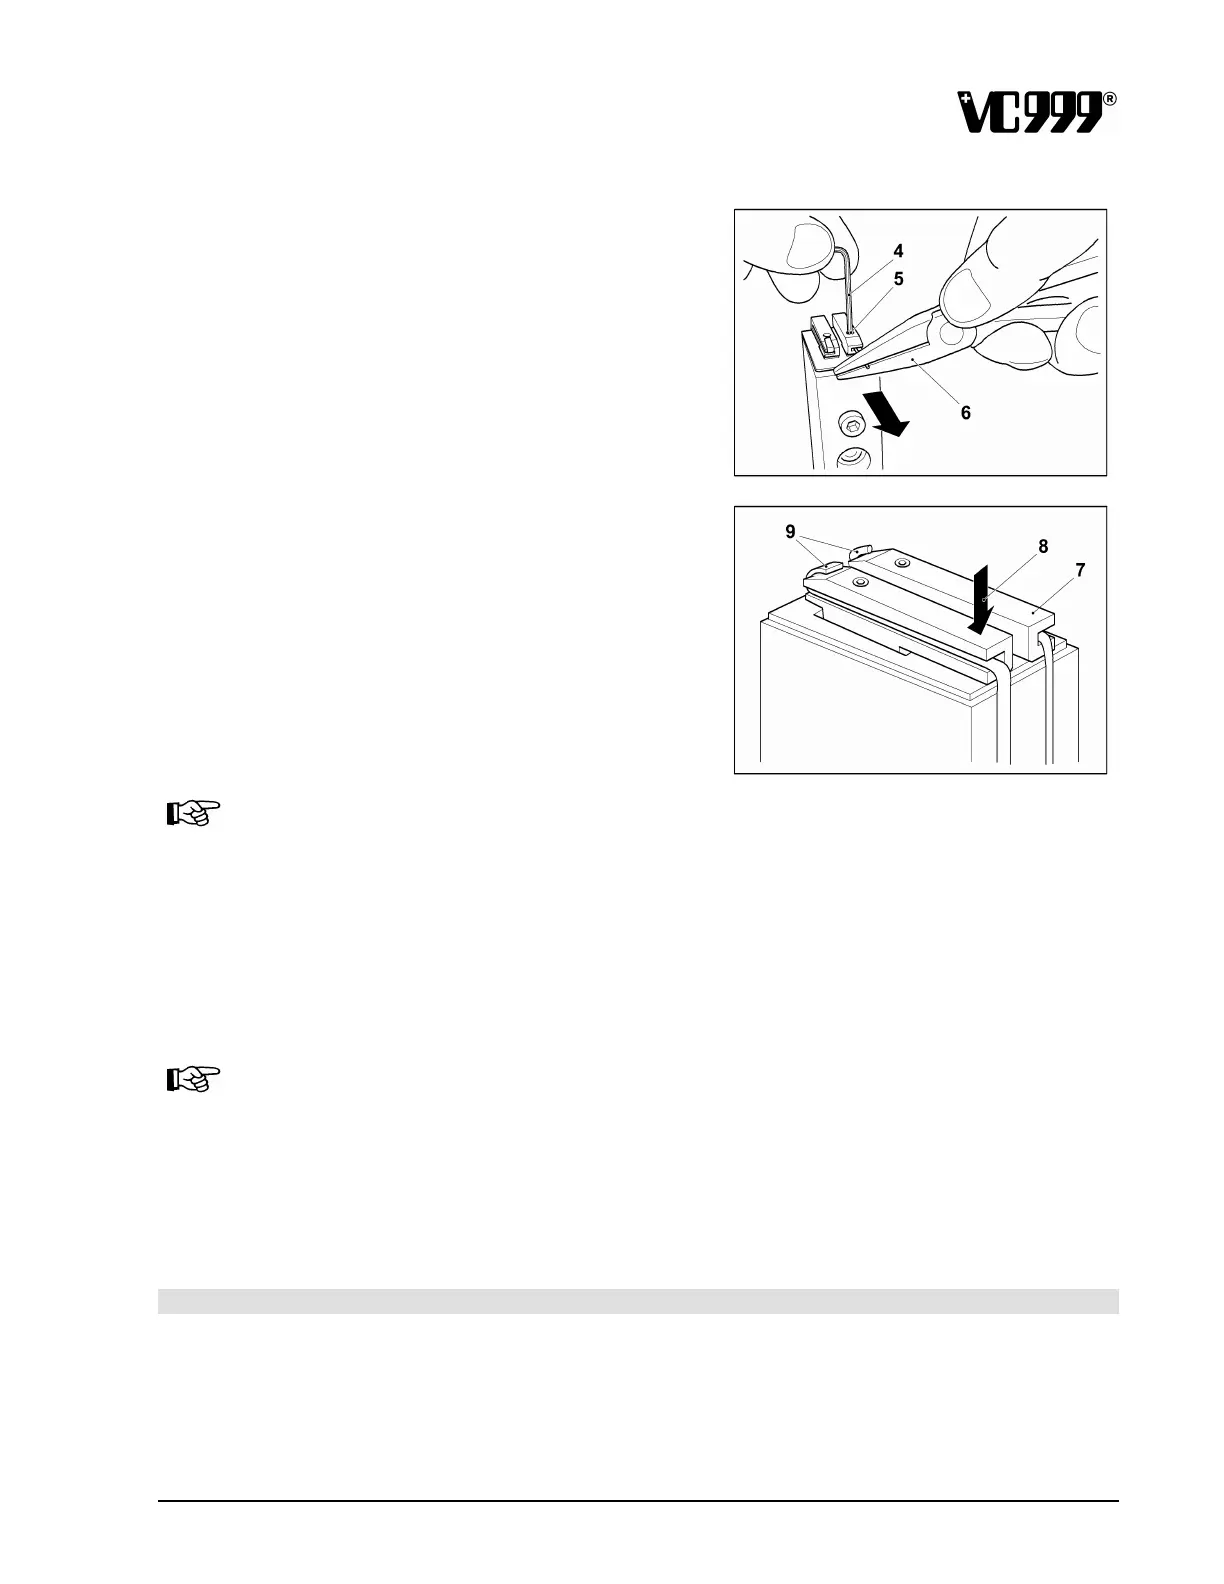
§ Use a hexagon socket head wrench (4) to remove
the threaded pin (5).
§ Also loosen the threaded pin on the other side
and insert a new wire. Secure it to the other side
using the threaded pin.
Fig. 13/3
§ Tighten it by pulling it through the clamping jaws
(7) using pliers (6).
§ Before you tighten the wire with the threaded pin,
press the clamping jaws as far as possible against
the welding bar (8).
§ Tighten the threaded pin and bend the protruding
end of the wire (9) over the clamping jaws.
Fig. 13/4
IMPORTANT
The clamping jaws (7) are pretightened with compression springs. You can tell that the wires
are correctly tightened if all 4 clamping jaws are pressed in as far as they will go (8)!
§ Attach the Teflon strip to the welding bar, as described above.
Installing the welding bar
§ Locate the welding bar onto the two guide pegs and push it upwards as far as it will go.
IMPORTANT
Ensure that it is installed in the correct position: with the flat welding wire against the inside of
the vacuum chamber and with the locking levers pointing outwards!
§ Secure the welding bar in place by turning the two locking levers through 90° into a horizontal
position. Try to move it in the opposite direct to ensure that it is properly fixed in place.
13.3.3 Maintenance of the welding cap pass
§ Replace the silicone strip if it is damaged. It is pressed lightly into the channel on the welding cap
pass and is easy to remove.
§ If this happens, also clean the welding bars, following the instructions in the section above.