14
PHTM II
Installation, Operating & Service Instructions
110331-01 - 5/20
Preparing Boiler (continued)
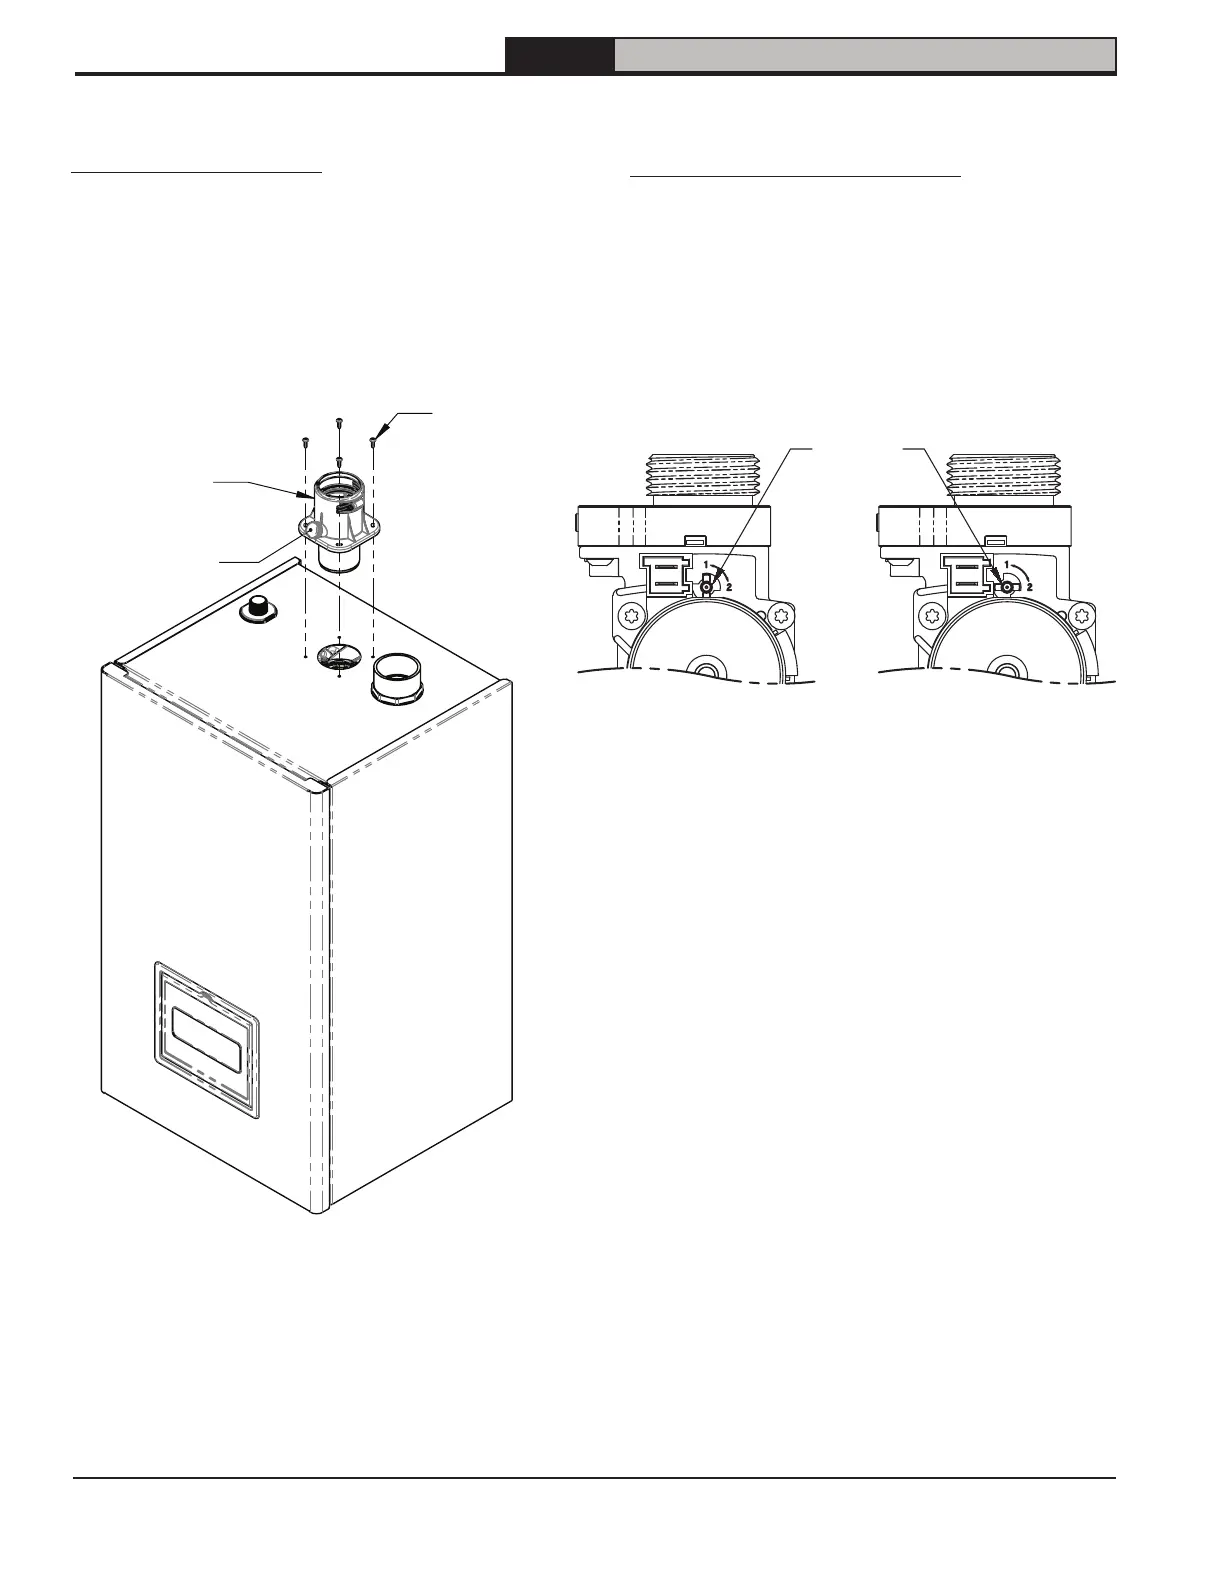
1. Remove vent connector and screws from
miscellaneous parts carton.
2. Lubricate heat exchanger vent gasket with
soapy water.
3. Insert vent connector through jacket into heat
exchanger with flue gas sample port facing
forward. See Figure 6-2.
4. Tighten 4 screws.
Install Vent Connector
Figure 6-2: Installing Vent Connector
Flue gas sample
port facing front
of boiler
Vent Connector
Attach with
(4) screws
Gas Valve Fuel Setting
Gas Valve Fuel Setting
Adjustment
Screw
Figure 6-3: Gas Valve Detail
Preparing for fuel conversion
If using LP gas. LP conversion requires (2)
steps: gas valve setting adjustment and control
parameter change.
1. Use 2.5 mm hex wrench to adjust gas valve
setting from “1” to “2” (Figure 6-3). For easy
access to gas valve remove left side panel using
(2) Phillips screws.
2. See Section 15 “Startup and Checkout” for Control
Parameter adjustment instructions.