Service - 37
SERVICE
Service And General Maintenance
Proper and timely service of this power unit is
critical to keep the power unit in a safe and reliable
operating condition. Follow the maintenance sched-
ule at the end of the service section. For conve-
nience, a frequent service guide decal and a quick
reference chart decal have been placed on the
power unit under the hood.
Cleaning And Appearance Care
For best results, and to maintain the fi nish of the
power unit, clean or wash the power unit to remove
accumulated clippings, leaves, dirt, gravel, and salt
deposits when the job is fi nished.
Attention
To maintain the fi nish of the power unit, thoroughly wash
the equipment after each use to remove any corrosive
agents (e.g. salt). Failure to clean the equipment may
result in corrosion of (including but not limited to) steel,
aluminum, and electrical components. Equipment that
will experience repeated exposure to corrosive agents
should be pretreated with a corrosion preventative.
CAUTION
If the engine has been running, it must be allowed
to cool in order to prevent damage to the block
and exhaust manifold.
Do not direct high pressure water at the engine,
air cleaner, muffl er, radiator, hydraulic oil cooler,
or any electrical components.
Allow the power unit and all components to cool
before washing. Refer to the specifi c service sections
for proper cleaning techniques for the engine, radia-
tor, and hydraulic oil cooler. Use mild soap and water
to clean the power unit. Harsh chemical cleaners
could cause damage to the fi nish or components.
It is necessary to periodically remove the lower rear
frame cover and blow out or wash out any accumu-
lated debris.
After cleaning, use touch up paint to repair scrapes.
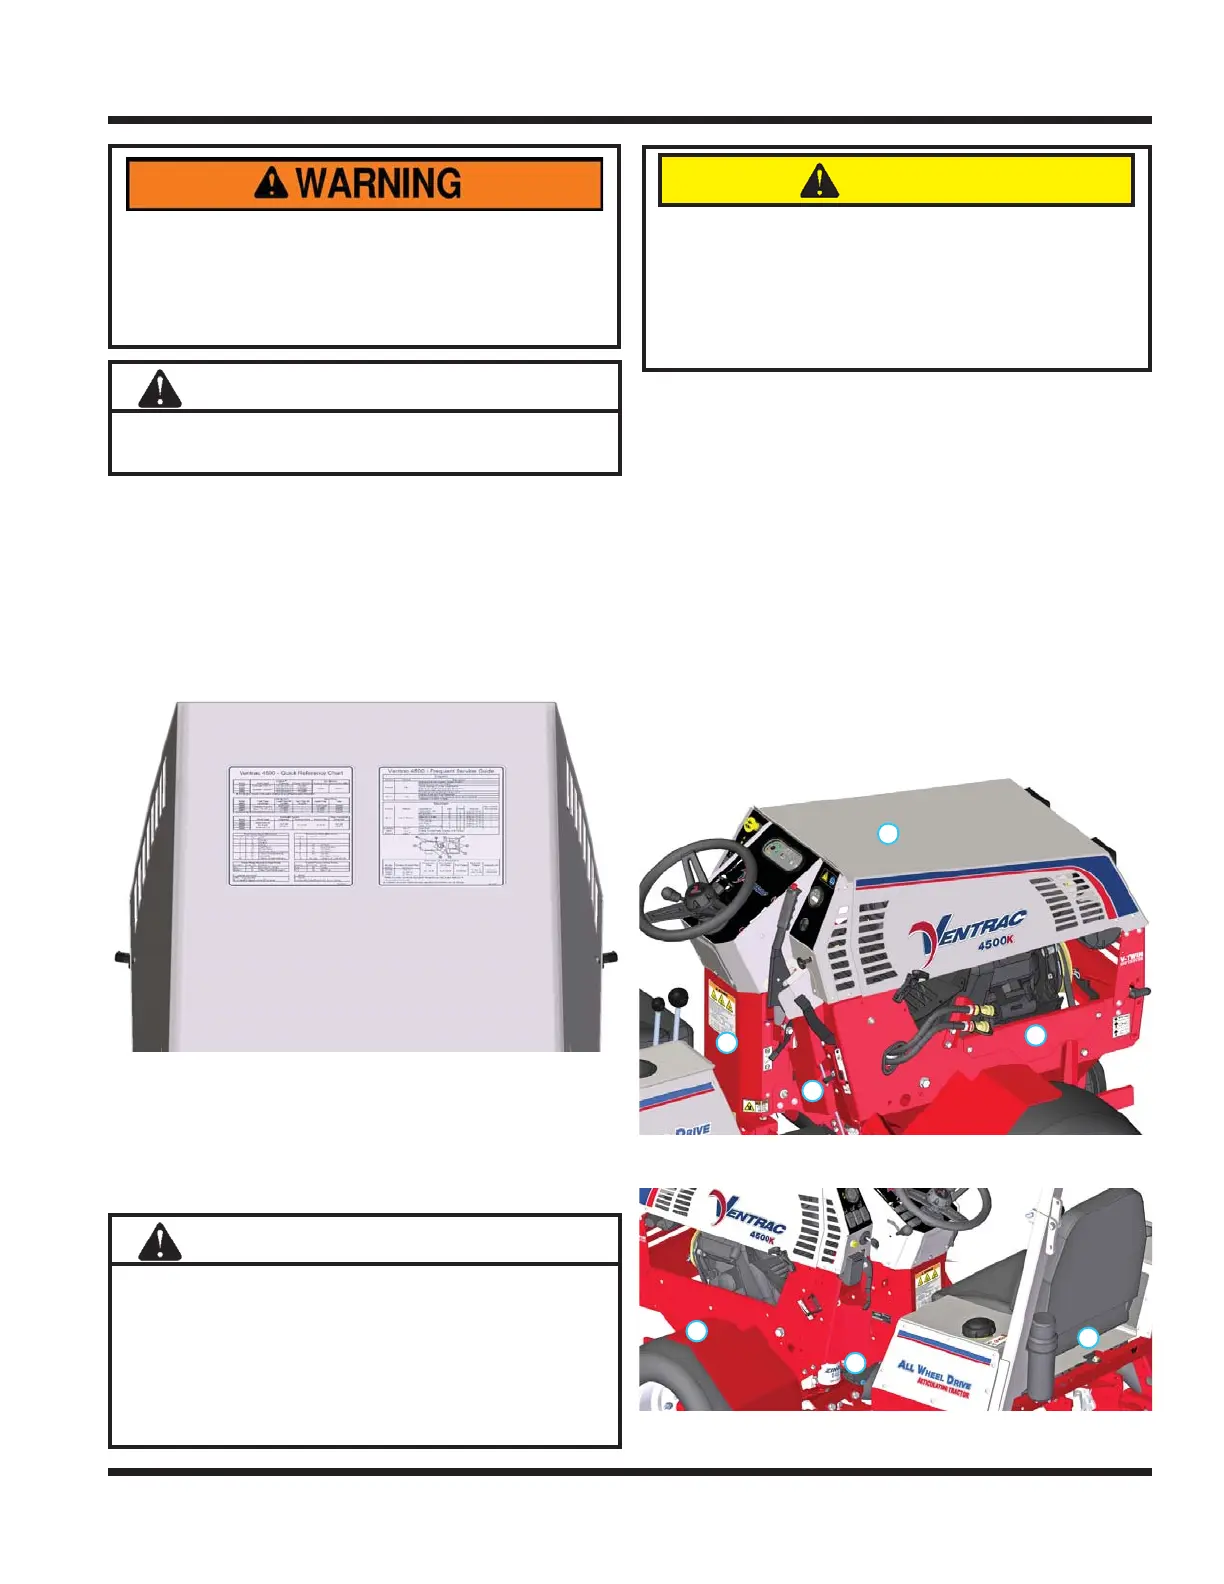
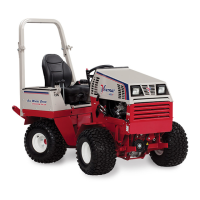
Service Access Points
Throughout the service section, different access
points are referred to. The following list and images
identify shields and covers that may need to be
removed or opened during service.
1
2
3
4
1. Engine Hood
2. Pump Cover
3. Right Pump Access Cover
4. Right Engine Access Panel
5
6
7
5. Left Engine Access Panel
6. Hydraulic Filter Access Cover
7. Seat
SERVICE
Always set the parking brake, shut off power
unit engine, remove the ignition key, and ensure
all moving parts have come to a complete stop
before inspecting components or attempting any
repair or adjustment.
Attention
If any component requires replacement, use only
original Ventrac replacement parts.