10 MX 800 SERIES INSTALLATION GUIDE
4 Attach the cable tie-down strap with the supplied screw.
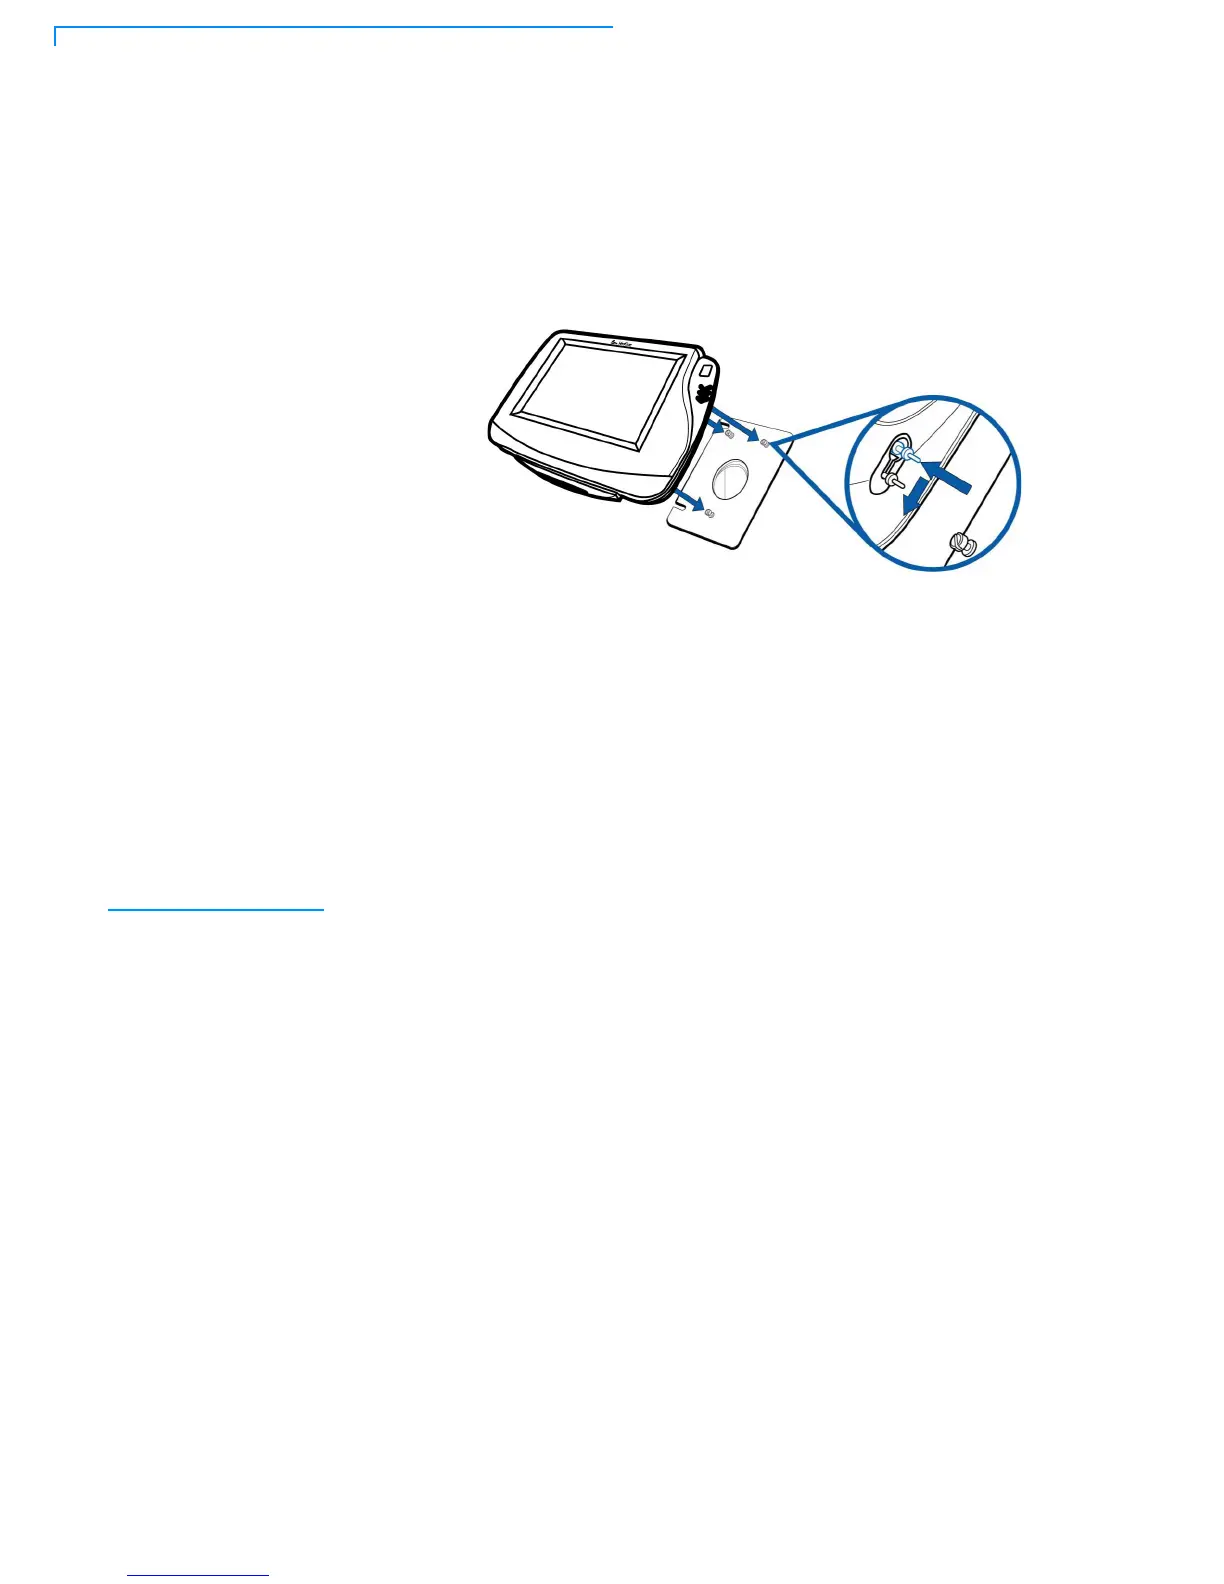
5 Align and seat the three pins on the top plate of the stand mount platform with
the three key-hole slots on the bottom of the terminal (Figure 2).
6 Slide the terminal down until the unit seats securely.
Figure 2 Aligning MX 800 Series Terminal with the Typical Mounting
Plate
7 Position the stand so that it is protected from being bumped by shopping
carts or other items. Being bumped and potentially trigger the system into
“thinking” a breach attempt has occurred, causing the encryption keys to be
cleared.
PIN Protection
Measures
The following techniques can be employed to provide for effective screening of
the PIN-entry keypad during the PIN entry process. These methods would
typically be used in combination, though in some cases a method might be used
singly.
• Positioning of terminal on the check-stand in such a way as to make visual
observation of the PIN-entry process infeasible. Examples include:
• Visual shields designed into the check-stand. The shields may be solely
for shielding purposes, or may be part of the general check-stand design.
• Position the PED so that it is angled in such a way that PIN spying is
difficult.
• Installing PED on an adjustable stand that allows consumers to swivel the
terminal sideways and/or tilt it forwards/backwards to a position that makes
visual observation of the PIN-entry process difficult.
• Positioning of in-store security cameras so that the PIN-entry keypad is not
visible.
The following table describes the two preferred mounting methods and the
recommended measure to protect from PIN capture in four observation corridors: