Quick Reference Guide MDV 3252-FH
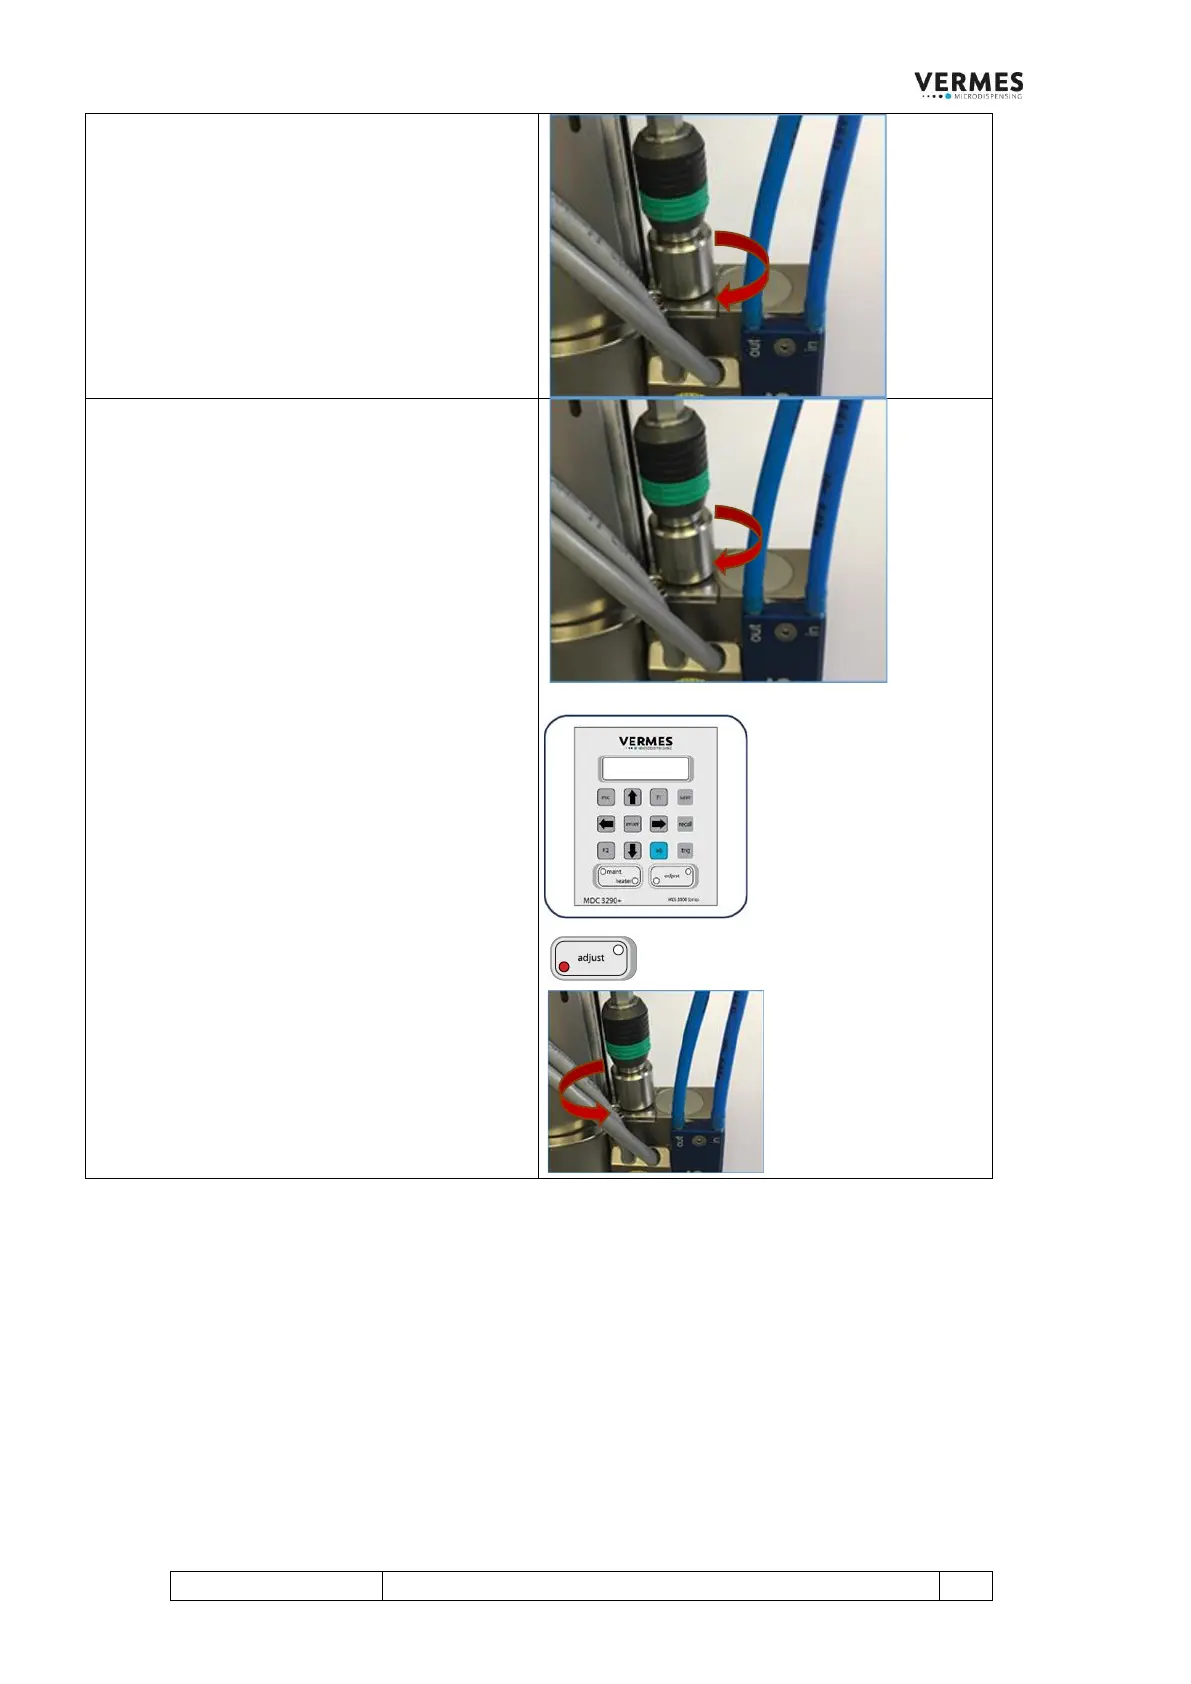
Step 2 (Turn in adjust screw)
In the display appears “Screw IN for Adjust”.
After a few seconds, the initial message
disappears from the display. Instead, the
following message appears: “-40 % slowly
Adjust Screw IN”.
Screw the adjust screw slowly inward
(clockwise). The adjust value shown in the
display moves towards 0.0 %.
Step 3 (Find adjust value and confirm it)
Turn the adjust screw slowly clockwise, then
remove the MDT 307 from the valve. Check if
the green adjust LED is ON. Keep turning until
the green adjust LED is ON.
The value in the display should be between
0.0 % and 1.0 %.
The display changes as follows (shown adjust
value as example): “0.5 % Press Enter”.
Confirm the adjust with pressing [enter]. The
adjust is finished and you are send back to the
main menu.
Note:
In case you had turned the adjust screw too far,
the red adjust LED is ON instead of the green
one (see picture). The following message
appears in the display: “4.0 % Adjust Screw
OUT” (number only example).
Unscrew the adjust screw (counter-clockwise)
until the displayed adjust value is in the range
of 0.0 % to 1.0 % and the green adjust LED is
ON. Press the [enter]-key.
4.2 The Initial Adjust
In certain situations, the system asks you to perform an initial adjust. This can for example be the case when
switching to an uncalibrated valve. The initial adjust performs the calibration. The initial adjust precedes the
normal adjust, which then follows directly afterwards.
In case an initial adjust is necessary, you will be informed directly at the start of the MDC. In case you initialize an
initial adjust through service code 1410, you start the initial adjust by pressing the [enter]-key. The following
steps though are the same.
IMPORTANT INFORMATION! (Time limit for the initial adjust)
If you do not reach step 4 of the initial adjust after approx. two minutes, the initial adjust is cancelled. You have to
start the initial adjust from the beginning.