Quick Reference Guide MDV 3252-FH
5. Disassembling the Valve
The dispensing process must be completed. The valve is in closed position.
If you cannot dismount and clean the system immediately after the dispensing, follow the three steps below.
1. Turn off the heater channels and the supply pressure.
Wait until the system is partially down.
2. Turn off the MDC
3. Turn off the MFC.
5.1 Disassembling the Valve
Wait until the system is cooled down completely. Dismount the valve and clean the parts. Perform all steps from
the assembling-chapter in reverse order. There is no need to stick on the torques.
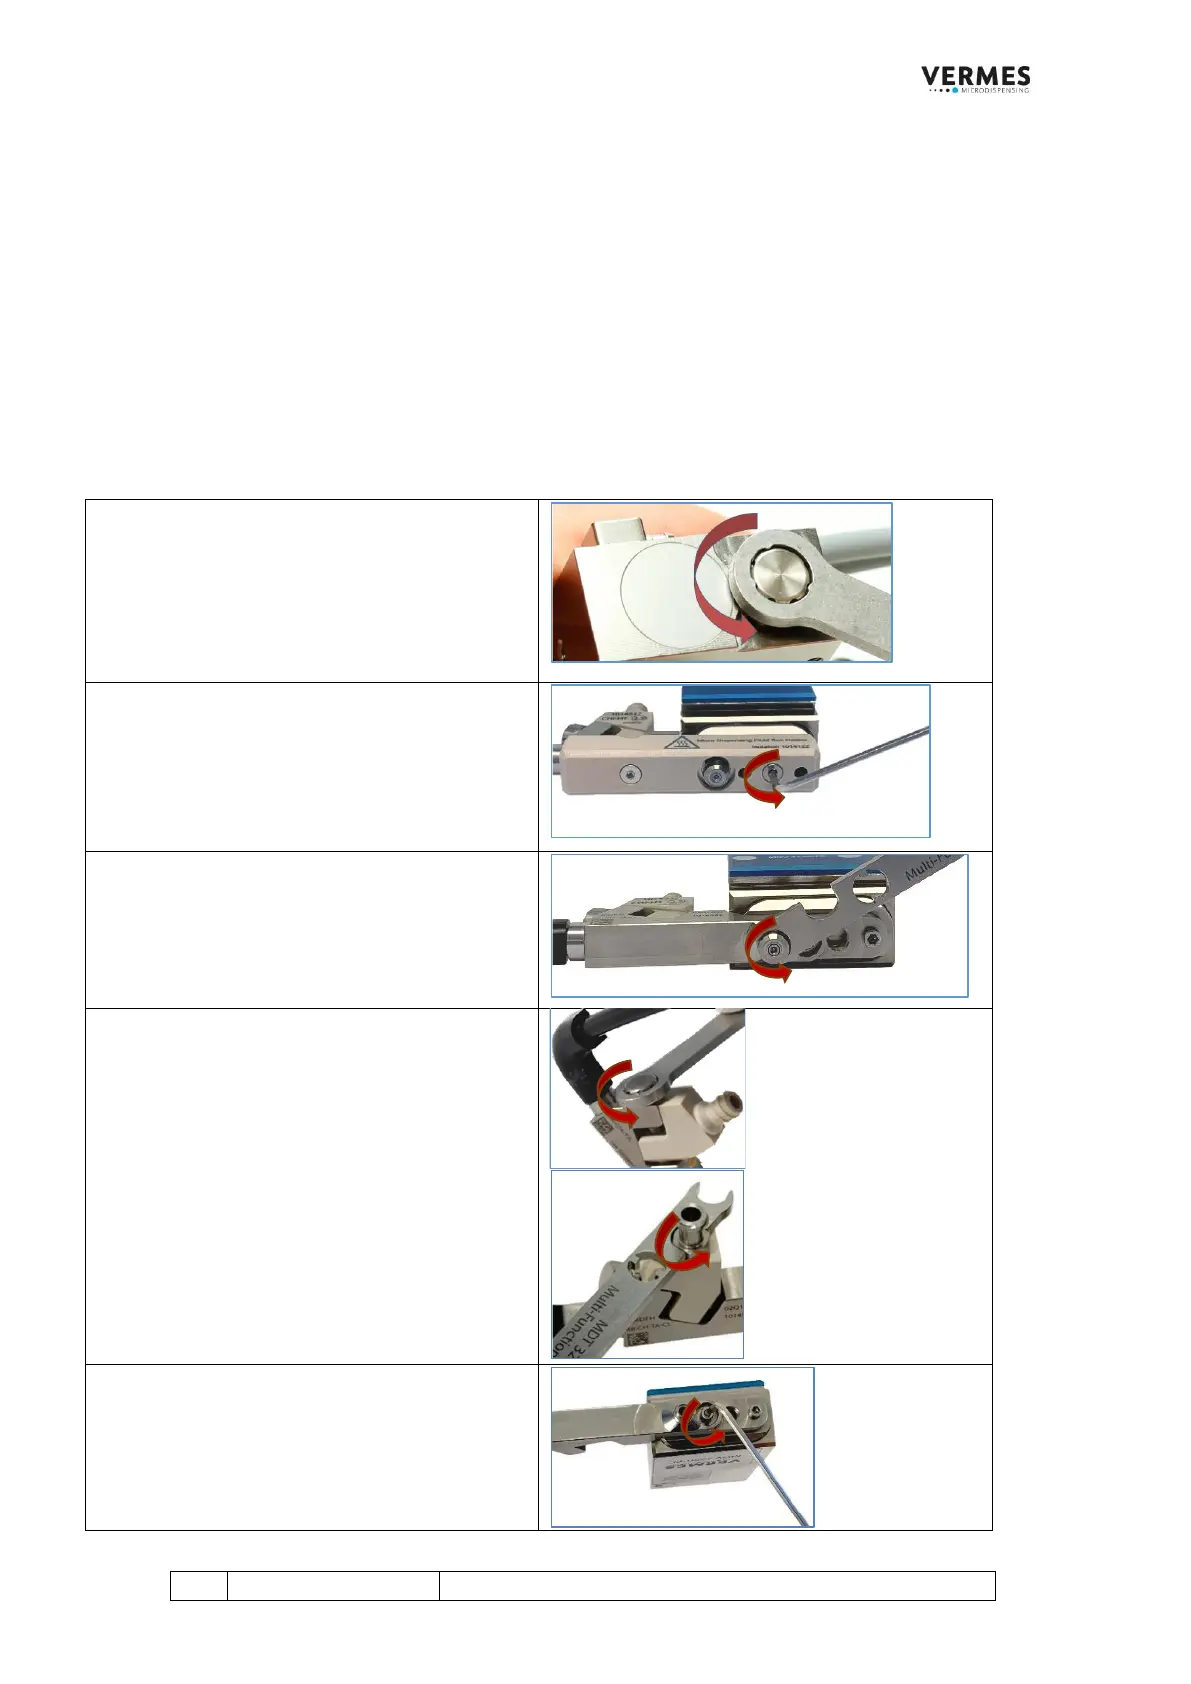
Step 1 (Loosen the adjust screw)
Make sure that the adjust screw is completely
open (screw counter-clockwise to open).
Using the MDT 327 - Multi-Function Tool or the
Adjustgrip of the MDT - 301 Universal tool.
Step 2 (Demount the isolation body)
To remove the isolation body, screw off the two
screws next to the nozzle fixation nut. Use the
MDT 329 - offset screw driver or a hexagon
socket key (size 2).
Take off the isolation body.
Step 3: (Open the nozzle fixation nut)
Unscrew the nozzle fixation nut using the MDT
327 - Multi-Function Tool or the MDT 306 with
BitVM hexagon socket (min. 150 cN.m).
Step 4 (Take off the cartridge base)
Screw open the tightening screw on the fluid
box using the MDT 327 - Multi-Function Tool.
Take off the cartridge base.
IMPORTANT NOTE!
If you use a cartridge base without integrated
luer lock, you need to screw off the Fluid Box
Connector Luer Lock first. Use the open-ended
wrench of the MDT 327 (hexagon screw size
M8).
Step 5 (Remove the fluid box from the valve)
Remove the fluid box screws and detach the
fluid box from the valve. Use the MDT 329 or a
hexagon socket key (size 2).