Quick Reference Guide MDV 3252-FH
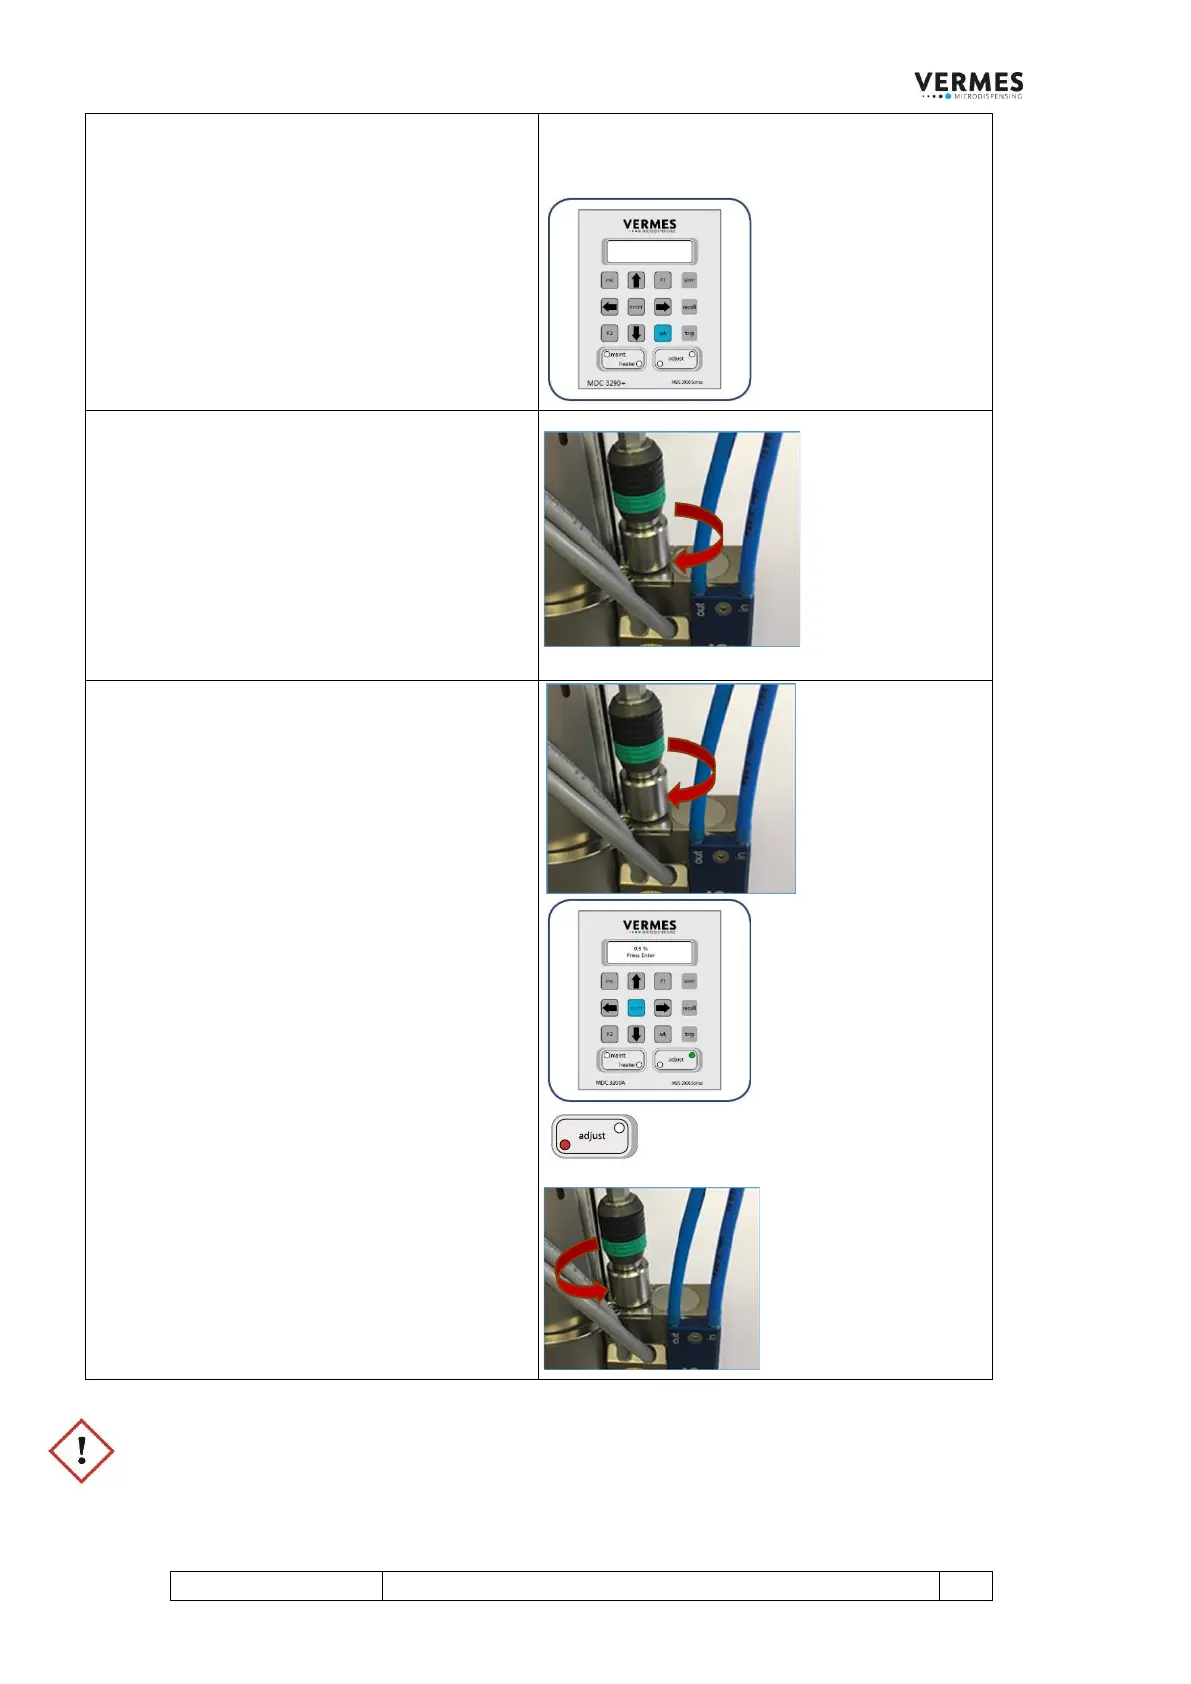
Screw open the adjust screw completely (screw
counter-clockwise to open).
Afterwards press the [enter]-key.
Wait until a new message appears in the
display.
Initial Adjust, Step 5 (Screw in adjust screw)
For a few moments, the message “Screw IN for
Adjust” appears in the display. After a few
seconds, the initial message disappears from
the display. The message “-40 % slowly Adjust
Screw IN” is shown instead.
Screw the adjust screw slowly inward
(clockwise). The adjust value displayed moves
towards 0 %.
Initial Adjust, Step 6 (Find adjust value and
confirm it)
Now turn the adjust screw slowly clockwise,
until the green adjust LED is ON.
The adjust value in the display should be
between 0.0 % and 1.0 %.
Confirm the initial adjust with pressing [enter].
The initial adjust is finished successfully and you
are send back to the main menu.
In case you had turned the adjust screw too far,
the red adjust LED is ON instead of the green
one.
The message “4.0 % Adjust Screw OUT”
(number only example) appears in the display.
Unscrew the adjust screw (counter-clockwise)
until the displayed adjust value is in the range
of 0.0 % to 1.0 % and the green adjust LED is
ON. Press the [enter]-key.
IMPORTANT NOTE!
Do not keep screwing the adjust screw further clockwise, if the red adjust LED is ON and the adjust value is
far above 1.0 %. With an adjust value of more than 59 % (without adjust offset), a warning message appears
in the display (“Adjust Screw OUT”), but you should avoid reaching this far. Otherwise, the tappet or the
nozzle insert could get damaged.