Quick Reference Guide MDV 3252-FH
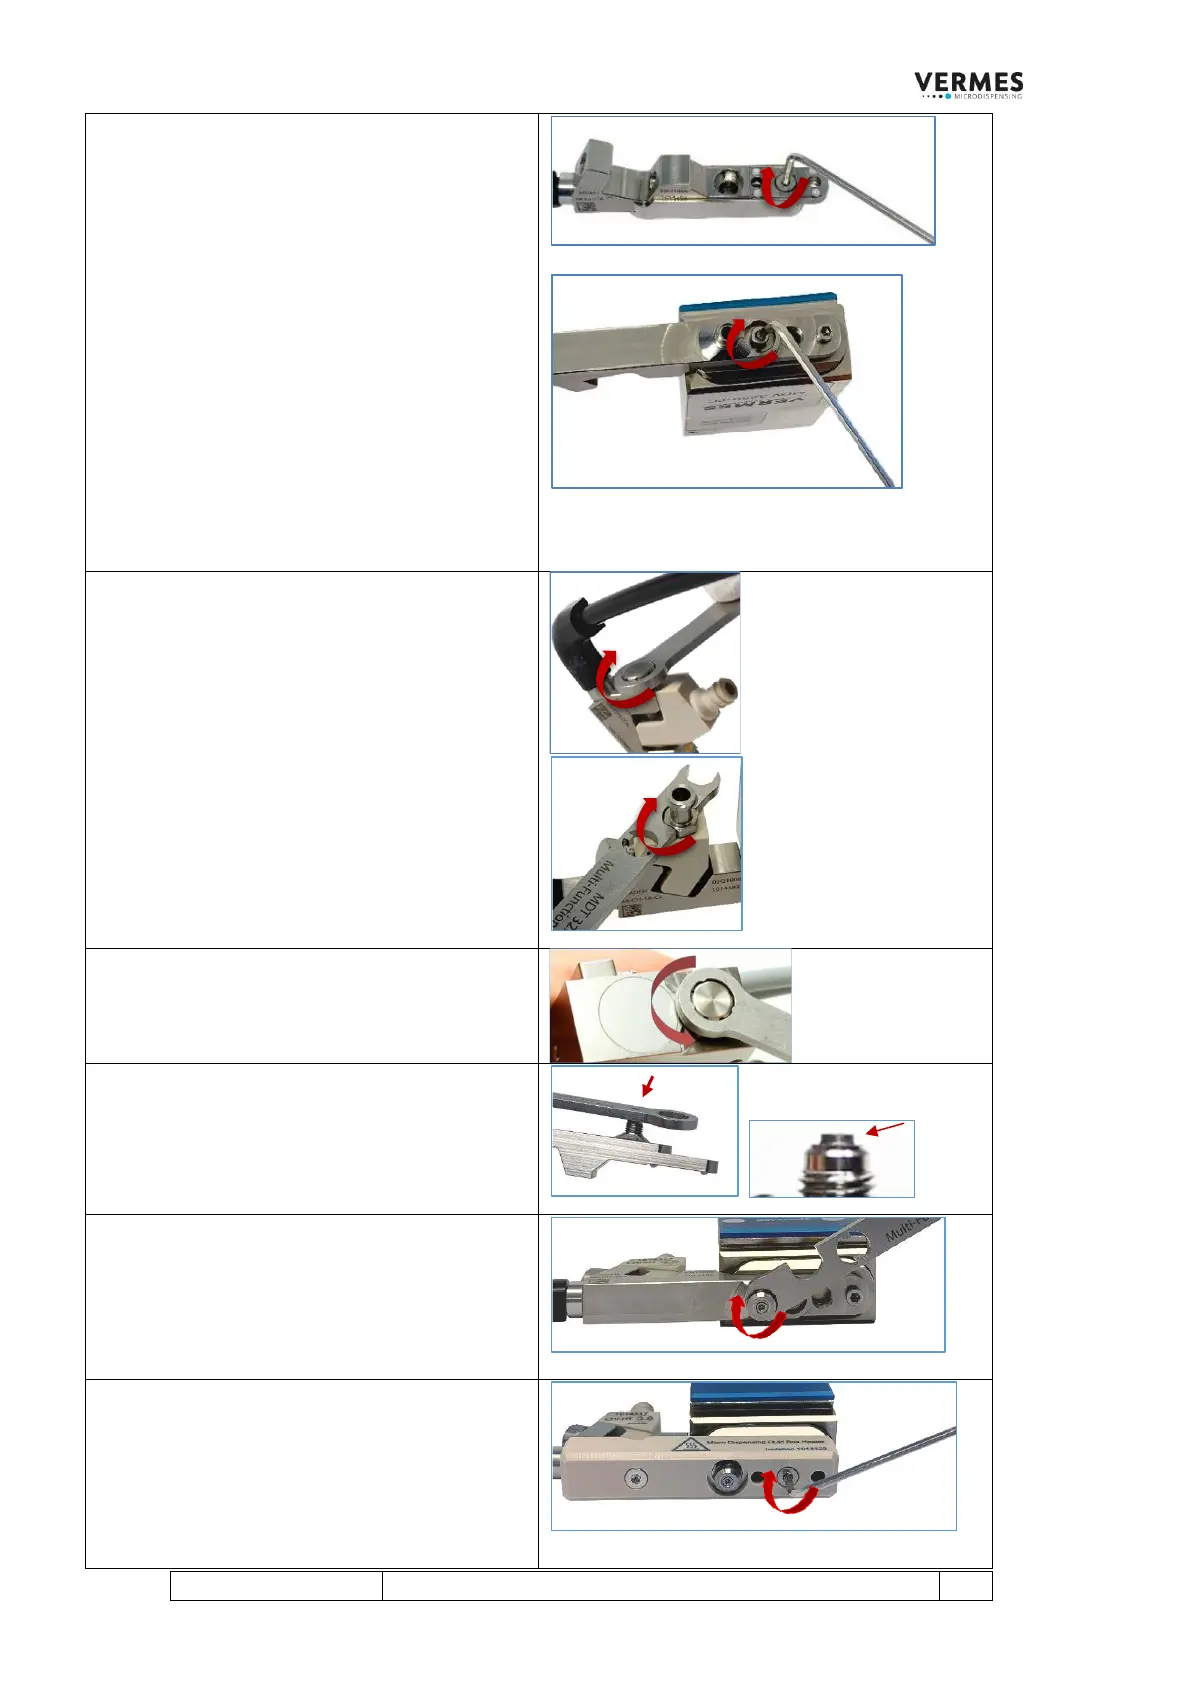
Step 3 (Screw in fluid box body)
Equip the fluid box with a heat conducting
plate.
Screw in the fluid box front screw to fix the heat
conducting plate to the fluid box. Use the MDT
329 - offset screw driver. Alternatively, use the
MDT 306 - Torque Wrench Tool VM (hexagon
socket size 2) or a hexagon socket key for
screwing.
Press the fluid box body onto the tappet on top
of the valve. Make sure the fluid box body is
straight, not tipped against the valve.
Otherwise, the tappet and/or the tappet sealing
could get damaged. Screw in the two screws on
top of the fluid box body.
Step 4 (Mount the cartridge base)
Mount the cartridge base to the fluid box body
using the tightening screw. Screw in the
tightening screw using the MDT 327 (torque
120-140 cN.m).
IMPORTANT NOTE!
If you use a cartridge base without integrated
luer lock, you need to screw the Fluid Box
Connector Luer Lock into the top bore of the
cartridge base. Use the open-ended wrench of
the MDT 327 (hexagon screw size M8, torque
stainless steel 100 – 120 cN.m, PEEK 40 – 60
cN.m).
Step 5 (Loosen the adjust screw)
Open the adjust screw completely. Screw
counter-clockwise. Use the MDT 327.
Step 6 (Mount the nozzle insert)
Clip the nozzle insert into the thread of the fluid
box. Use the MDT 327 - Multi-Function Tool or
tweezers. Make sure it sits level within the
socket.
Step 7 (Screw in the nozzle fixation nut)
Screw the nozzle fixation nut clockwise onto the
fluid box. Use the MDT 327 - Multi-Function
Tool or MDT 306 with BitVM hexagon socket
(min. torque: 150 cN.m).
Step 8 (Mount the isolation body)
An isolation body is necessary for thermally
sensitive applications. Pull it onto the fluid box,
until it clips in. Screw it tight with the 2 screws
for the isolation body (torque 40 – 50 cN.m).
Use the MDT 329 or a hexagon socket key size
2.