Vertex
FTL-1011, FTL-2011
&
FTL-7011
Operating Manual
to the cigarette lighter or other existing circuits may result in over-
load, or degrade transceiver performance.
Always use the supplied DC power cable, which includes fuses
to protect you, the vehicle and the equipment. If the cable is too
short, use
#12
AWG stranded, insulated copper wire to lengthen it.
Use the shortest length possible, connected to the end of the DC
cable that does not have connectors installed.
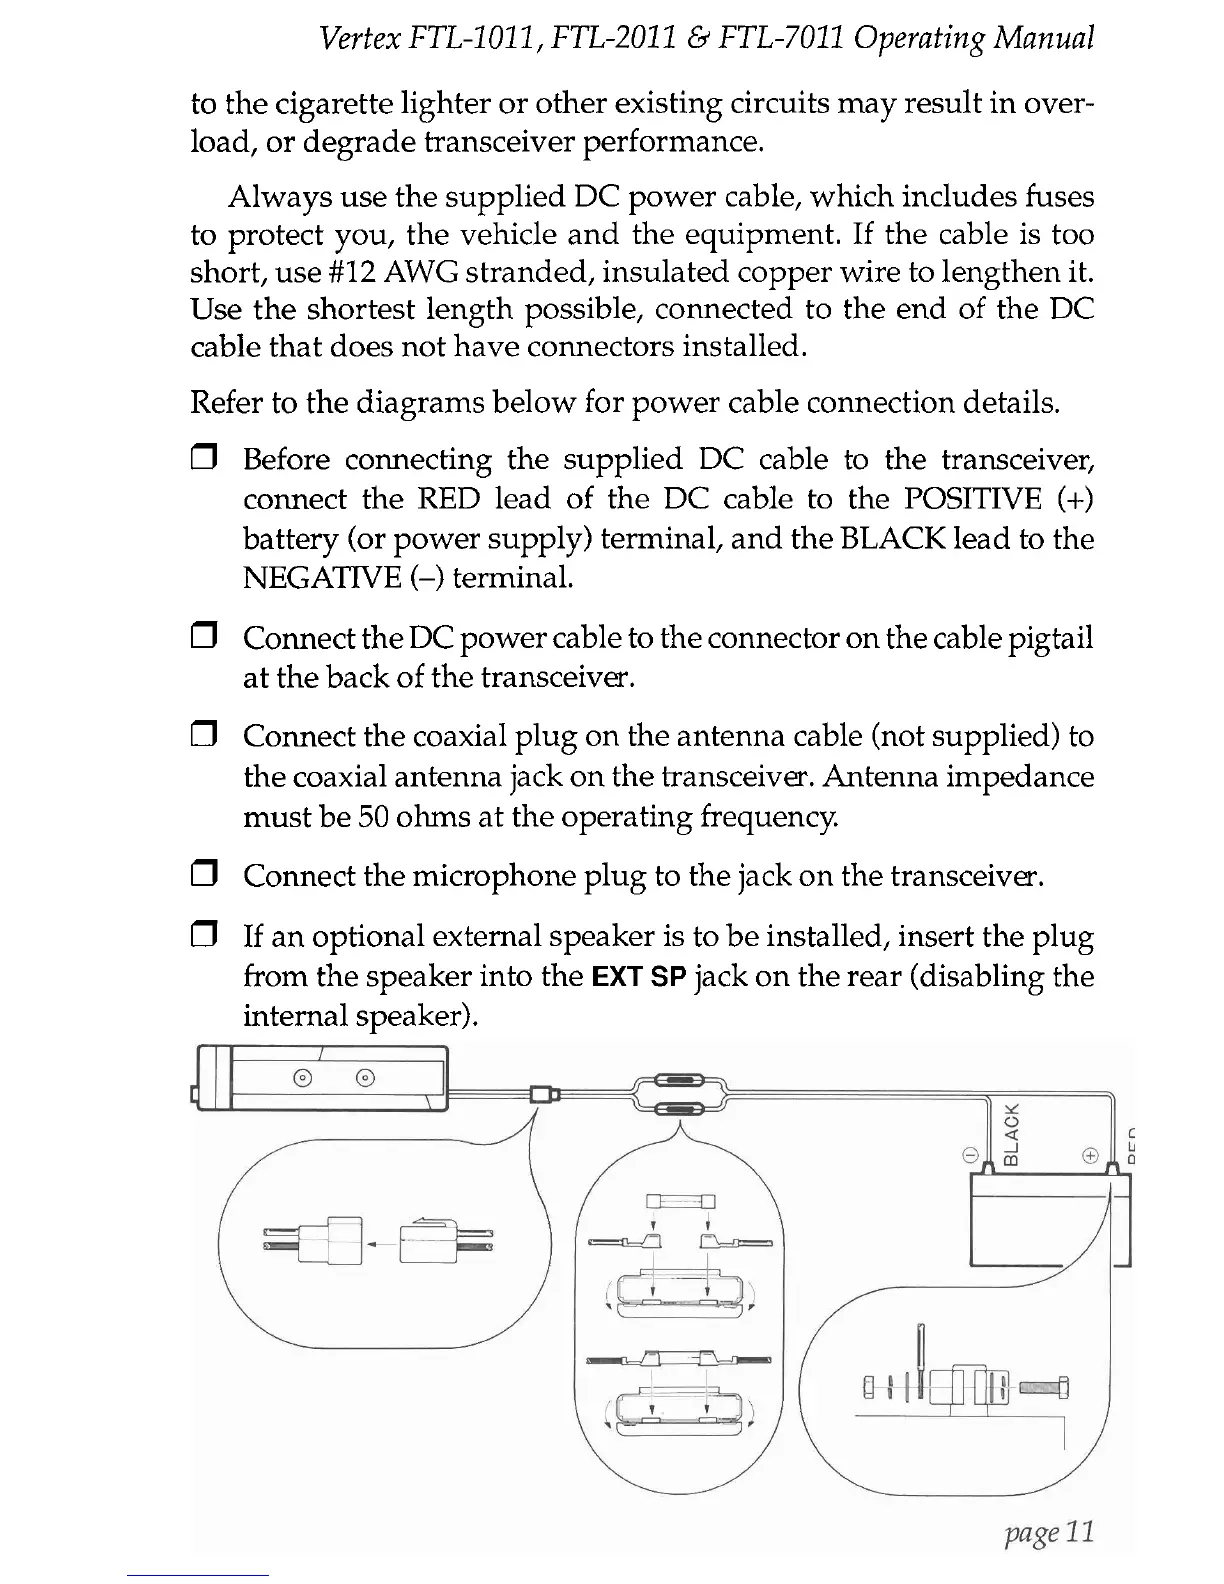
Refer to the diagrams below for power cable connection details.
0
Before connecting the supplied DC cable to the transceiver,
connect the RED lead of the DC cable to the POSITIVE
(+)
battery (or power supply) terminal, and the BLACK lead to the
NEGATIVE
(-)
terminal.
0
Connect the DC power cable to the connector on the cable pigtail
at the back of the transceiver.
0
Connect the coaxial plug on the antenna cable (not supplied) to
the coaxial antenna jack on the transceiver. Antenna impedance
must be
50
ohms at the operating frequency.
0
Connect the microphone plug to the jack on the transceiver.
0
If an optional external speaker is to be installed, insert the plug
from the speaker into the
EXT
SP
jack on the rear (disabling the
internal speaker).