Figure 7-2 Receiver
The annotations in the figure are as follows:
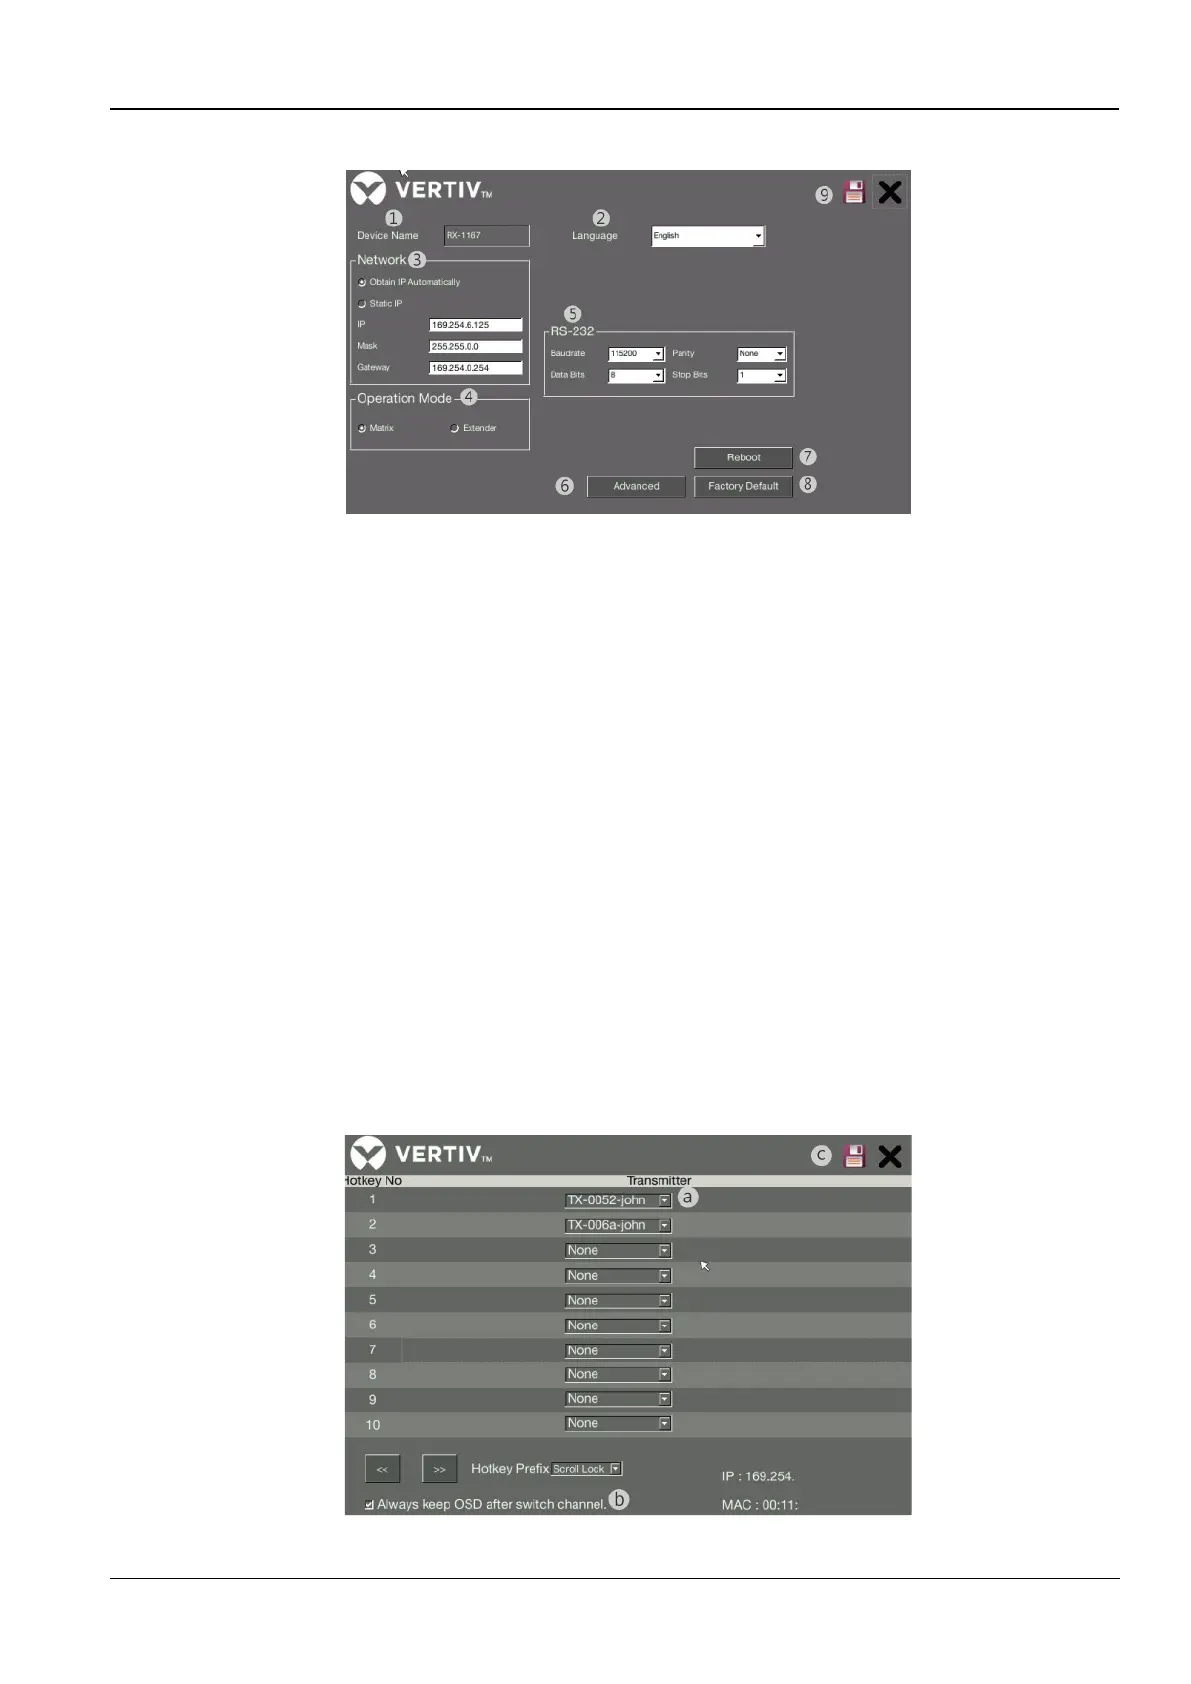
1. Device Name: You can change to a new name to for recognizing the receiver.
2. Language: Drop down to select a preferred language.
3. Network: Select to obtain an IP automatically or select static IP to setup manually.
4. Operation mode: Select a desired mode according to your requirement. Make sure this option you selected is
matched with the transmitter.
5. RS232: Setup the serial parameters for the connected RS-232 device. Make sure these parameters must
match the settings of transmitter and RS-232 device. By default, the system settings are as following:
6. Advanced: Refer to the chapter of Advanced settings for more details.
7. Reboot: Click to reboot the receiver, and then click OK to confirm.
8. Factory default: Click to restore the receiver to the factory default settings, and then click OK to confirm.
9. Save: Click to save the settings once you have changed.
Warning: MUST reboot the units after save to make new setting active
7.3.1 Advanced settings
This KVM is not only supporting the selection of transmitter on the control page, but also using the keyboard hotkey.
Each keyboard hotkey is consisted by using three specific keystrokes. The concept of keyboard hotkey is Scroll Lock
+ Scroll Lock + Command key(s). Except the default setting, you also can define a desired command key.
Figure 7-3 Advanced Settings