a.) Hotkey No Device: Click to drop down the options and select the desired transmitter.
b.) Always keep OSD after switch channel: Tick to display the information on the screen after switching the channel.
c.) Save: Click Save to save the settings and exit.
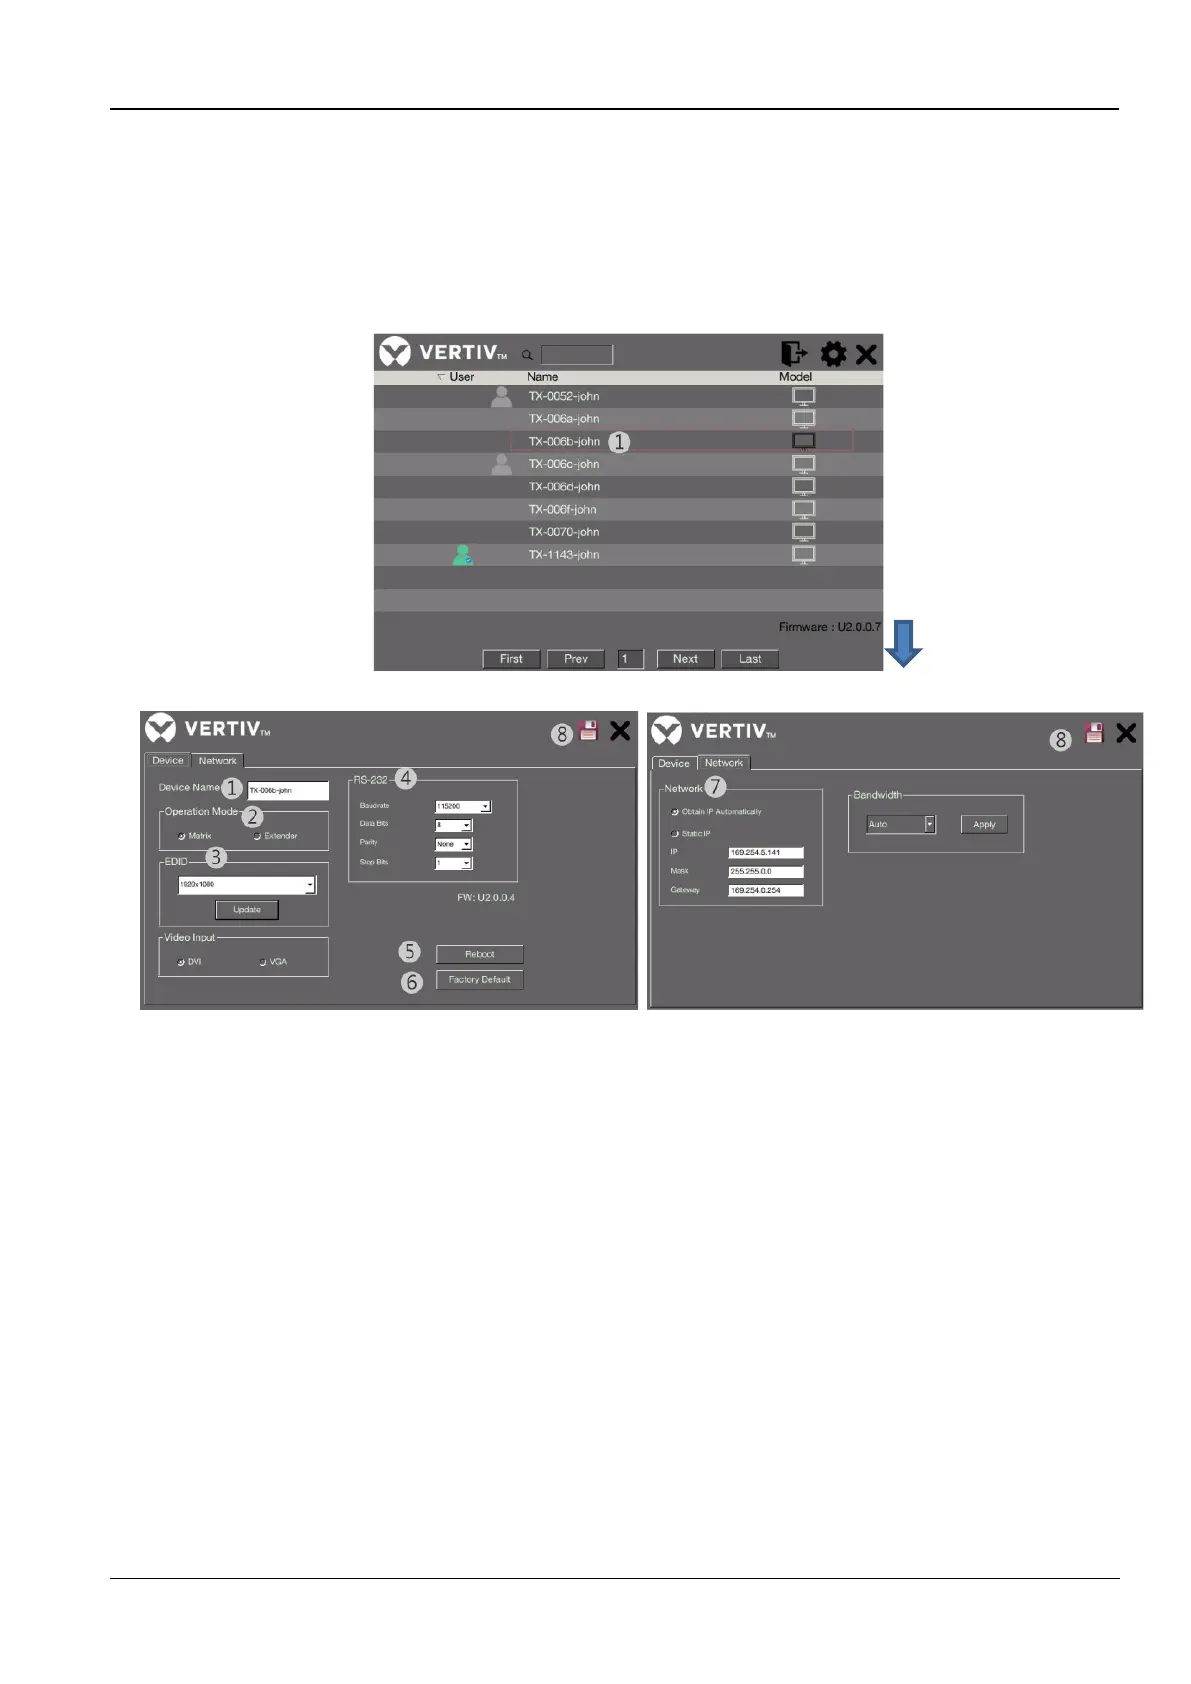
7.4 Transmitter configuration
Figure 7-4 Receiver
Figure 7-5 Transmitter
The annotations in the figure are as follows:
1. Device Name: Click any transmitter icon to enter the settings. You can change to a new name to for
recognizing the transmitter.
2. Operation mode: Select a desired mode according to your requirement. Make sure this option you selected is
matched with the receiver.
3. EDID: Select the output resolution of image source, or you can click Update to upload the EDID of monitor.
4. RS232: Setup the serial parameters for the connected RS-232 device. Make sure these parameters must
match the settings of receiver and RS-232 device.
By default, the system settings are as following:
Baudrate: 115200 Data bits: 8 Parity: None Stop bits: 1
5. Reboot: Click to reboot the transmitter, and then click OK to confirm.
6. Factory default: Click to restore the transmitter to the factory default settings, and then click OK to confirm.
7. Network: Select to obtain an IP automatically or select static IP to setup manually.
8. Save: Click to save the settings once you have changed.
Warning: MUST reboot the units after save to make new setting active
7.5 Admin OSD menu