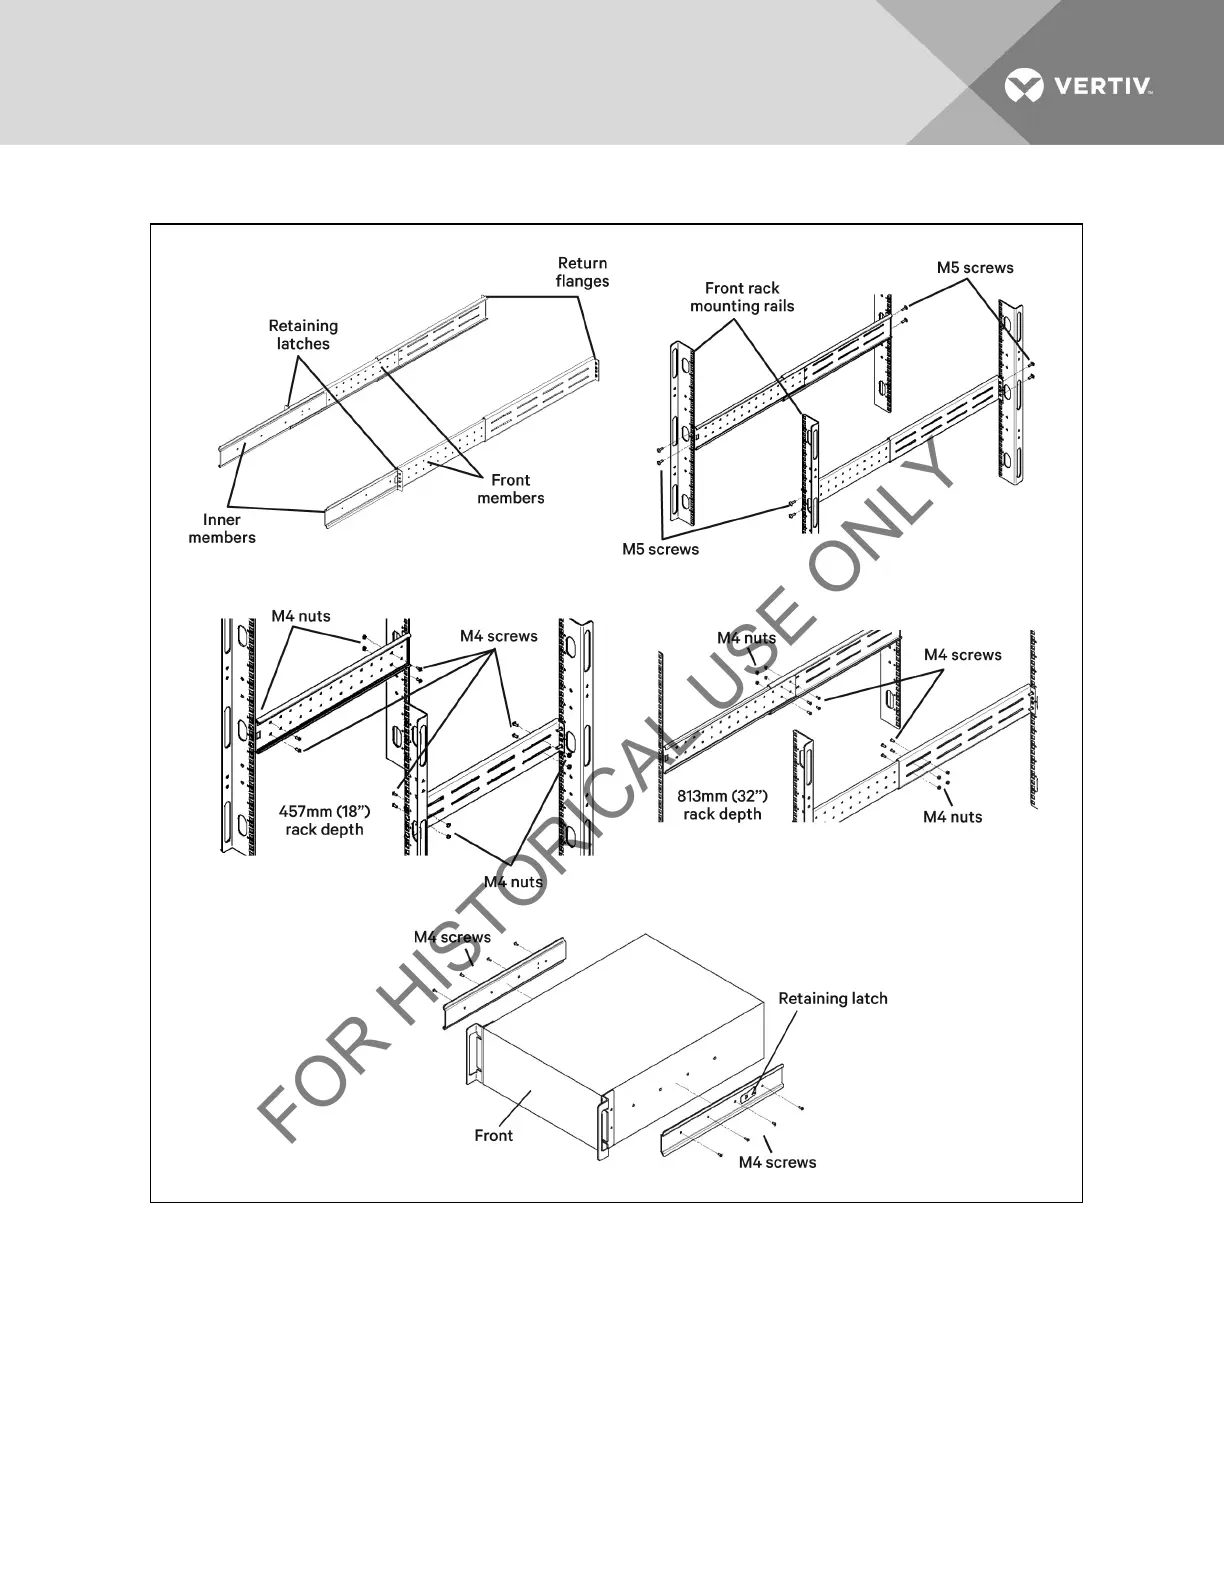
Figure 5.4 Installing Rack Mount Brackets
3. Install the rear member of each bracket assembly into the rack enclosure with two M5 screws provided in this
kit (see figure at right). The return flanges on the bracket assembly fit to the inside of rack mounting rails. Insert
screws loosely (finger-tight) into the top and bottom holes of the return flange on the rear member. Extend the
bracket assembly by sliding the front member forward until it touches the front rack mounting rail. Insert two
M5 screws loosely (finger-tight) into the top and bottom holes of the return flange on each front member. Make
sure that the bracket assemblies are at the same mounting height on all four (4) rack mounting rails.
4. Get eight M4 screws and eight M4 nuts from the hardware pack in this kit. Each nut has a locking, nylon insert
that begins gripping the screw when it is halfway tight. Make sure to tighten the nut and screw completely to
ensure locking action. Fasten the rear member and the front member together using four screws and four nuts
per bracket assembly as shown in at right. For maximum support, insert fasteners for each bracket assembly as
Vertiv | Liebert® GXT3 ™ Installer/User Guide | 26