c. Pull the logo on the front plastic bezel cover gently, rotate it 90 degrees clockwise and snap it back into
position. The rotated front plastic bezel cover is shown in Figure 5.3 on the previous page.
d. Replace the front plastic bezel cover on the Liebert GXT3. At this point, the UPS operation and display
panel and logo have been rotated 90 degrees clockwise, which provides upright viewing for users.
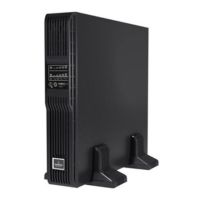
5. Place the Liebert GXT3 and any battery cabinets on the support bases. Each Liebert GXT3 needs two support
assemblies, as shown in the lower half of Figure 3.1 on page13.
5.1.2 Rack-Mount UPS Installation
When using the Liebert GXT3 in a rack, the UPS must be supported by a slide kit, fixed rails or a shelf.
When using the optional Adjustable Rack Mount Kit, you will use the following instructions. The figures accompanying
Installing the Adjustable Rack-Mount Kit—Sold Separately on page 25 shows the positioning of the rack-mounting brackets.
Emerson recommends taking the internal batteries out of the UPS during rack installation. This will make the UPS cabinet
lighter and easier to handle.
CAUTION: The Liebert GXT3 is heavy; see Specifications on page 57. The UPS must be installed as near the
bottom of a rack as possible. If placed too high, it can make the rack top-heavy and prone to tipping over.
5.1.3 Installing the Adjustable Rack-Mount Kit—Sold Separately
This kit contains parts needed to mount several different models of UPS and external battery cabinets into EIA310-D
standard four-post racks that are 18-32" deep (457-813mm). The weight limit per pair of adjustable rack-mounting brackets
is 91 kg (200lb).
Parts included are:
ITEM QUANTITY
Rear bracket members 2
Front bracket members 2
Inner bracket members 2
M4 machine screws 16
M4 locking hex nuts 8
M5 machine screws 8
Tools needed for installation are:
• one Phillips screwdriver
• one 7mm wrench
The adjustable rack-mounting brackets (Part#: RMKIT18-32) feature retaining latches to prevent users from inadvertently
sliding the UPS or battery cabinet out of the rack.
To install the rack mount brackets:
1. Unpack two rack-mounting bracket assemblies and mounting hardware from this kit. Bracket assemblies are
interchangeable between left-hand or right-hand.
Remove inner member of each bracket assembly as shown at right by extending it to its outermost position,
depressing the retaining latch and then pulling the inner member out of the bracket assembly.
2. Determine the height position inside the rack enclosure where you want to mount the UPS or battery cabinet.
CAUTION: Reduce the risk of tipping the rack enclosure by placing the UPS or battery cabinet in the lowest
possible rack position.
Vertiv | Liebert® GXT3 ™ Installer/User Guide | 25



 To Next Page