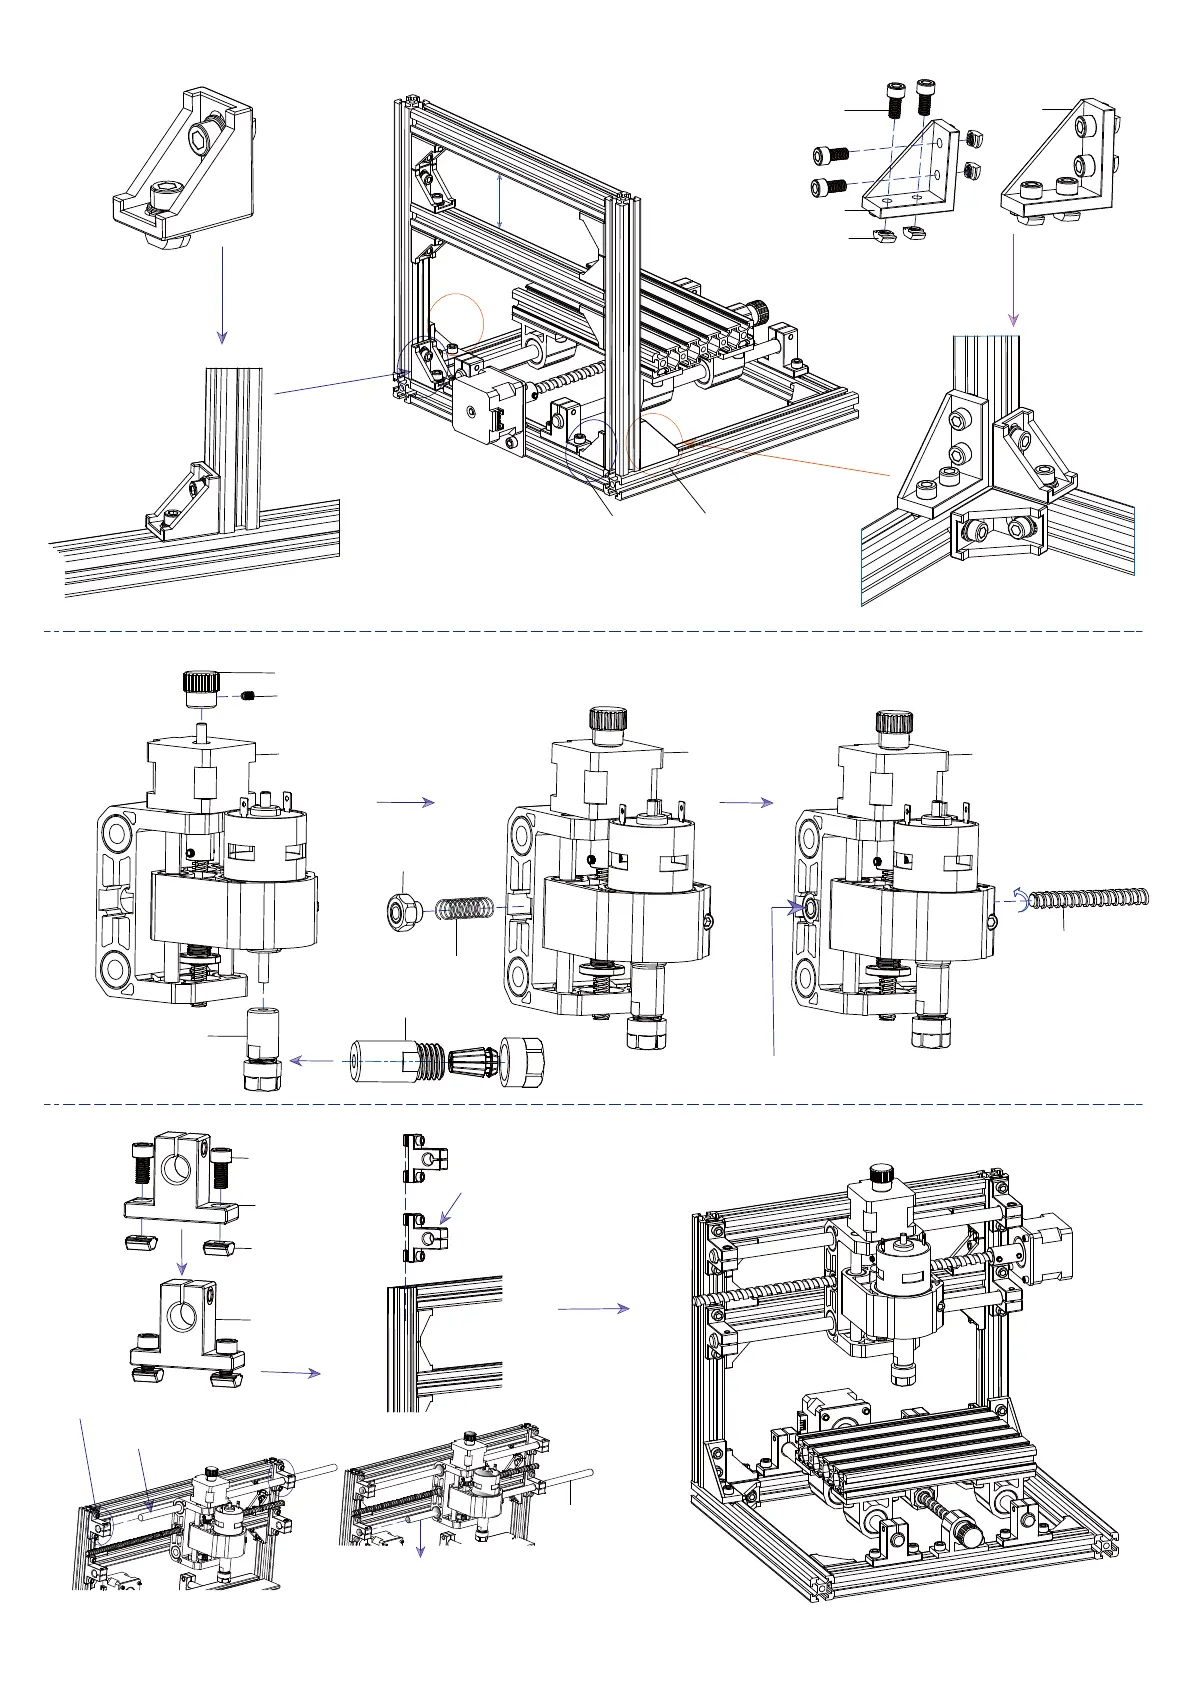
11: T8 Nut 1PCS
19: Spring 1PCS
30: ER11 assembly
Component A
Component A
08: X Lead screw
T8*263mm 1PCS
2Set
2
S
e
t
2Set
4Set
06: X Smooth axis
Φ10*260mm 2PCS
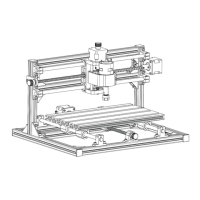
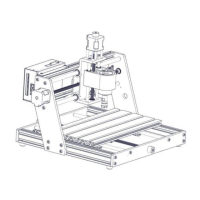
Step
Step
Step
-1.The support for smooth axis slides into
the aluminum profile T-slot from the top
-2. First, fix the above two 10 (Support for
smooth axis) on the aluminum profile.
-3. Then, component A and 06X Smooth axisare
assembled on the 10Support for smooth axis).
-4. Finally, assemble 06X Smooth axis,
adjust component A to left-right movement is smooth,
fixt the 10Support for smooth axis.
Press T8 nut to the bottom and turn X Lead screw at the same time
5/14
Component A
30: ER11 1Set
29: M4*5 1PCS
21: Hand knob Φ5mm 1PCS
23: M5*10 2PCS
Screw
27: Trapezoidal nut
M5-20 2PCS
10: 1PCS Support for
smooth axis
56mm
05: 2040 1PCS
26: M5-10 4PCS
Ship nut
23: M5*10 4PCS
Screw
S1610 Ver 1.2
 Loading...