Cabinet
Counter
Top
Ceiling
Wall
Use woodscrews to
mount onto the plywood.
Install Mounting
Bracket
Apply spackle in
between spaces
of the plywood
and drywall
seamlessly.
Cabinet
Counter
Top
Ceiling
Wall
Use woodscrews
to mount into
the studs.
Be alert of
any electrical
hazards before
plugging into
the outlet to
check the fan
motor and lights
are functioning.
Be alert of
any electrical
hazards before
plugging into
the outlet to
check the fan
motor and lights
are functioning.
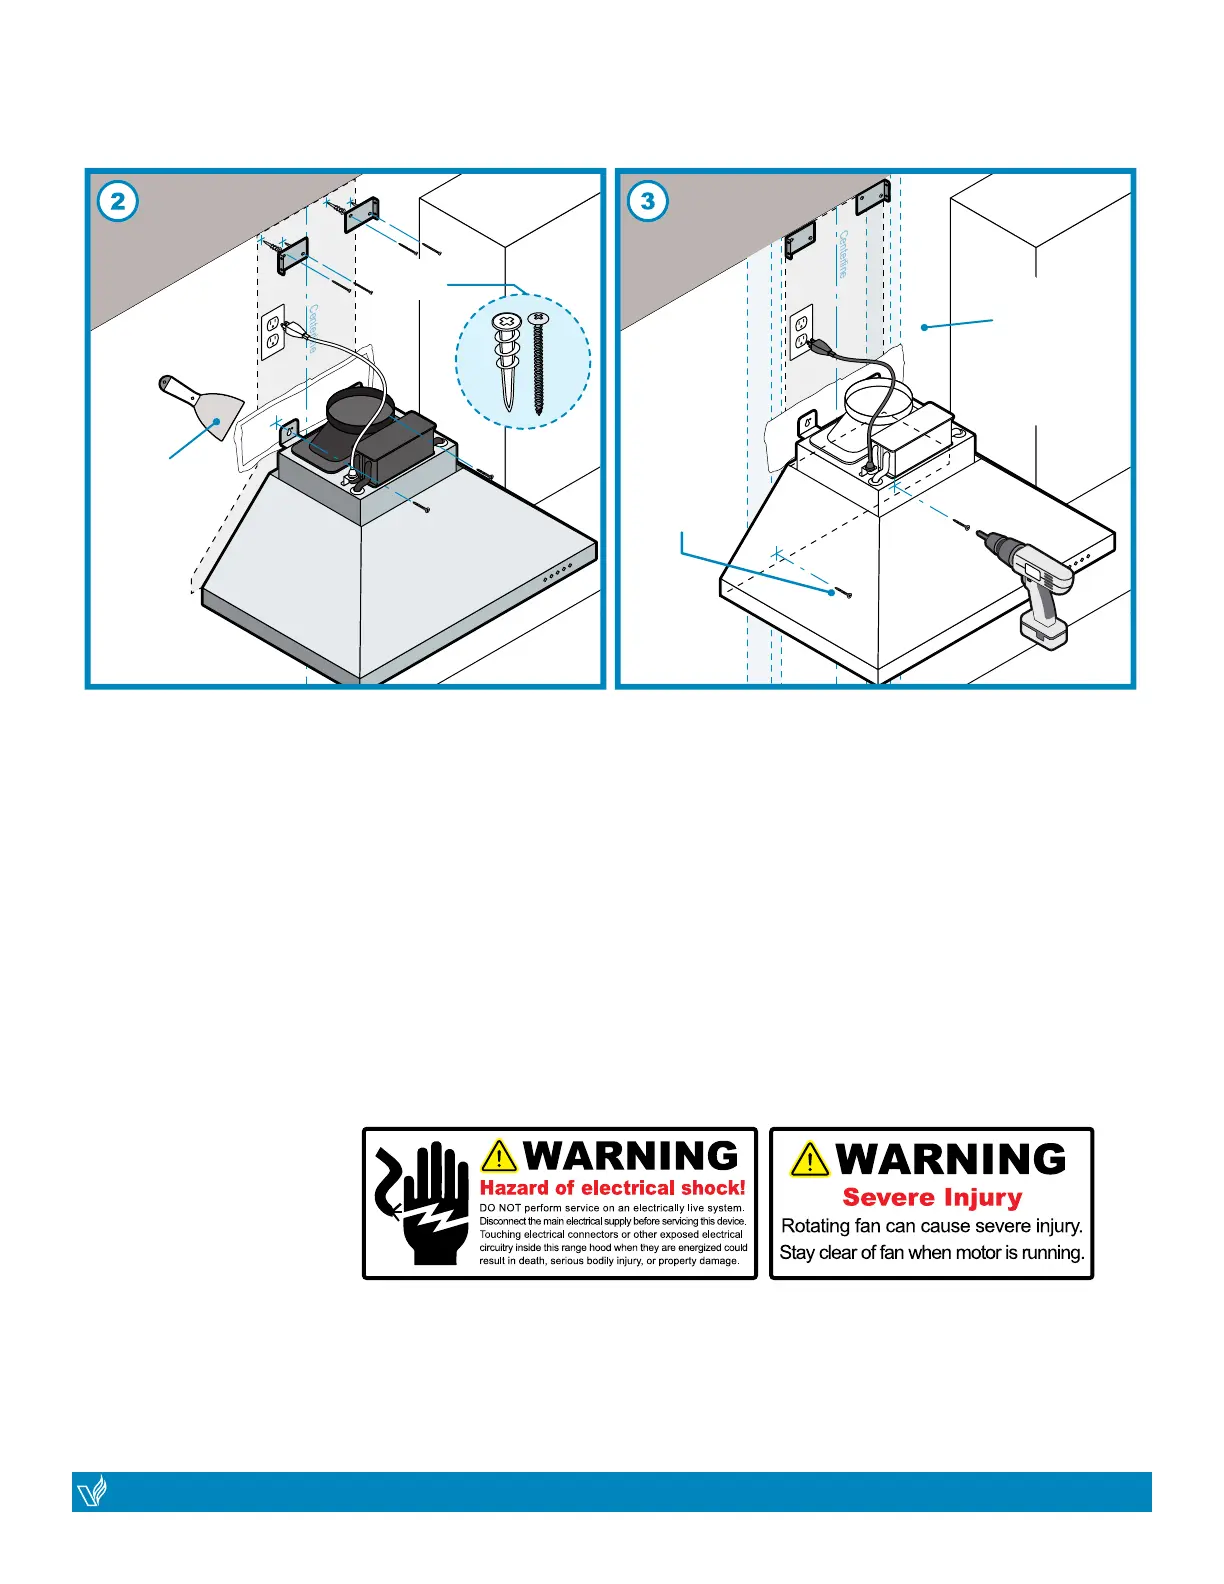
(2) Apply spackle in between spaces of the plywood
and drywall seamlessly. Sand down any rough
spackle to smooth out. Paint area if required.
Use the drywall plastic anchors and metal screws to
install the mounting brackets to prepare for the upper
chimney.
Fasten #8 2-½“ woodscrews to mount onto the
plywood based on your earlier measurements
already established.
(3) If added support is needed, from the inside rear
panel of the range hood, fasten #8 2-½“ woodscrews
to mount into the studs based on your earlier
measurements already established.
Connect the range hood to a designated standard
outlet (please refer to the product label for the suitable
voltage of this unit). Check the fan motor and lights
are functioning.
SAFETY WARNING: Risk of electrical shock. this range hood must be properly grounded. Make sure this
is done by qualied electrician in accordance with all applicable national and local electrical codes. Before
connecting wires, switch power o at service panel and lock service panel to preduct power from being
switched on accidentally.
VICTORY range hoods
| CLASSIC / PLANE
14
VICTORY range hoods
CLASSIC / PLANE |
15
INSTALLATION
(
Continued
)
 Loading...