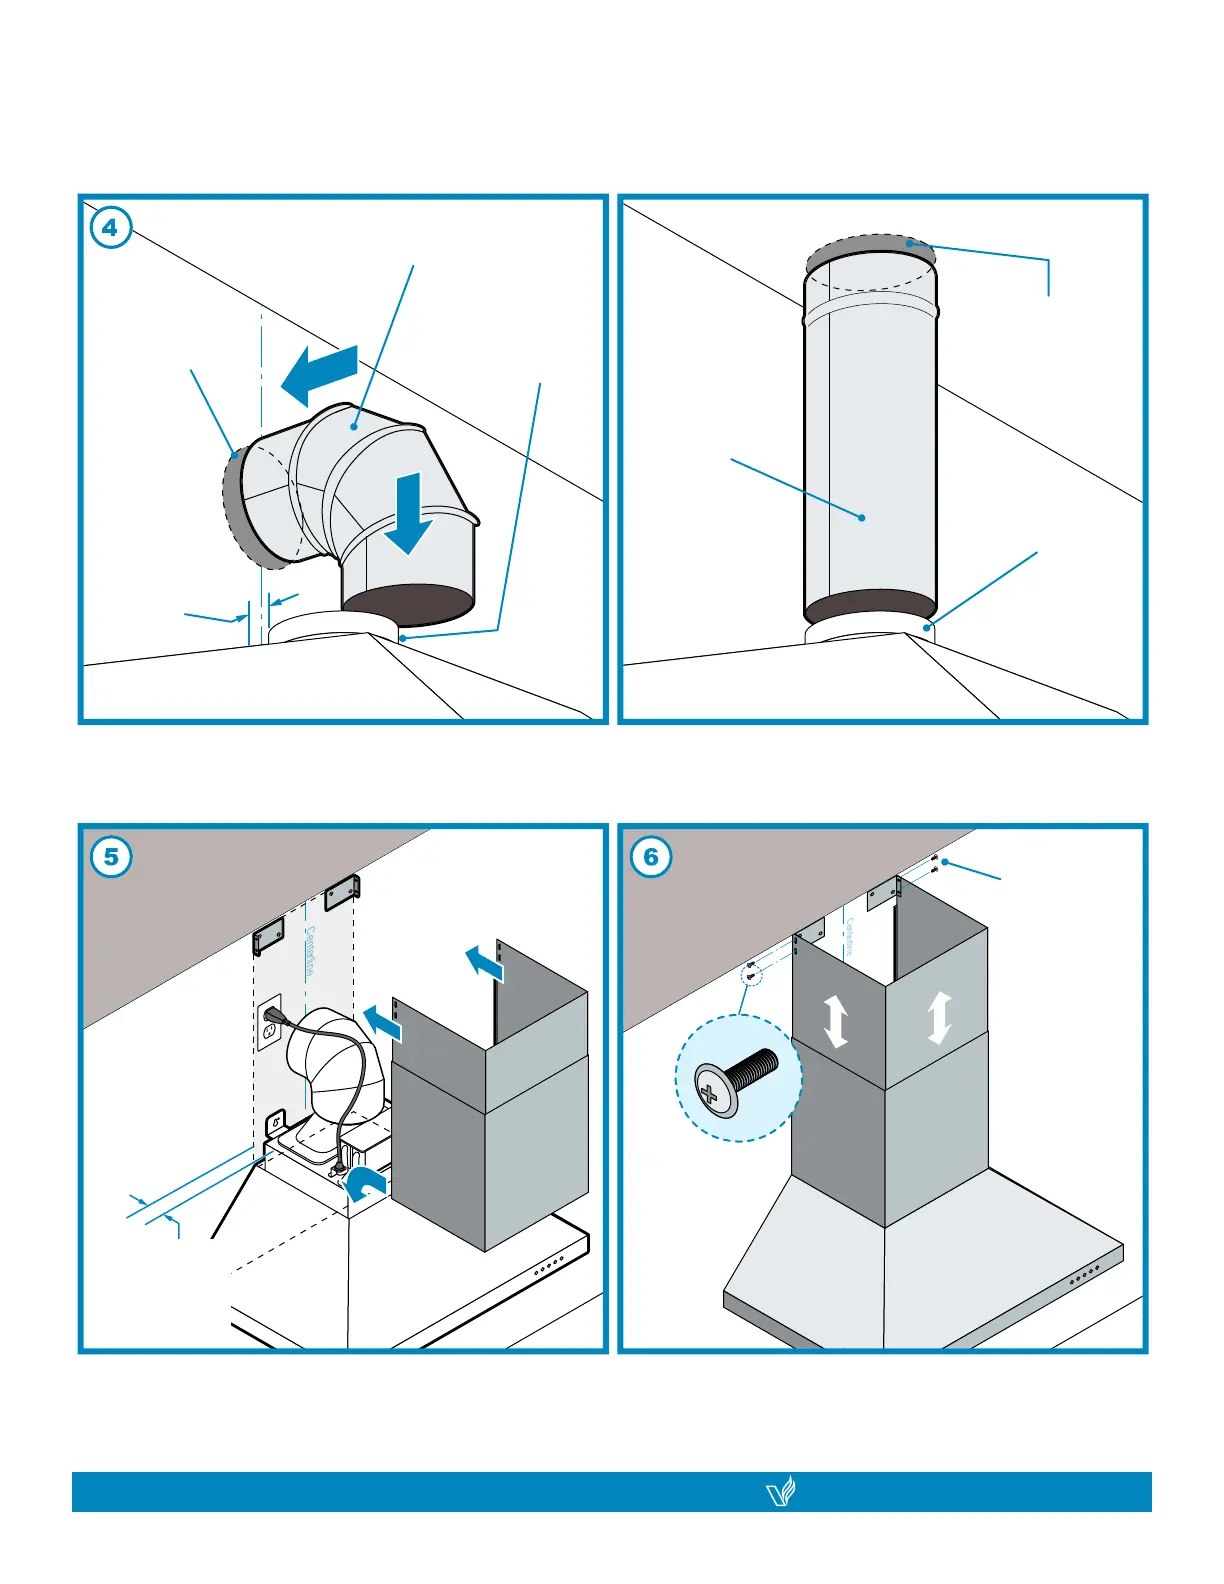
6” - Ø Elbow Duct
6” - Ø Transition
Cut out hole
in wall to
accommodate
elbow duct.
Distance from
wall to transition
circumference
edge: 1
¼”
WALL VENT
6”- Ø Duct
6”- Ø Transition
Cut out hole
on the top panel
of cabinet, and
in ceiling for
exhaust duct
ROOF VENT
Ceiling
Wall
*8” - Ø
Elbow Duct
inserted into
wall cut out
(10” optional)
6” - Ø
Elbow Duct
inserted into
wall cut out
Distance from
wall to transition
circumference
edge: 1 ¼”
Ceiling
Wall
Fasten screws to
hold chimney to
mounting bracket
Expand the upper
chimney to sit flush
against the ceiling
(4) Distance from wall to transition circumference edge for
6” - Ø Transition will be 1 ¼””
Use 6” round steel pipe to connect the exhaust on the
hood to the duct work above. Use aluminum tape to make
all joints secure and air tight.
(5) Insert both chimneys onto the range hood. They
should be able to slide into the gap of the top housing.
(6) To avoid scratching the chimney, extend the upper
chimney slowly and carefully to the chimney-mounting
bracket and tighten screws.
VICTORY range hoods
| CLASSIC / PLANE
16
VICTORY range hoods
CLASSIC / PLANE |
17
INSTALLATION
(
Continued
)