12
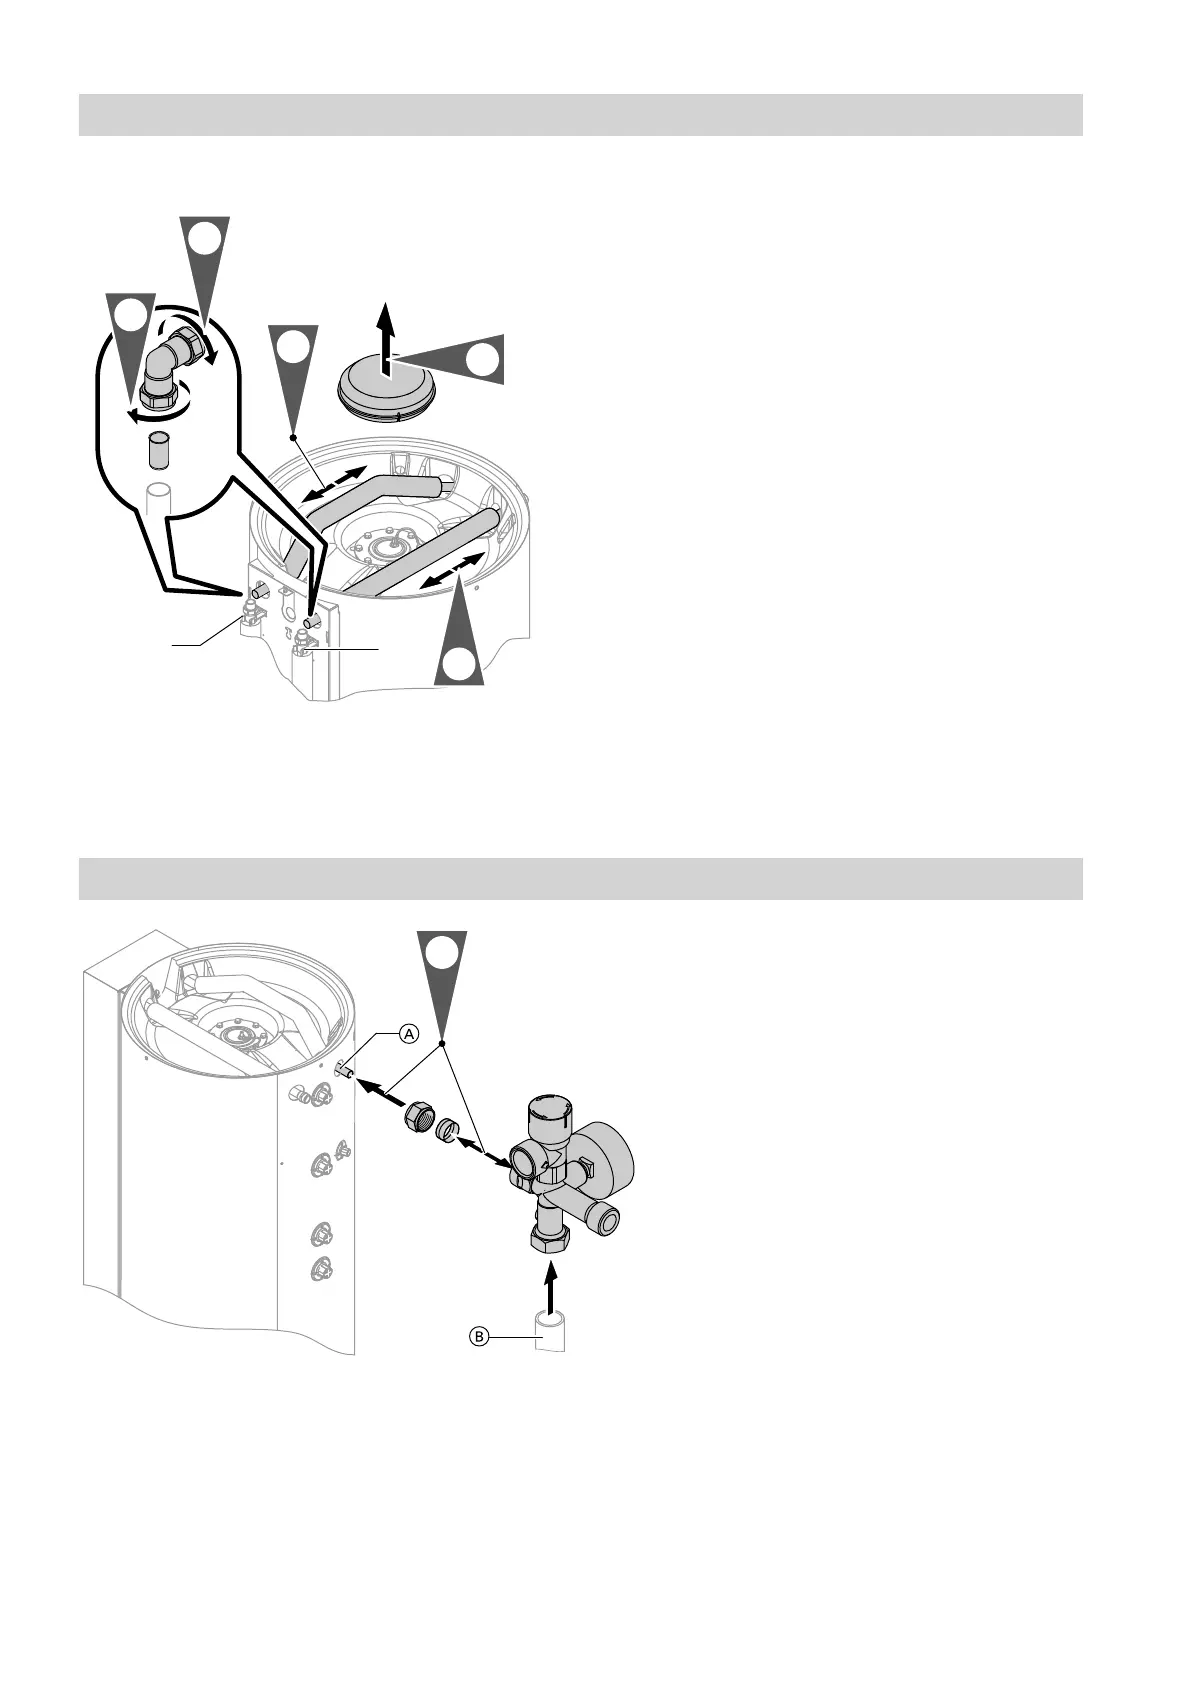
Upper heating water connections (solar)
Fig. 10
A
Heating water return, solar
B
Heating water flow, solar
1. Remove the insulating cap.
2. Insert the Ø22 support sleeves into the flow pipe
and return pipe and position the 22 x 18 elbow fit-
tings on the pipes.
3. Guide the upper 2 connection pipes through the
appropriate 4 openings in the base support of the
Solar-Set and the DHW cylinder.
Note
Insert the pipe with the threaded part on the right
(heating water flow). Position the threaded part at
the back of the DHW cylinder.
4. Secure the thermally insulated upper connection
pipes with the 22 x 18 elbow fittings.
Note
Apply the thermal insulation of the pipes after the
installation over the entire pipe length up to the edge of
the DHW cylinder.
Safety assembly
Fig. 11
A
Heating water return, solar
B
Optional connection of the diaphragm expansion
vessel (DEV)
Hydraulic connection (on the solar side) (cont.)
5838620

 Loading...