8
Lower heating water connections (solar)
Note
If a heat meter is installed, continue to page 9
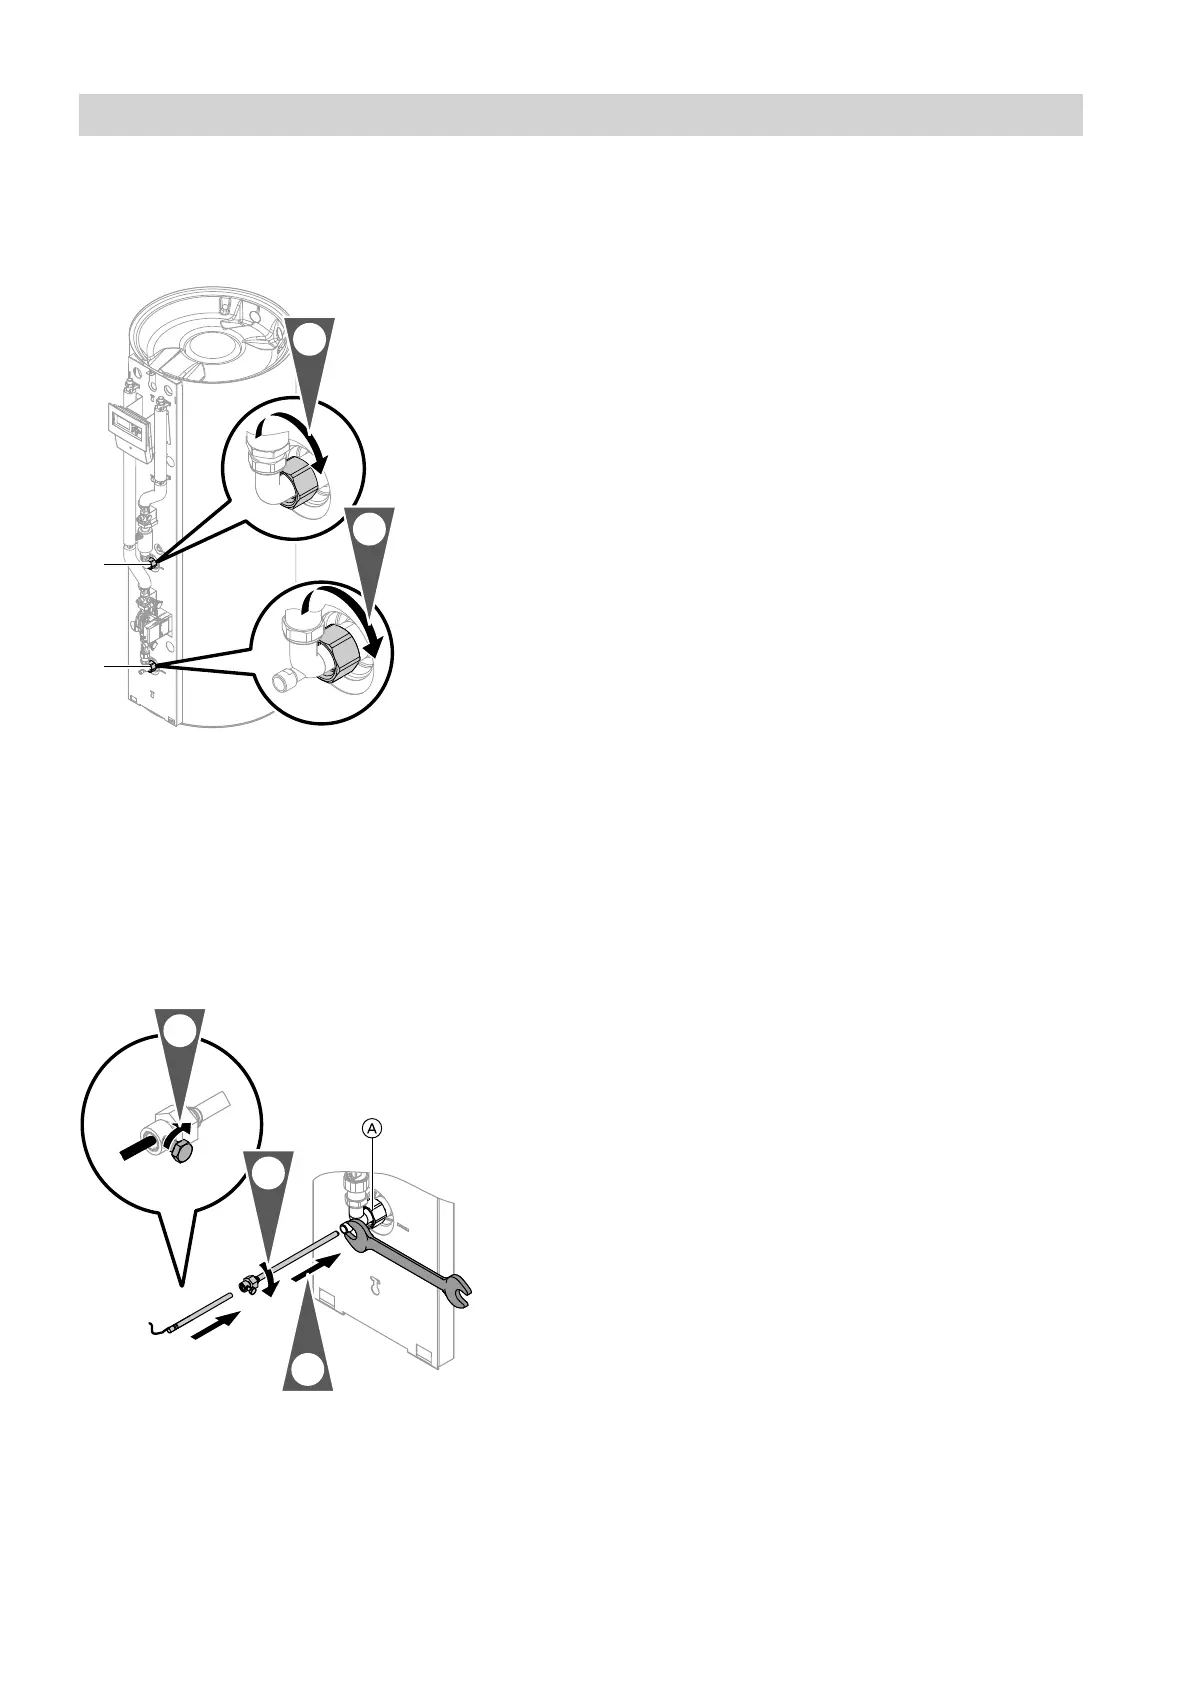
Fig. 4
A
Heating water return, solar
B
Heating water flow, solar
1.
Secure solar heating water flow line
B
using the
flat gasket and union nut provided. Torque: 50 Nm.
2.
Secure solar heating water return line
A
using the
flat gasket and union nut provided. Torque: 50 Nm.
Cylinder temperature sensor of the Solar-Set
Note
The cylinder temperature sensor is already factory-fit-
ted.
Fig. 5
A
Heating water return, solar
1. Insert the sensor well and locking ring into the
solar elbow.
2. Tighten the union nut onto the solar elbow, with a
torque of 20 Nm.
Note
Counterhold mating part with a spanner.
3. Insert the cylinder temperature sensor into the
solar elbow as far as it will go and fasten with the
strain relief screw.
Hydraulic connection (on the solar side)
5838620

 Loading...