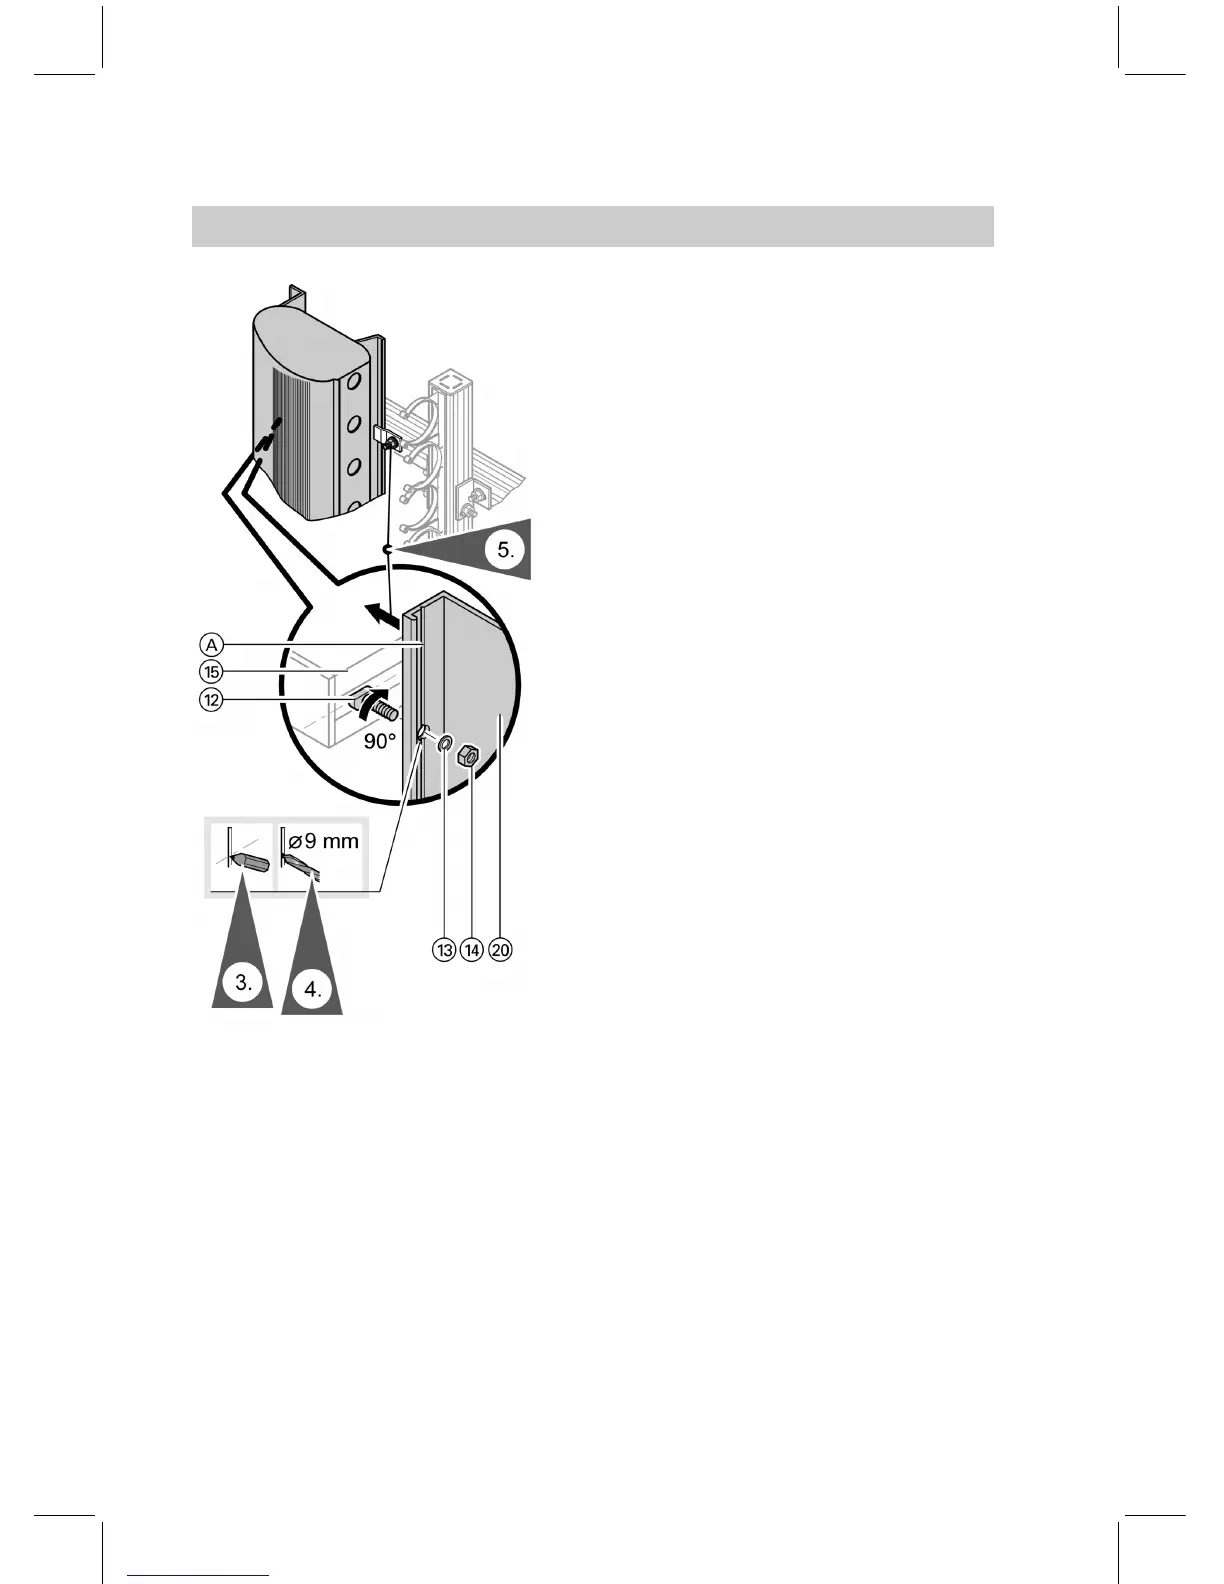
A Centering groove
3. Mark the fixing points at the back of
the connecting chamber.
Use the centering groove as a tem-
plate.
4. Drill 7 9 mm holes.
5. Secure the connecting chamber.
6. Where several collectors are
installed a bove each other, co n-
tinue with "Installing the connecting
chamber" on p age 45, otherwise
continue with "Fitting the vacu um
tubes" on page 46.
Installation on walls (cont.)
44
5862 788 GB